Magical Bubblegum Slices Recipe: Sweet Treats for Happy Smiles
Sweet tooth adventurers will adore these playful bubblegum slices that capture childhood nostalgia in every delectable bite.
Candy lovers understand the magic of unexpected dessert experiences.
Delightful pastel colors dance across each slice, promising a whimsical treat.
Soft, chewy textures blend perfectly with subtle sugary notes.
Crafting these treats requires minimal ingredients and simple techniques.
Kitchen creativity reaches new heights with this unexpected confection.
You can totally master these charming dessert bites that spark instant joy and memories.
Why Bubblegum Slices Are a Colorful, Fun Treat
What You’ll Need for Bubblegum Slices
Main Ingredients:Liquid Enhancers:Finishing and Coloring:Simple Steps to Make Bubblegum Slices
Step 1: Prepare the Baking Pan
Grab a rectangular baking pan and give it a light coating of vegetable oil. Make sure every single corner gets covered to keep your slices from sticking.
Step 2: Mix the Base Ingredients
In a medium saucepan, combine your ingredients:Stir everything together until the mixture looks smooth and well-blended.
Step 3: Heat and Whisk
Place the saucepan on medium-high heat. Grab your whisk and keep stirring constantly. This prevents any burning and helps everything mix perfectly.
Step 4: Bring to a Boil
Watch the mixture bubble up and reach a rolling boil. Keep whisking for about 5-7 minutes, paying close attention to how it’s cooking.
Step 5: Add Flavor and Color
Pull the pan off the heat. Quickly mix in vanilla extract and pink food coloring. Stir until the color spreads evenly throughout the mixture.
Step 6: Pour into Pan
Carefully pour the hot liquid into your prepared pan. Gently tilt the pan to create an even, smooth layer across the surface.
Step 7: Let It Set
Leave the pan alone at room temperature for 2-3 hours. Give the mixture plenty of time to solidify completely.
Step 8: Slice and Shape
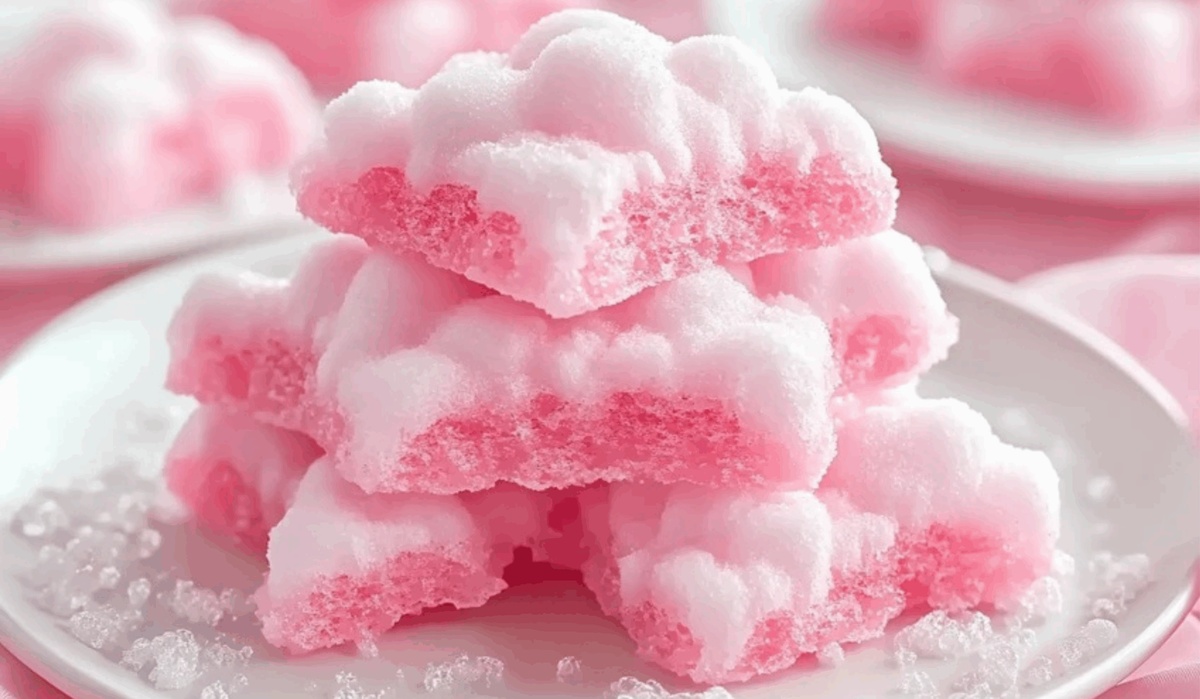
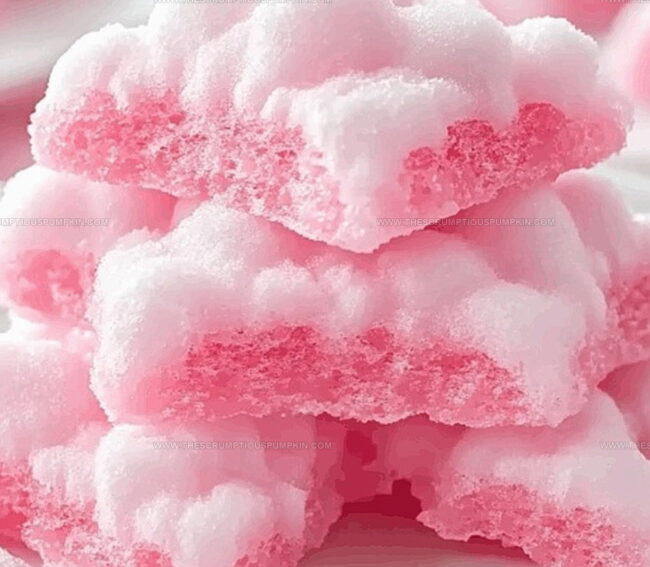
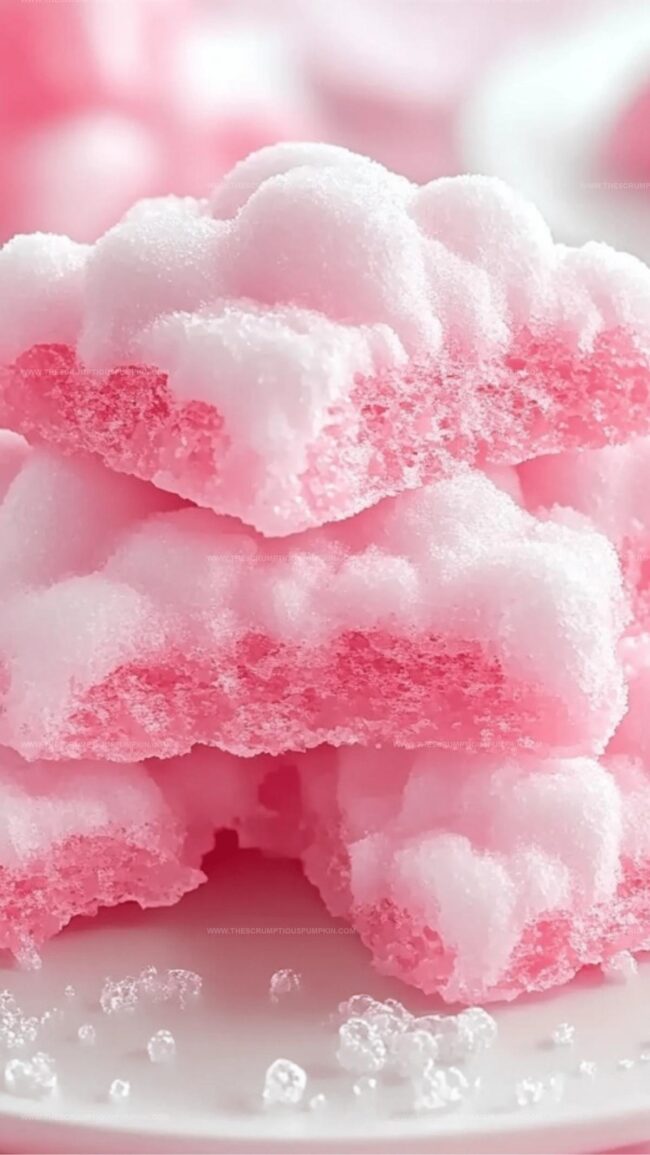
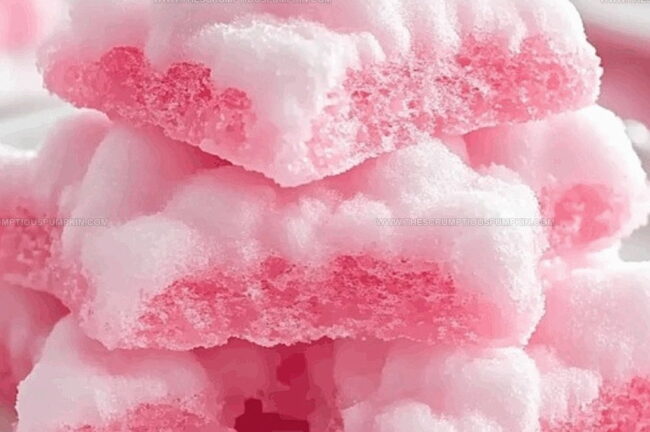
Once the mixture is fully set, grab a sharp knife. Cut the gelatin into clean rectangular or diamond-shaped pieces.
Step 9: Add Final Touch
If you want extra sweetness, sprinkle some granulated sugar over the slices. They’ll look like sparkling candy gems!
Step 10: Store Properly
Transfer your bubblegum slices to an airtight container. Place parchment paper between layers to keep them from sticking together. Store at room temperature and enjoy your sweet creation!
Tips for the Best Bubblegum Slice Texture
Fun Twists for Bubblegum Slices You Can Try
Sweet Pairings for Bubblegum Slices
How to Keep Bubblegum Slices Fresh and Soft
Bubblegum Slices Questions Answered Simply
Bubblegum flavor gelatin and vanilla extract are the key ingredients that create the unique taste, with pink food coloring adding to the visual appeal.
While bubblegum flavor gelatin is recommended, you could experiment with other flavors, but this will significantly change the original recipe’s taste and concept.
The mixture should reach a rolling boil and become slightly thickened, typically taking 5-7 minutes of continuous whisking over medium-high heat.
No, traditional gelatin is animal-based, so this recipe is not vegetarian-friendly. Vegetarians would need to use agar-agar or plant-based gelatin alternatives.
Print
Bubblegum Slices Recipe
- Total Time: 2-3 hours and 17 minutes
- Yield: 12 1x
Description
Whimsical bubblegum slices transport dessert lovers into a playful world of sweet nostalgia. Colorful layers and creamy textures promise a delightful treat that sparks childhood memories while satisfying sophisticated palates with its unique charm.
Ingredients
main ingredients:
- 2 cups bubblegum flavor gelatin
- 1 cup granulated sugar
- 1/2 cup water
sweetening agents:
- 2 tbsp corn syrup
- 1 tsp vanilla extract
additional ingredients:
- 1/4 tsp food coloring (pink)
- 1 pinch salt
- 1 tsp vegetable oil (for greasing)
Instructions
- Lightly coat a rectangular baking pan with vegetable oil, ensuring complete coverage to prevent sticking.
- In a medium saucepan, combine bubblegum flavor gelatin, granulated sugar, water, corn syrup, and salt, stirring until ingredients are thoroughly blended.
- Position the saucepan over medium-high heat, continuously whisking the mixture to prevent scorching and ensure smooth incorporation.
- Allow the mixture to reach a rolling boil, monitoring temperature carefully and stirring consistently for approximately 5-7 minutes.
- Remove from heat and quickly integrate vanilla extract and pink food coloring, mixing until the color is uniformly distributed.
- Immediately pour the hot liquid into the prepared pan, gently tilting to create an even layer across the surface.
- Let the mixture sit undisturbed at room temperature for 2-3 hours, allowing complete solidification and setting.
- Once fully set, use a sharp knife to slice the gelatin into clean, uniform rectangular or diamond-shaped pieces.
- Optionally, dust slices with additional granulated sugar for extra sweetness and a sparkling appearance.
- Store bubblegum slices in an airtight container at room temperature, separating layers with parchment paper to prevent sticking.
Notes
- Precision matters when heating the mixture, as overheating can cause caramelization and alter the delicate bubblegum flavor.
- Use a candy thermometer to monitor the temperature precisely, aiming for the soft-ball stage around 235-240°F for perfect texture.
- Experiment with natural food coloring options like beet juice or raspberry puree for a more vibrant and health-conscious alternative to artificial pink coloring.
- For a gluten-free version, ensure the gelatin and all ingredients are certified gluten-free, making this treat accessible to those with dietary restrictions.
- Prep Time: 10 minutes
- Cook Time: 7 minutes
- Category: Desserts, Snacks
- Method: Boiling
- Cuisine: American
Nutrition
- Serving Size: 12
- Calories: 133
- Sugar: 22 g
- Sodium: 1 mg
- Fat: 0 g
- Saturated Fat: 0 g
- Unsaturated Fat: 0 g
- Trans Fat: 0 g
- Carbohydrates: 33 g
- Fiber: 0 g
- Protein: 0 g
- Cholesterol: 0 mg
Mia Thompson
Pastry Chef & Content Creator
Expertise
Education
Portland Community College – Baking and Pastry Arts Program
Specialized in artisanal bread, seasonal desserts, and sustainable baking methods.
National University of Natural Medicine – Bachelor of Science in Nutrition (BScN)
Focused on “Food as Medicine” philosophy, with core threads in nutrition.
Mia’s love affair with baking began in her grandmother’s kitchen, where sneaking spoonfuls of batter first sparked her curiosity. She refined her skills through Portland Community College’s Baking and Pastry Arts Program and her expertise at the National University of Natural Medicine, earning a B.Sc. in Nutrition.
At The Scrumptious Pumpkin, Mia reimagines classics with effortless seasonal treats, healthier twists on old favorites, and playful confections that feel like pure joy. Beyond the oven, she nurtures her urban garden, forages local ingredients around Portland, and leads hands‑on nutrition workshops for her community.