
Juicy Cheeseburger Sliders Recipe: Bite-Sized Joy for Everyone
Crafting the ultimate cheeseburger sliders for your next gathering promises pure culinary magic.
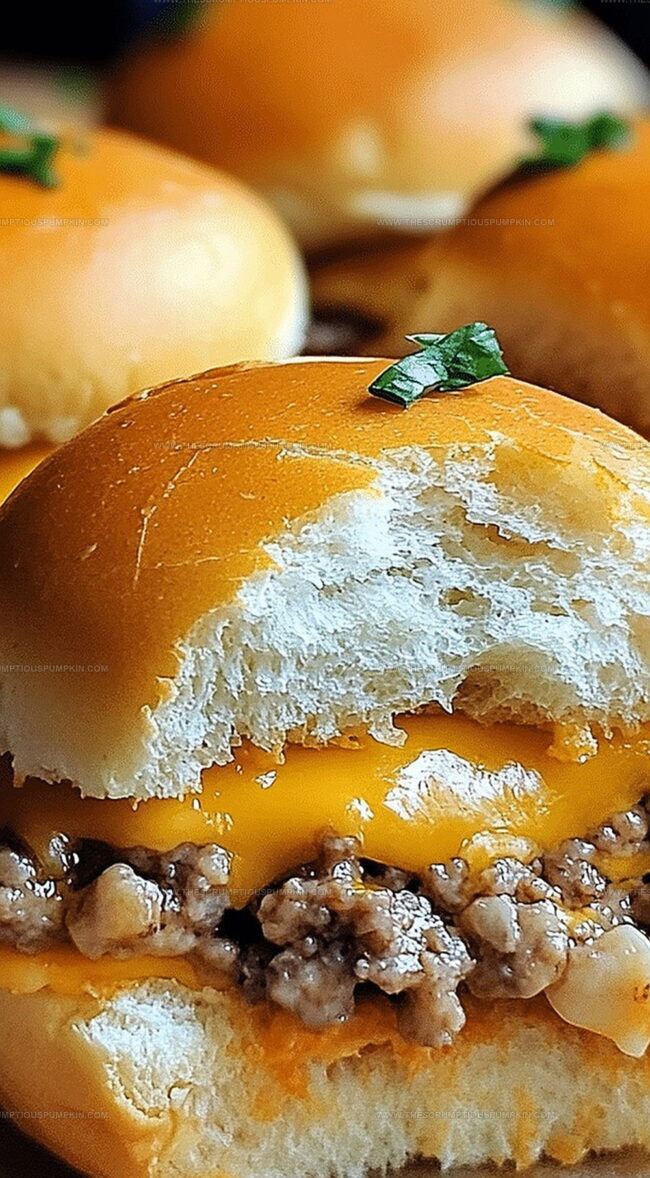
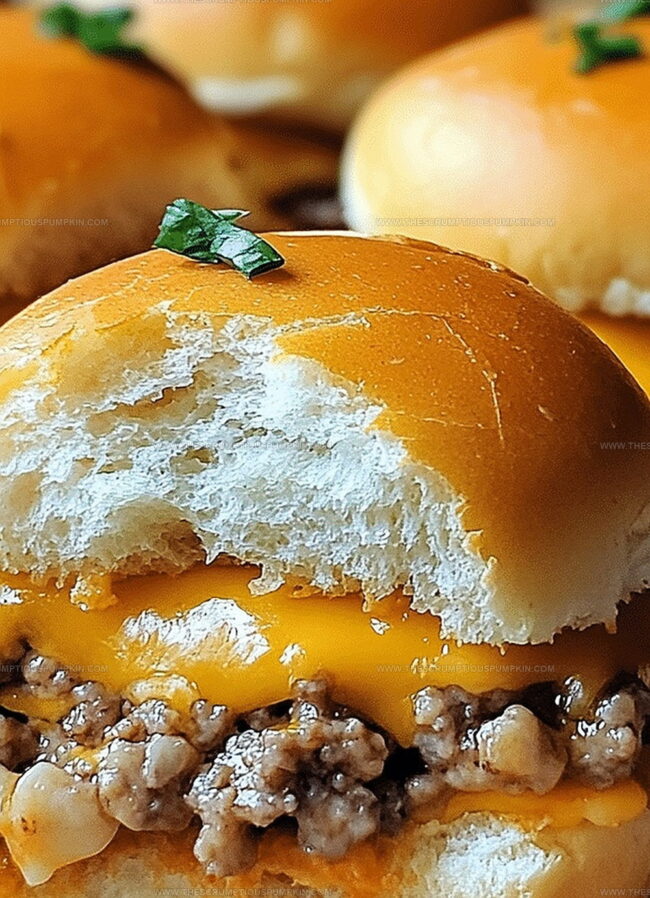
Mini burgers pack incredible flavor into bite-sized delights that everyone adores.
Tender beef patties nestled between soft rolls create an irresistible combination.
Juicy meat and melted cheese blend perfectly in these miniature masterpieces.
Quick to prepare and even faster to devour, these sliders bring serious excitement to any meal.
Compact and delicious, they will transform your appetizer game with minimal effort.
Cheeseburger Sliders Overview
Cheeseburger Sliders Ingredients
Meat:Cheese:Bread:Seasonings and Enhancers:Finishing Touches:Serving Condiments:How to Make Cheeseburger Sliders

Step 1: Warm Up The Oven
Fire up your oven to a cozy 350°F (175°C) and get ready for some mini burger magic.
Step 2: Spice And Shape The Beef
Sprinkle ground beef with these flavor boosters:Gently mix and form adorable mini patties that will make everyone smile.
Step 3: Sizzle The Patties
Heat a skillet over medium flame and cook those little patties until they’re beautifully browned and perfectly done.
Each side should develop a delicious golden crust.
Step 4: Prep The Slider Bases
Split your cute little slider buns into top and bottom halves.
Arrange the bottom pieces neatly on a baking sheet, creating a welcoming platform for our meaty stars.
Step 5: Build Your Mini Burgers
Place the cooked patties onto the bottom bun halves.
Crown each patty with a slice of melty cheese that will create irresistible gooey goodness.
Step 6: Butter And Bake
Brush the top buns with melted butter for extra richness.
Cover the cheesy patties with bun tops and slide the tray into the preheated oven.
Step 7: Melt And Finish
Bake for 10 minutes until the cheese transforms into a luscious, melted blanket.
Step 8: Serve And Enjoy
Plate these mini wonders with classic accompaniments.
Cheeseburger Sliders Tips
Cheeseburger Sliders Variations
Serving Suggestions for Cheeseburger Sliders
Storage Tips for Cheeseburger Sliders
FAQs
Yes, you can substitute ground beef with ground turkey, chicken, or lamb for a unique flavor profile.
Mix in a binding agent like breadcrumbs or an egg, and avoid overhandling the meat when forming patties.
American, cheddar, or Swiss cheese are classic choices that melt beautifully and complement the beef.
You can assemble the sliders and refrigerate them before baking, but bake just before serving to maintain the best texture and taste.
Print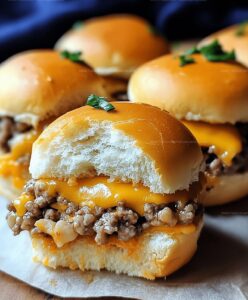
Cheeseburger Sliders Recipe
- Total Time: 33 minutes
- Yield: 8 1x
Description
Cheeseburger sliders bring mini burger magic to game day gatherings with irresistible bite-sized goodness. Juicy beef patties topped with melted cheese and classic condiments create party-perfect flavor that will delight hungry guests.
Ingredients
Main Ingredients:
- 1 pound ground beef
- 12 slider buns
- 12 cheddar cheese slices
Condiments and Toppings:
- 1/4 cup ketchup
- 2 tablespoons mustard
- 1/4 cup pickles
Seasonings and Extras:
- 2 tablespoons butter
- 1 teaspoon onion powder
- 1 teaspoon garlic powder
- 1 teaspoon salt
- 1/2 teaspoon black pepper
Instructions
- Prepare workstation with all ingredients and preheat oven to 350F for consistent heating.
- Mix ground beef thoroughly with salt, pepper, onion powder, and garlic powder to distribute seasonings evenly.
- Shape seasoned meat into compact, uniform mini patties ensuring consistent cooking.
- Heat skillet over medium temperature and cook patties until golden brown and fully cooked through, approximately 3-4 minutes per side.
- Carefully slice slider buns horizontally, creating top and bottom halves for assembly.
- Arrange bottom bun halves on clean baking sheet, creating a stable base for sliders.
- Transfer cooked beef patties directly onto bottom bun halves, ensuring proper fit.
- Layer cheese slices atop each patty, allowing edges to slightly overhang for melting.
- Gently place bun tops over cheese-covered patties, creating miniature burger sandwiches.
- Generously brush exposed bun surfaces with melted butter for golden, crispy exterior.
- Bake in preheated oven for 10 minutes until cheese melts completely and buns turn light golden brown.
- Remove from oven and let rest briefly before garnishing with pickles, ketchup, and mustard.
- Serve immediately while sliders are warm and cheese remains gooey.
Notes
- Use a meat thermometer to ensure ground beef reaches 160°F for safe consumption, preventing any foodborne illnesses.
- Experiment with additional spices like smoked paprika or worcestershire sauce to elevate the burger’s flavor profile.
- Try different cheese varieties like sharp cheddar, pepper jack, or blue cheese to create unique taste combinations.
- Swap beef for ground turkey or plant-based alternatives, and use gluten-free buns to accommodate various dietary restrictions.
- Prep Time: 15 minutes
- Cook Time: 18 minutes
- Category: Lunch, Dinner, Snacks
- Method: Sautéing
- Cuisine: American
Nutrition
- Serving Size: 8
- Calories: 320 kcal
- Sugar: 4 g
- Sodium: 550 mg
- Fat: 20 g
- Saturated Fat: 8 g
- Unsaturated Fat: 10 g
- Trans Fat: 1 g
- Carbohydrates: 25 g
- Fiber: 1.5 g
- Protein: 18 g
- Cholesterol: 60 mg
Lucas Bennett
Founder & Recipe Developer
Expertise
Education
Blue Ridge Community College – Certificate in Culinary Arts
Focused on seasonal cooking, sustainable kitchen practices, and farm-to-table techniques.
Appalachian State University – B.A. in English
Built critical thinking and analysis through diverse texts. Guided by faculty, it prepares graduates for publishing and more.
Growing up in the rolling hills of North Carolina, Lucas learned early that some of life’s best memories start around a kitchen table. After studying English at Appalachian State University and honing his culinary skills at Blue Ridge Community College, he dreamed of blending storytelling with rustic, seasonal cooking, and The Scrumptious Pumpkin was born.
Lucas focuses on easy, single-serving recipes that turn fresh, local ingredients into something special. His style is simple, heartfelt, and rooted in the beauty of the seasons. When he’s not testing a new dish, you’ll probably find him hiking in the Blue Ridge Mountains, browsing farmers’ markets, or scribbling food stories in a notebook.