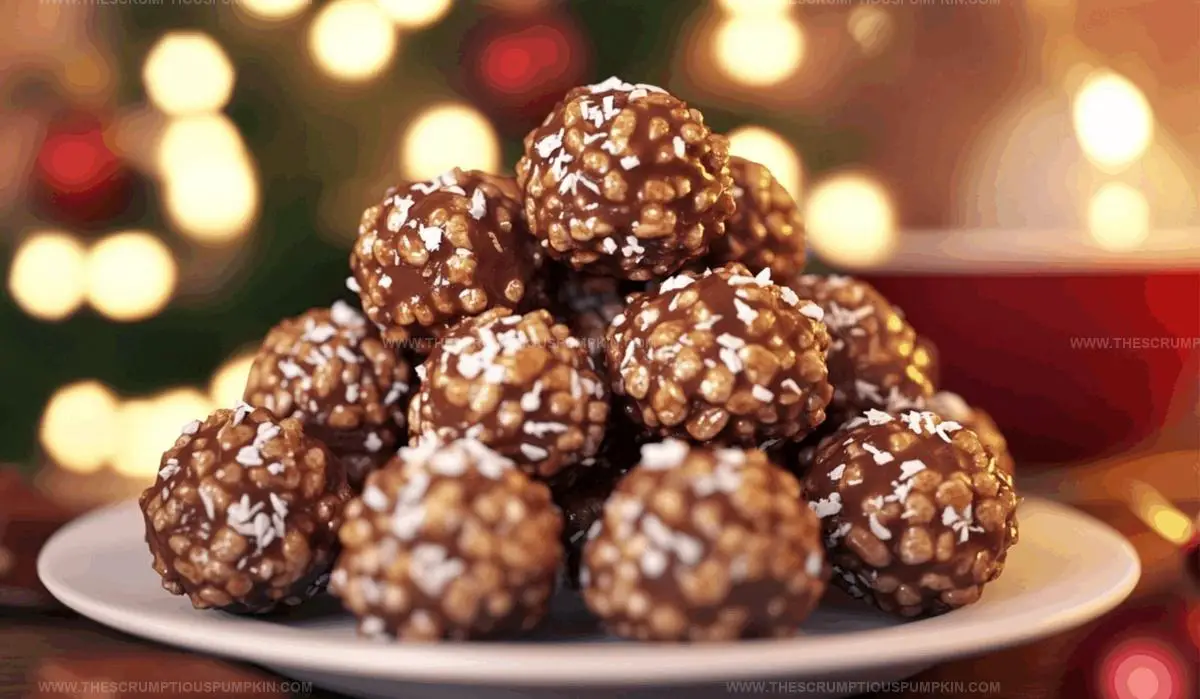
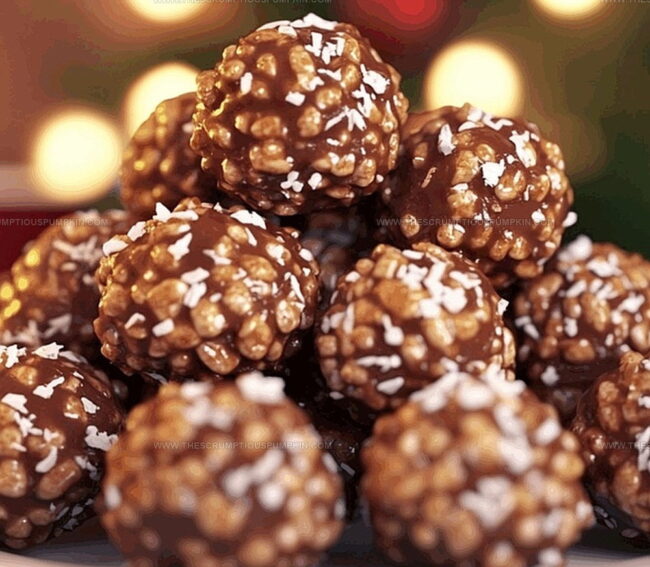
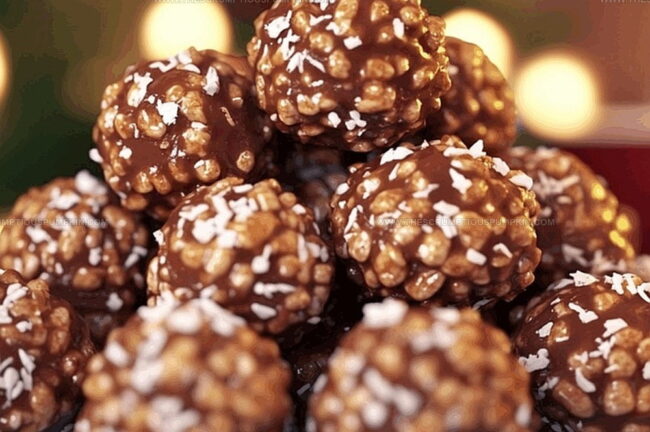
Jolly Christmas Chocolate Rice Krispie Balls Recipe for All
Sweet memories of holiday cheer come alive with these delightful christmas chocolate rice krispie balls that melt in your mouth.
Cheerful gatherings spark joy when you roll out these festive treats.
Kids and adults alike will adore the combination of crispy cereal and rich chocolate coating.
Marshmallow magic binds each bite into a perfect sphere of deliciousness.
Compact and adorable, these little confections shine at every holiday party.
Minimal ingredients and simple steps make this recipe a winner for busy cooks.
You’ll want to whip up a batch and watch smiles spread across everyone’s faces.
Why Rice Krispie Balls Make the Holidays Sweeter
What You Need for Chocolate Krispie Balls
Base Ingredients:Chocolate Components:Binding and Sweetening Agents:Decorative Elements:How to Shape Perfect Rice Krispie Balls with Chocolate
Step 1: Butter Melting Magic
Gently melt butter in a large saucepan over low heat until it transforms into a smooth, liquid pool of golden goodness.
Step 2: Marshmallow Transformation
Toss marshmallows into the melted butter, stirring continuously until they meld into a creamy, dreamy mixture that looks like fluffy clouds.
Step 3: Syrup Binding Technique
Pour corn syrup into the marshmallow blend, stirring vigorously to create a glossy, sticky binding liquid that will hold everything together.
Step 4: Cereal Coating Extravaganza
Remove the pan from heat and gently fold rice krispies cereal into the marshmallow mixture, ensuring every crispy piece gets a luxurious coating.
Step 5: Chocolate Chip Surprise
Fold chocolate chips into the cereal blend, allowing them to slightly melt and create pockets of rich, chocolatey excitement throughout the mixture.
Step 6: Cooling Comfort
Let the mixture cool for 5-10 minutes until it’s comfortable to handle but still wonderfully malleable.
Step 7: Ball Formation
Roll the mixture into compact, uniform balls using gentle pressure, creating perfectly sized treats that are about 1-inch in diameter.
Step 8: Chilling Moment
Refrigerate the balls for 15 minutes to help them firm up and maintain their delightful shape.
Step 9: White Chocolate Drizzle
Melt white chocolate wafers in a microwave-safe bowl, heating in short 15-second intervals and stirring between each cycle to achieve smooth perfection.
Step 10: Decorative Drizzling
Drizzle the melted white chocolate over the chilled rice krispie balls using a spoon or piping bag, creating a festive winter wonderland effect.
Step 11: Sprinkle Spectacular
Immediately shower the white chocolate-covered balls with:before the chocolate sets, adding a burst of holiday cheer.
Step 12: Setting the Stage
Allow the decorated balls to rest at room temperature for 10-15 minutes until the chocolate hardens completely.
Step 13: Storage Solution
Store these festive treats in an airtight container in the refrigerator for up to 5 days, separating layers with parchment paper to keep them pristine.
Smart Tips for Chocolate Krispie Ball Success
Holiday Variations for Chocolate Rice Krispie Balls
Treats to Serve with Your Rice Krispie Balls
Storing Rice Krispie Balls for Maximum Crunch
Christmas Rice Krispie Ball FAQs
Yes, you can substitute white chocolate with milk or dark chocolate for a different flavor profile and appearance. Just ensure the chocolate melts smoothly for drizzling.
Lightly grease your hands with cooking spray or butter before rolling the balls. This helps create smoother, more uniform shapes without the mixture sticking to your fingers.
Absolutely! Kids can help with mixing ingredients, rolling balls, and sprinkling decorations. Just supervise during the melting and handling of hot marshmallow mixture.
Yes, you can prepare these balls a day or two before your event.
Print
Christmas Chocolate Rice Krispie Balls Recipe
- Total Time: 30 minutes
- Yield: 12 1x
Description
Festive Christmas chocolate rice krispie balls bring holiday cheer with their irresistible blend of marshmallow, chocolate, and crispy rice. Sweet treats that sparkle with seasonal joy will delight guests and make celebrations memorable.
Ingredients
Main Ingredients:
- 3 cups rice krispies cereal
- 1 cup chocolate chips (milk or dark)
- 1/2 cup unsalted butter
Binding Ingredients:
- 1/4 cup light corn syrup
- 1/4 cup marshmallows
- 2 tbsp powdered sugar
Decorative Ingredients:
- 1/2 cup christmas sprinkles
- 1/4 cup white chocolate melting wafers
- 2 tbsp festive colored sugar crystals
Instructions
- Melt butter in a large saucepan over low heat until completely liquefied and smooth.
- Add marshmallows to the melted butter, stirring continuously until they transform into a creamy, uniform mixture.
- Pour in corn syrup and stir vigorously to create a glossy, cohesive binding liquid.
- Remove the pan from heat and gently fold in rice krispies cereal, ensuring every piece is evenly coated with the marshmallow mixture.
- Mix chocolate chips into the cereal blend, allowing them to slightly melt and create pockets of chocolatey goodness.
- Let the mixture cool for 5-10 minutes until it’s comfortable to handle but still malleable.
- Roll the mixture into compact, uniform balls approximately 1-inch in diameter, using gentle pressure to maintain their shape.
- Refrigerate the balls for 15 minutes to help them firm up and hold their structure.
- Melt white chocolate wafers in a microwave-safe bowl, heating in 15-second intervals and stirring between each cycle.
- Drizzle melted white chocolate over the chilled rice krispie balls using a spoon or piping bag.
- Immediately sprinkle christmas sprinkles and colored sugar crystals over the white chocolate coating before it sets.
- Allow the decorated balls to rest at room temperature for 10-15 minutes until the chocolate hardens completely.
- Store in an airtight container in the refrigerator for up to 5 days, separating layers with parchment paper.
Notes
- Use room temperature butter for smoother, more even melting and better integration with marshmallows.
- Work quickly when mixing ingredients to prevent rice krispies from becoming soggy and maintaining their crispy texture.
- Lightly grease hands with cooking spray when rolling balls to prevent sticky mixture from clinging to fingers.
- Choose gluten-free rice krispies for a celiac-friendly version of this festive treat.
- Opt for dairy-free white chocolate and vegan marshmallows to create a plant-based alternative that’s equally delicious.
- Experiment with different chocolate drizzles like milk chocolate or dark chocolate for varied flavor profiles.
- Add a pinch of sea salt to the marshmallow mixture to enhance the overall sweetness and complexity of the dessert.
- Prep Time: 10 minutes
- Cook Time: 20 minutes
- Category: Desserts, Snacks
- Method: Rolling
- Cuisine: American
Nutrition
- Serving Size: 12
- Calories: 176
- Sugar: 15 g
- Sodium: 33 mg
- Fat: 9 g
- Saturated Fat: 5 g
- Unsaturated Fat: 4 g
- Trans Fat: 0 g
- Carbohydrates: 23 g
- Fiber: 0.2 g
- Protein: 1 g
- Cholesterol: 15 mg
Mia Thompson
Pastry Chef & Content Creator
Expertise
Education
Portland Community College – Baking and Pastry Arts Program
Specialized in artisanal bread, seasonal desserts, and sustainable baking methods.
National University of Natural Medicine – Bachelor of Science in Nutrition (BScN)
Focused on “Food as Medicine” philosophy, with core threads in nutrition.
Mia’s love affair with baking began in her grandmother’s kitchen, where sneaking spoonfuls of batter first sparked her curiosity. She refined her skills through Portland Community College’s Baking and Pastry Arts Program and her expertise at the National University of Natural Medicine, earning a B.Sc. in Nutrition.
At The Scrumptious Pumpkin, Mia reimagines classics with effortless seasonal treats, healthier twists on old favorites, and playful confections that feel like pure joy. Beyond the oven, she nurtures her urban garden, forages local ingredients around Portland, and leads hands‑on nutrition workshops for her community.