Jolly Christmas Fudge Recipe: Sweet Holiday Magic in Every Bite
Sweet holiday memories often spark around this delectable christmas fudge that melts smoothly on your tongue.
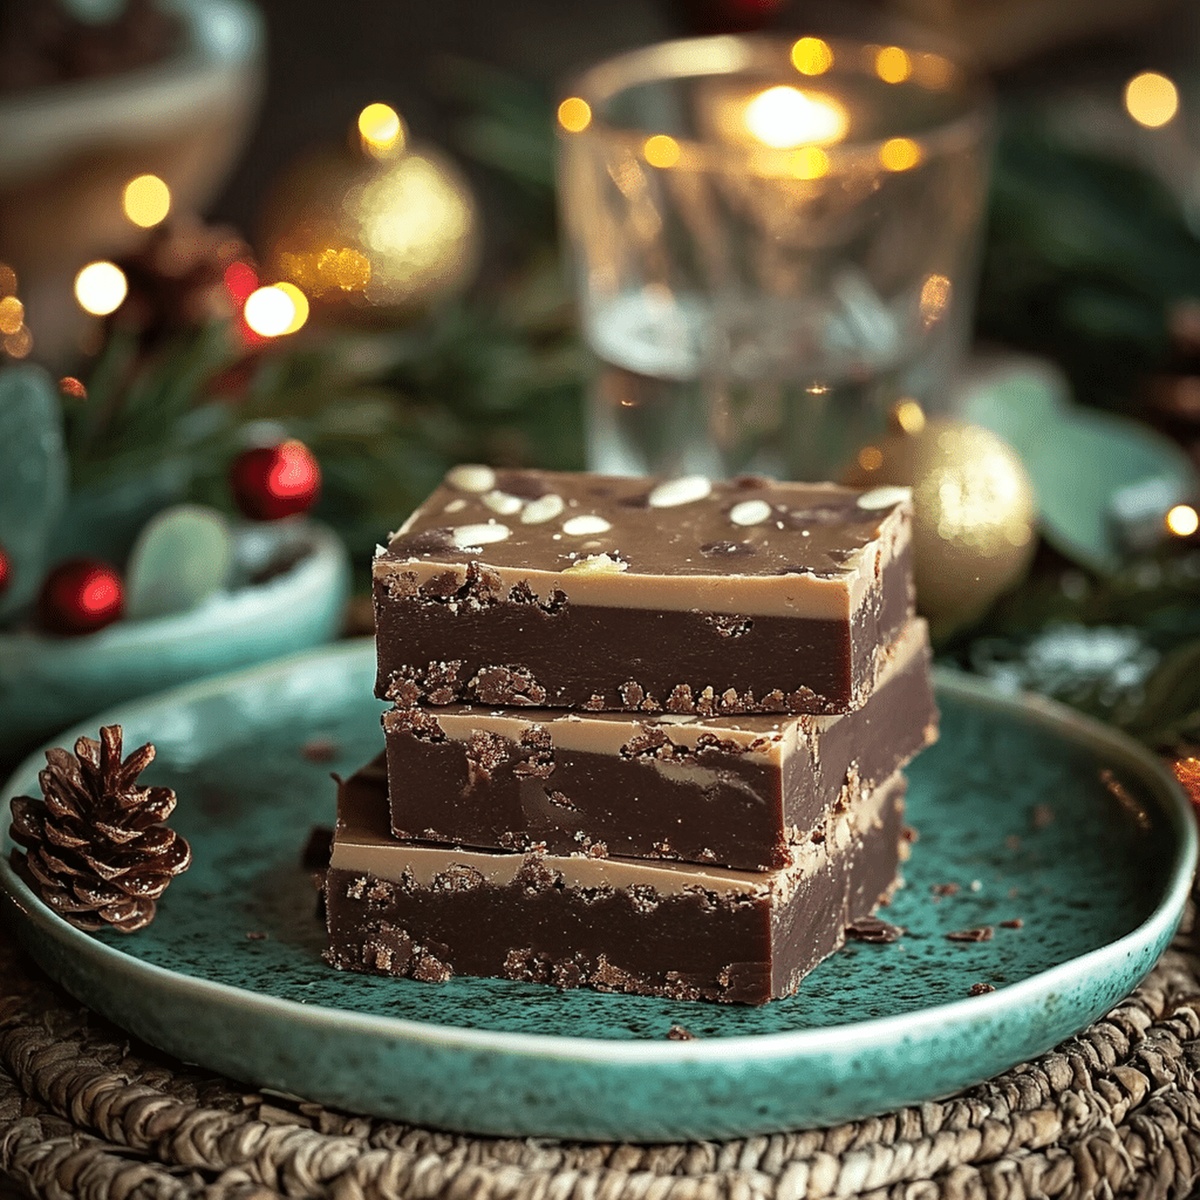
Creamy chocolate chunks blend with marshmallow swirls to create a festive treat.
Grandma’s kitchen would smell incredible with such a rich dessert cooling on her marble countertop.
Festive gatherings feel magical when you share these delightful chocolate squares.
Each bite carries hints of nostalgia and warmth from traditional seasonal celebrations.
Seasonal ingredients come together effortlessly to craft something truly spectacular.
Dive into this simple recipe that promises pure indulgence and joy.
What Makes Christmas Fudge So Fun

What’s Inside Christmas Fudge
For the Base:For the Flavoring:For the Mix-Ins and Decoration:How To Make Christmas Fudge Easily

Step 1: Prepare Baking Pan
Line an 8×8-inch baking pan with parchment paper, letting extra hang over the edges for easy removal. Lightly grease the paper to prevent sticking.
Step 2: Create Melting Station
Set up a double boiler by placing a heat-safe glass bowl over a pot of gently simmering water. Make sure the bowl doesn’t touch the water’s surface.
Step 3: Melt Chocolate Base
Combine chocolate base ingredients in the glass bowl:Stir constantly over low-medium heat until completely melted and silky smooth, about 5-7 minutes.
Step 4: Add Flavor Enhancers
Remove melted mixture from heat. Quickly stir in:Ensure all flavors are fully blended.
Step 5: Mix in Festive Elements
Gently fold in delightful mix-ins:Distribute evenly throughout the fudge mixture.
Step 6: Transfer to Pan
Pour the festive mixture into the prepared pan. Use a spatula to spread evenly and create a smooth surface.
Step 7: Chill and Set
Refrigerate the fudge for 2-3 hours until completely firm and set to the touch.
Step 8: Remove and Slice
Lift the fudge out of the pan using parchment paper overhang. Place on a cutting board and slice into small, bite-sized squares. Clean the knife between cuts for precise edges.
Step 9: Store Properly
Keep in an airtight container in the refrigerator. Place parchment paper between layers to prevent sticking. Enjoy within one week for maximum freshness.
Tips To Get The Best Christmas Fudge
New Ways To Style Your Christmas Fudge
Great Sips Or Snacks For Christmas Fudge
How To Keep Christmas Fudge From Drying Out
Your Top Questions On Christmas Fudge
The red and green sprinkles, crushed candy canes, and peppermint extract create a holiday-themed dessert that looks and tastes like Christmas.
Use a double boiler method and stir constantly while melting white chocolate chips with sweetened condensed milk to prevent burning and create a silky texture.
Yes, you can swap pecans for other nuts like walnuts or almonds, or omit them entirely if you have nut allergies or preferences.
Parchment paper makes removing the fudge from the pan easier and ensures clean, precise cuts without the fudge sticking to the pan’s surface.
Print
Christmas Fudge Recipe
- Total Time: 2-3 hours 25 minutes
- Yield: 12 1x
Description
Seasonal magic unfolds with this delightful Christmas Fudge, blending rich chocolate and festive cheer. Sweet memories melt together, inviting you to savor holiday happiness in each delectable bite.
Ingredients
Main Ingredients:
- 3 cups white chocolate chips
- 1 can (14 oz) sweetened condensed milk
- 1/4 cup unsalted butter
Festive Mix-Ins:
- 1/2 cup crushed candy canes
- 1/4 cup red and green sprinkles
- 1/3 cup chopped pecans
Optional Flavor Enhancers:
- 1 tsp vanilla extract
- 1/4 tsp peppermint extract
- 1 pinch salt
Instructions
- Line an 8×8-inch baking pan with parchment paper, allowing excess to hang over the edges for easy removal, and lightly grease the paper to prevent sticking.
- Create a double boiler by placing a heat-safe glass bowl over a pot of simmering water, ensuring the bottom of the bowl doesn’t touch the water.
- Combine white chocolate chips, sweetened condensed milk, and butter in the glass bowl, stirring constantly until completely melted and smooth at low-medium heat (approximately 5-7 minutes).
- Remove the melted mixture from heat and quickly incorporate vanilla extract, peppermint extract, and salt, stirring until fully integrated.
- Gently fold in crushed candy canes, chopped pecans, and red and green sprinkles, distributing evenly throughout the fudge mixture.
- Pour the festive mixture into the prepared pan, using a spatula to spread it evenly and create a smooth surface.
- Refrigerate the fudge for 2-3 hours or until completely set and firm to the touch.
- Using the parchment paper overhang, lift the fudge out of the pan and place on a cutting board.
- Slice into small squares, wiping the knife clean between cuts for neat edges.
- Store in an airtight container in the refrigerator for up to one week, separating layers with parchment paper.
Notes
- Prevent candy cane bleeding by adding crushed candy canes just before setting, ensuring vibrant red and green colors remain distinct and crisp.
- Swap pecans with other nuts like almonds or walnuts for different flavor profiles and to accommodate nut allergies.
- Use dairy-free white chocolate chips and coconut condensed milk for a vegan-friendly version that maintains the festive texture and taste.
- Clean knife with hot water between cuts to achieve perfectly smooth, professional-looking fudge squares without crumbling or jagged edges.
- Prep Time: 15 minutes
- Cook Time: 10 minutes
- Category: Desserts, Snacks
- Method: Baking
- Cuisine: American
Nutrition
- Serving Size: 12
- Calories: 220
- Sugar: 24 g
- Sodium: 50 mg
- Fat: 10 g
- Saturated Fat: 6 g
- Unsaturated Fat: 4 g
- Trans Fat: 0 g
- Carbohydrates: 30 g
- Fiber: 0.5 g
- Protein: 2 g
- Cholesterol: 15 mg
Mia Thompson
Pastry Chef & Content Creator
Expertise
Education
Portland Community College – Baking and Pastry Arts Program
Specialized in artisanal bread, seasonal desserts, and sustainable baking methods.
National University of Natural Medicine – Bachelor of Science in Nutrition (BScN)
Focused on “Food as Medicine” philosophy, with core threads in nutrition.
Mia’s love affair with baking began in her grandmother’s kitchen, where sneaking spoonfuls of batter first sparked her curiosity. She refined her skills through Portland Community College’s Baking and Pastry Arts Program and her expertise at the National University of Natural Medicine, earning a B.Sc. in Nutrition.
At The Scrumptious Pumpkin, Mia reimagines classics with effortless seasonal treats, healthier twists on old favorites, and playful confections that feel like pure joy. Beyond the oven, she nurtures her urban garden, forages local ingredients around Portland, and leads hands‑on nutrition workshops for her community.