
Festive Christmas Peanut Butter Balls Recipe: Sweet Holiday Treats
Creamy, decadent christmas peanut butter balls have been my holiday secret weapon for years.
Chocolate-coated confections always spark joy around my festive kitchen.
Sweet memories flood back with each batch I prepare.
Kids and adults alike cannot resist these delightful treats.
Little hands eagerly help roll these bite-sized delights during our annual baking marathon.
Powdered sugar and rich peanut butter create magic in every single sphere.
You’ll want to make multiple batches – trust me!
Why Christmas Peanut Butter Balls Are a Sweet Tradition
Peanut Butter Ball Ingredients That Keep It Festive
Base Ingredients:Coating Ingredients:Decorative Ingredients:Rolling Perfect Peanut Butter Balls—Made Simple
Step 1: Whip Creamy Base
In a large mixing bowl, blend peanut butter and softened butter using an electric mixer. Whip the ingredients until they transform into a silky, smooth consistency with no lumps visible.
Step 2: Form Sweet Dough
Add powdered sugar gradually into the butter mixture. Mix thoroughly until the ingredients merge and create a uniform dough-like texture that holds together easily when pressed.
Step 3: Shape Bite-Sized Treats
Roll the mixture into small round balls, approximately one inch in diameter. Arrange the balls on a parchment-lined baking sheet.
Place the tray in the freezer for 20-30 minutes to help them firm up completely.
Step 4: Melt Chocolate Coating
Select a microwave-safe bowl and combine:Microwave in 30-second intervals, stirring between each session until the chocolate becomes completely smooth and glossy.
Step 5: Dunk and Decorate
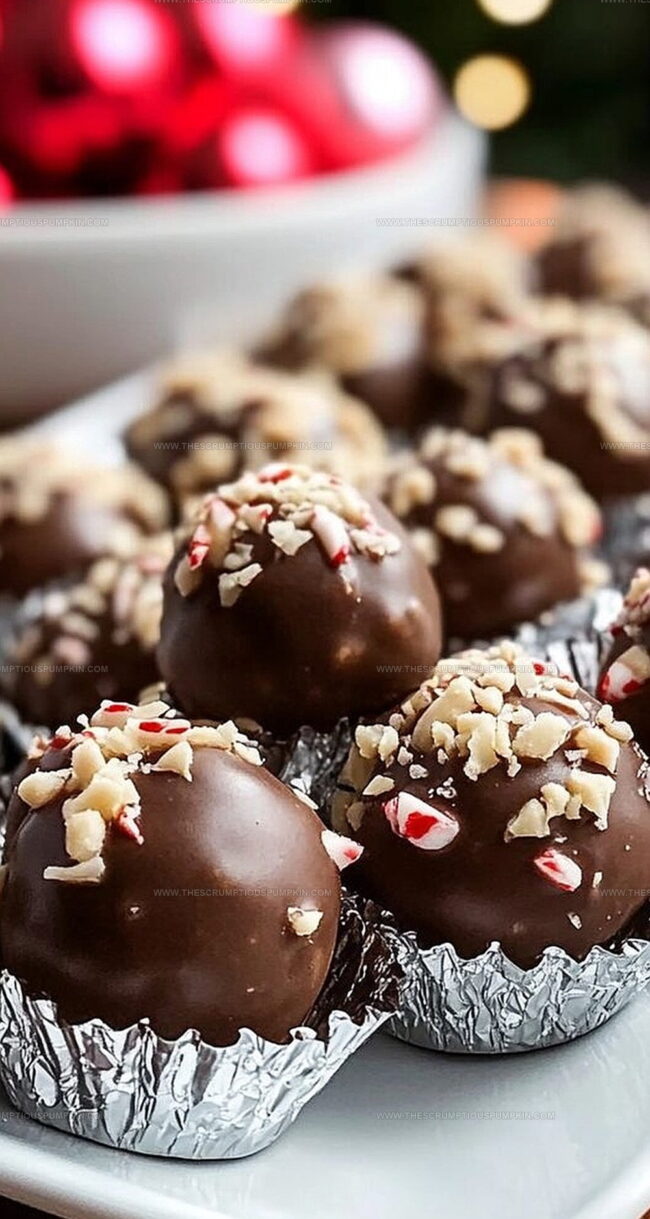
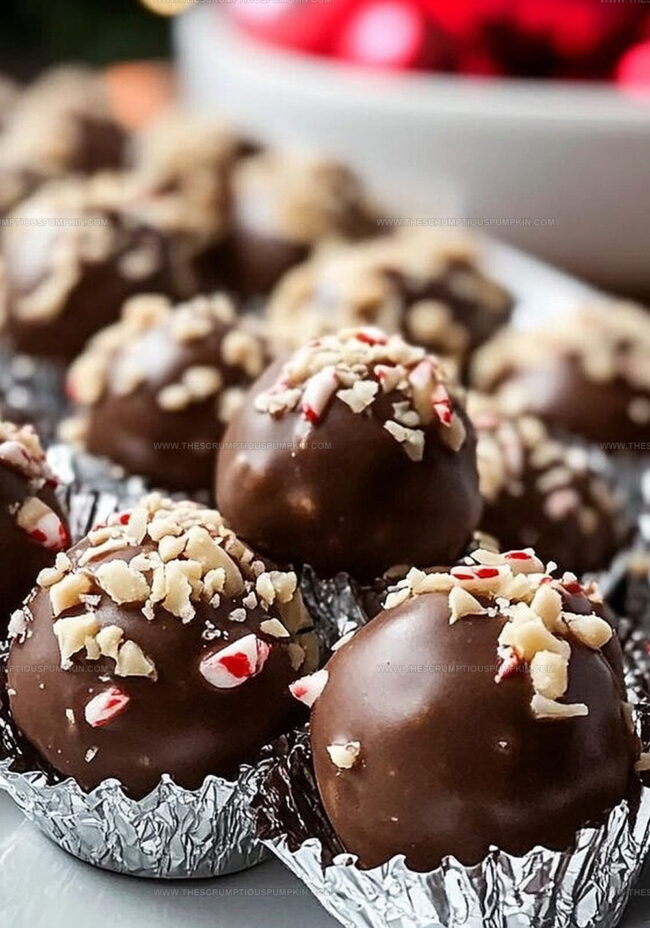
Use a fork or skewer to dip each frozen peanut butter ball into the melted chocolate. Ensure full coverage by gently rolling and tapping off excess chocolate.
Return coated balls to the parchment paper.
Step 6: Add Festive Flair
Immediately sprinkle decorative toppings like holiday sprinkles or crushed candy canes onto the chocolate-covered balls while the coating is still wet.
Step 7: Set and Serve
Allow the chocolate-covered balls to set at room temperature or refrigerate to speed up the hardening process. Once firm, serve and enjoy these delightful holiday treats.
Tips for Peanut Butter Balls That Melt in Your Mouth
Tasty Twists for These Holiday Treats
What Beverages or Bites to Pair with Peanut Butter Balls
Keep These Holiday Treats Fresh and Snack-Ready
Your Sweet Tooth’s Guide to Peanut Butter Ball FAQs
Place parchment paper between layers when storing, and keep them chilled in the refrigerator to maintain their shape and prevent sticking.
Yes, you can use milk chocolate, dark chocolate, or white chocolate depending on your preference. Just ensure it melts smoothly for easy coating.
They can be gluten-free if you use gluten-free powdered sugar and confirm your chocolate chips are gluten-free. Always check ingredient labels carefully.
When stored in an airtight container in the refrigerator, they can last up to 2 weeks, making them perfect for holiday preparation in advance.
Print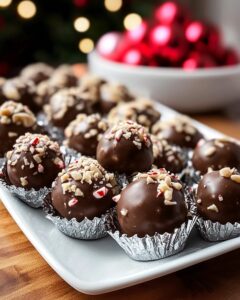
Christmas Peanut Butter Balls Recipe
- Total Time: 45 minutes
- Yield: 4 1x
Description
Festive holiday spirit meets sweet indulgence in these Christmas peanut butter balls, a delightful treat perfect for seasonal gatherings. Rich chocolate coating and creamy peanut butter center create a delectable dessert you’ll savor with every delicious bite.
Ingredients
Main Ingredients:
- 1 cup (240 ml) creamy peanut butter
- 2 cups (240 g) powdered sugar
- 2 cups (340 g) semisweet chocolate chips
Binding Ingredients:
- 1/4 cup (57 g) unsalted butter, softened
Garnish:
- 1 tablespoon (15 ml) coconut oil (optional)
- Sprinkles or crushed candy canes for garnish
Instructions
- Blend peanut butter and softened butter in a large mixing bowl until achieving a silky, uniform texture.
- Gradually incorporate powdered sugar, stirring consistently until the mixture transforms into a dense, moldable dough.
- Craft compact spherical treats approximately one inch in diameter, positioning them carefully on a parchment-lined baking sheet.
- Refrigerate the formed spheres for 20-30 minutes, ensuring they become solidly chilled and maintain their structured shape.
- Utilize a microwave-safe container to gently melt chocolate chips, stirring every 30 seconds until achieving a glossy, smooth consistency.
- Delicately immerse each chilled peanut butter sphere into the molten chocolate, utilizing a fork to ensure complete, even coverage.
- Return chocolate-enrobed spheres to the parchment-lined surface, swiftly adorning with festive sprinkles or crushed candy canes while the chocolate remains liquid.
- Allow the chocolate coating to solidify naturally at room temperature or expedite the process by placing them in the refrigerator for quicker setting.
Notes
- Ensure butter and peanut butter are at room temperature for smooth, easy mixing without lumps.
- Sift powdered sugar gradually to prevent clumping and create a silky, uniform texture.
- Use a small cookie scoop or melon baller for consistent, perfectly sized peanut butter balls.
- Chill the balls before dipping in chocolate to prevent them from falling apart during coating.
- Melt chocolate slowly and carefully to avoid burning, using a double boiler for best results.
- Experiment with different chocolate types like dark, milk, or white for varied flavor profiles.
- For gluten-free option, verify all ingredients are certified gluten-free, especially chocolate chips.
- Store in an airtight container in the refrigerator for up to a week, separating layers with parchment paper.
- Prep Time: 15 minutes
- Cook Time: 10 minutes
- Category: Snacks, Desserts
- Method: Rolling
- Cuisine: American
Nutrition
- Serving Size: 4
- Calories: 480
- Sugar: 48 g
- Sodium: 95 mg
- Fat: 26 g
- Saturated Fat: 10 g
- Unsaturated Fat: 14 g
- Trans Fat: 0 g
- Carbohydrates: 57 g
- Fiber: 1 g
- Protein: 8 g
- Cholesterol: 15 mg
Mia Thompson
Pastry Chef & Content Creator
Expertise
Education
Portland Community College – Baking and Pastry Arts Program
Specialized in artisanal bread, seasonal desserts, and sustainable baking methods.
National University of Natural Medicine – Bachelor of Science in Nutrition (BScN)
Focused on “Food as Medicine” philosophy, with core threads in nutrition.
Mia’s love affair with baking began in her grandmother’s kitchen, where sneaking spoonfuls of batter first sparked her curiosity. She refined her skills through Portland Community College’s Baking and Pastry Arts Program and her expertise at the National University of Natural Medicine, earning a B.Sc. in Nutrition.
At The Scrumptious Pumpkin, Mia reimagines classics with effortless seasonal treats, healthier twists on old favorites, and playful confections that feel like pure joy. Beyond the oven, she nurtures her urban garden, forages local ingredients around Portland, and leads hands‑on nutrition workshops for her community.