
Dreamy Cookie Dough Snickers & Reese’s Ice Cream Recipe
Whipping up this cookie dough snikers & reese’s ice cream promises an indulgent adventure for dessert enthusiasts.
Sweet tooths will absolutely melt over this decadent creation.
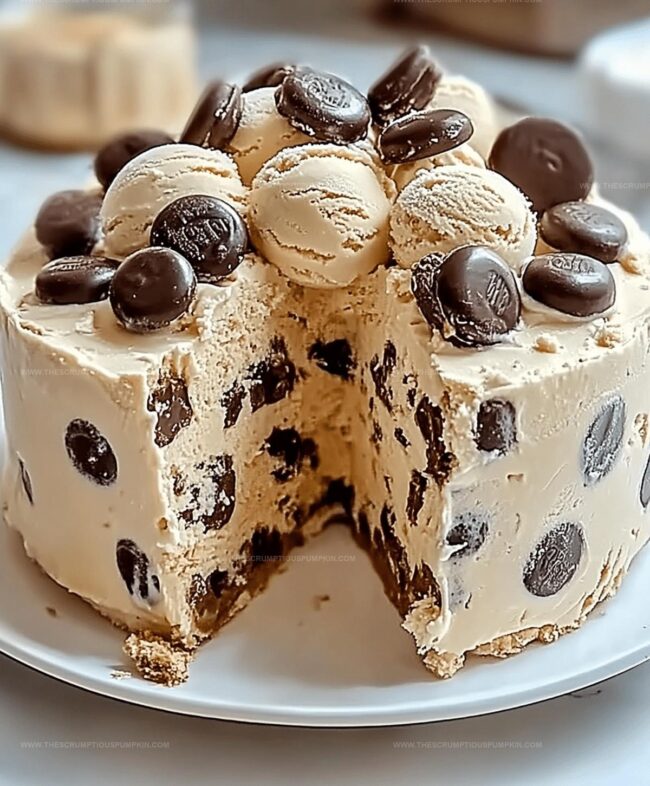
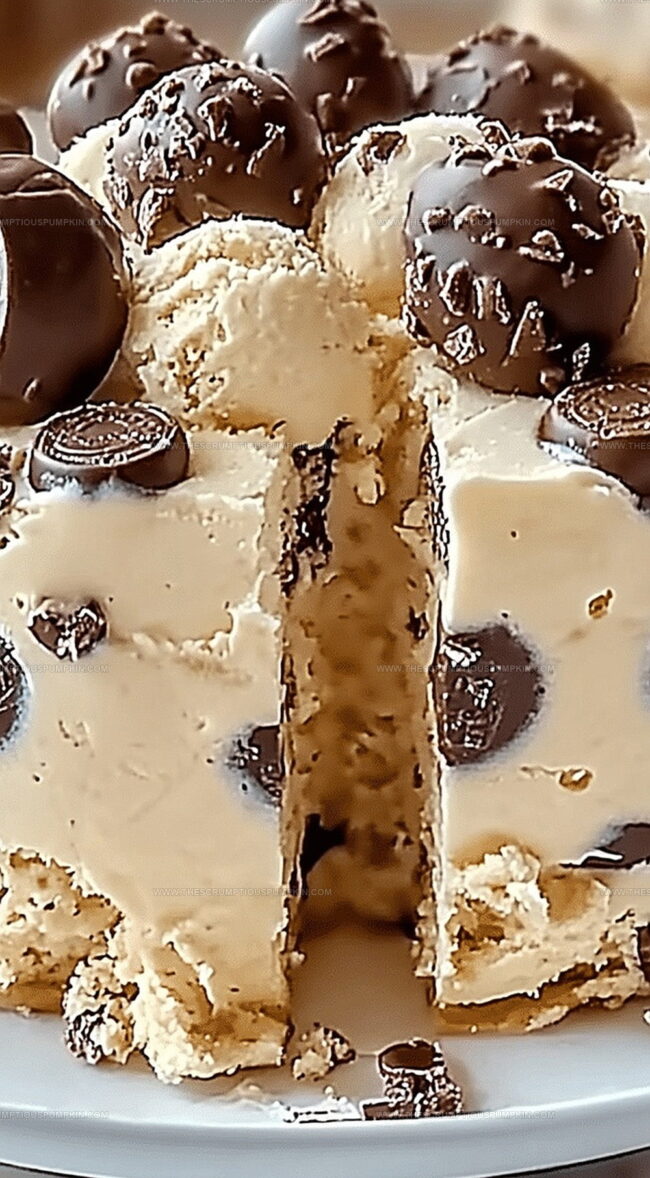
Layers of creamy richness blend perfectly with chunks of chocolate and peanut butter.
Unexpected textures dance across your palate with each spoonful.
Craving something wildly delicious yet simple to prepare?
No complicated techniques stand between you and this dreamy treat.
Buckle up for a mouthwatering journey that guarantees pure dessert bliss.
What Makes Cookie Dough Snickers Ice Cream Special

Ingredients Needed for Cookie Dough Snickers Ice Cream
Dairy Base:Candy Mix-Ins:Cookie Dough Component:Instructions to Make Cookie Dough Snickers Ice Cream
Step 1: Create Creamy Ice Cream Base
Grab a mixing bowl and whisk together the following ingredients until they form a smooth, well-blended mixture:Blend everything thoroughly to ensure a silky, consistent texture.
Step 2: Churn the Ice Cream
Pour the liquid mixture into your ice cream maker and follow the manufacturer’s churning instructions.
This process will transform your liquid base into a soft, creamy texture.
Step 3: Add Delicious Candy Chunks
During the final 5 minutes of churning, gently fold in these delightful mix-ins:Ensure the candy pieces are evenly distributed throughout the ice cream.
Step 4: Freeze and Enjoy
Transfer the ice cream to an airtight container.
Place in the freezer and let it set for at least 4 hours.
This allows the ice cream to firm up and the flavors to meld together perfectly.
When ready, scoop and indulge in your homemade candy-loaded ice cream treat!
Tips to Get Perfect Cookie Dough Ice Cream Texture
Variations to Try with Cookie Dough Snickers Ice Cream

Ideas for Serving Cookie Dough Snickers Ice Cream
Best Storage Tips for Cookie Dough Ice Cream
FAQs
Yes, you can use the no-churn method by whipping heavy cream until stiff peaks form, then folding in condensed milk and other ingredients before freezing.
Use heat-treated flour and pasteurized eggs or egg-free recipe to ensure the cookie dough is safe for consumption.
The ice cream will stay fresh in the freezer for up to 2 weeks when stored in an airtight container.
Absolutely! Feel free to use your favorite candy bars or chocolate chunks to customize the ice cream.
Print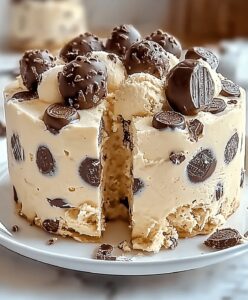
Cookie Dough Snikers & Reese’s Ice Cream Recipe
- Total Time: 4 hours 35 minutes
- Yield: 4 1x
Description
Indulgent cookie dough snikers & reese’s ice cream delivers a heavenly fusion of chocolate, peanut butter, and creamy delight. Dessert enthusiasts will savor each luxurious spoonful of this irresistible frozen treat that promises pure bliss in every bite.
Ingredients
Main Ingredients:
- 2 cups (473 ml) heavy cream
- 1 cup (237 ml) whole milk
- 3/4 cup (150 g) granulated sugar
Candy Mix-Ins:
- 1/2 cup chopped Snickers
- 1/2 cup chopped Reese’s
- 1/2 cup mini chocolate chips
Flavor Enhancers:
- 1 teaspoon vanilla extract
Instructions
- Whisk heavy cream, milk, sugar, and vanilla extract in a large mixing bowl until ingredients are thoroughly integrated and smooth.
- Pour the creamy base into an ice cream maker, then churn at medium speed for approximately 20-25 minutes according to the manufacturer’s guidelines.
- During the final 5 minutes of churning, gently incorporate chopped Snickers bars, Reese’s pieces, mini chocolate chips, and crumbled edible cookie dough into the churning mixture, ensuring even distribution.
- Carefully transfer the enriched ice cream to a freezer-safe container with an airtight seal, smoothing the surface to create an even layer.
- Place the container in the freezer and allow the ice cream to solidify for a minimum of 4 hours, preferably overnight, to achieve optimal texture and flavor melding.
- When ready to serve, remove the ice cream from the freezer 5-10 minutes before scooping to soften slightly, which will make portioning easier and enhance the creamy consistency.
Notes
- Chill all ingredients beforehand to ensure a smoother, creamier ice cream texture.
- Use room temperature heavy cream and milk for better incorporation and smoother blending.
- Opt for full-fat dairy to create a rich, luxurious mouthfeel and prevent ice crystals from forming.
- For a lighter version, substitute half-and-half or whole milk, understanding the texture might be slightly less creamy.
- Prep Time: 10 minutes
- Cook Time: 4 hours 25 minutes
- Category: Desserts
- Method: Churning
- Cuisine: American
Nutrition
- Serving Size: 4
- Calories: 479
- Sugar: 45 g
- Sodium: 116 mg
- Fat: 31 g
- Saturated Fat: 19 g
- Unsaturated Fat: 10 g
- Trans Fat: 0.5 g
- Carbohydrates: 46 g
- Fiber: 2 g
- Protein: 7 g
- Cholesterol: 115 mg
Lucas Bennett
Founder & Recipe Developer
Expertise
Education
Blue Ridge Community College – Certificate in Culinary Arts
Focused on seasonal cooking, sustainable kitchen practices, and farm-to-table techniques.
Appalachian State University – B.A. in English
Built critical thinking and analysis through diverse texts. Guided by faculty, it prepares graduates for publishing and more.
Growing up in the rolling hills of North Carolina, Lucas learned early that some of life’s best memories start around a kitchen table. After studying English at Appalachian State University and honing his culinary skills at Blue Ridge Community College, he dreamed of blending storytelling with rustic, seasonal cooking, and The Scrumptious Pumpkin was born.
Lucas focuses on easy, single-serving recipes that turn fresh, local ingredients into something special. His style is simple, heartfelt, and rooted in the beauty of the seasons. When he’s not testing a new dish, you’ll probably find him hiking in the Blue Ridge Mountains, browsing farmers’ markets, or scribbling food stories in a notebook.