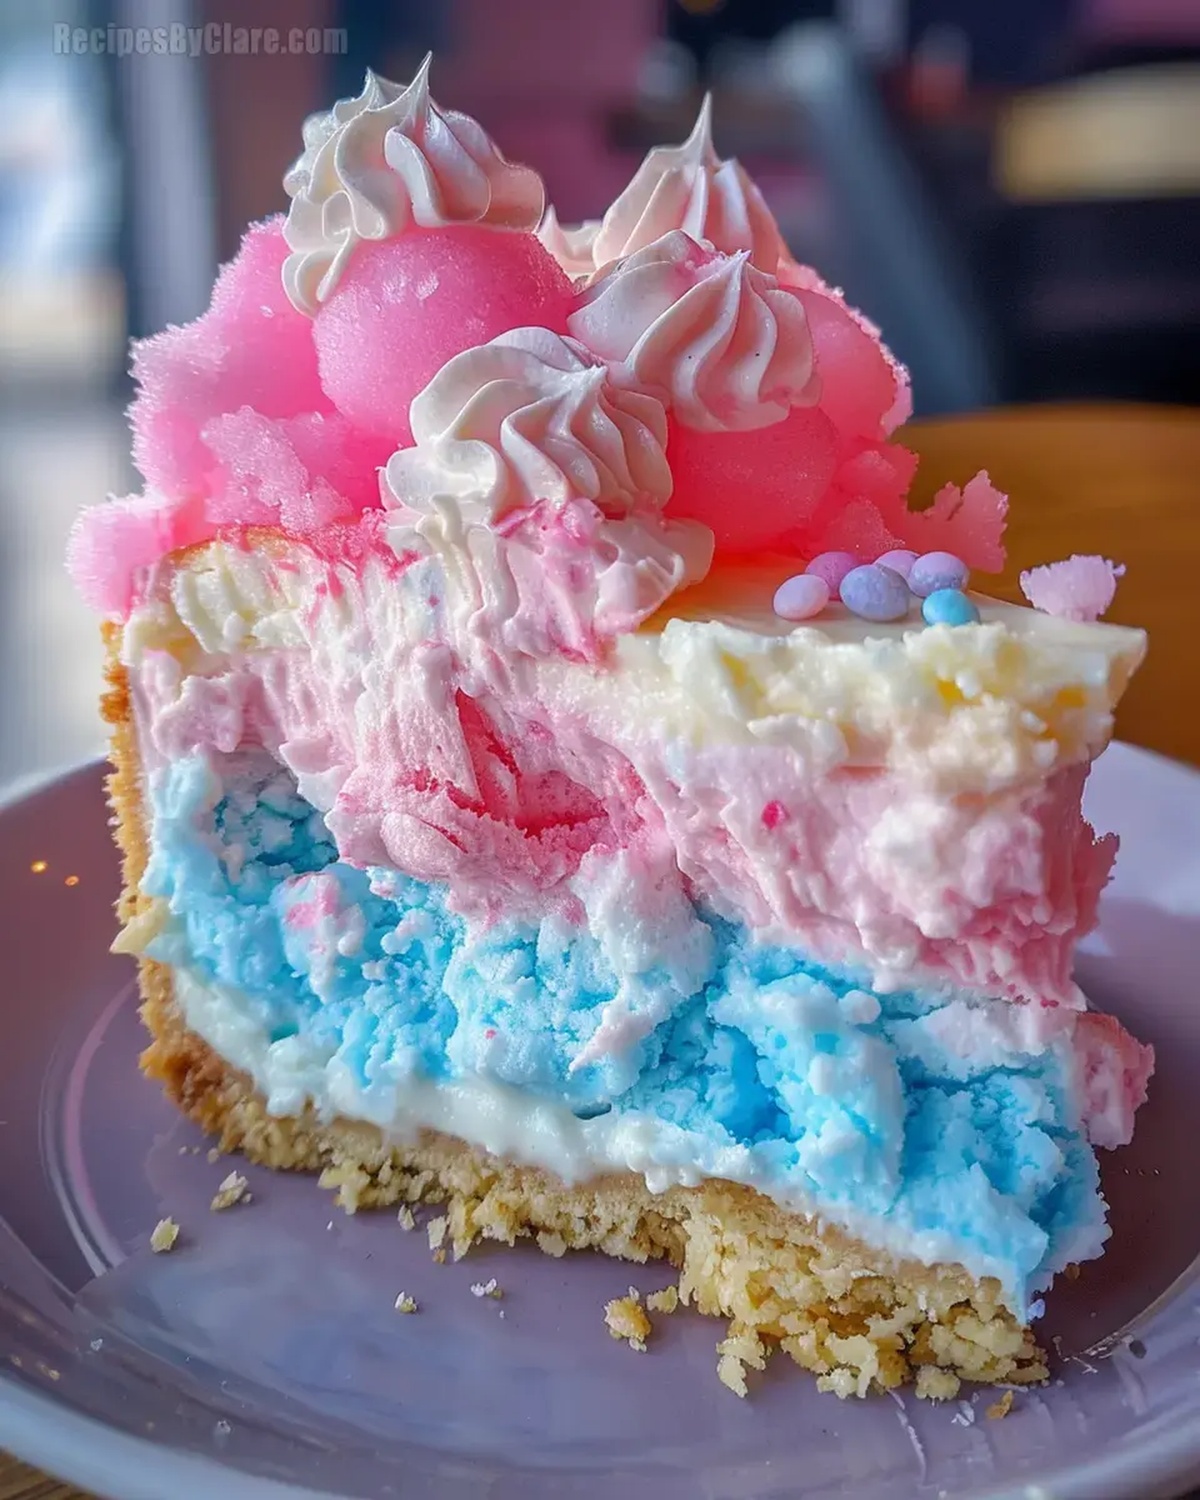
Dreamy Cotton Candy Cheesecake Recipe: Sweet Cloud Delight
Sweet dreams come alive with this cotton candy cheesecake that promises pure delight.
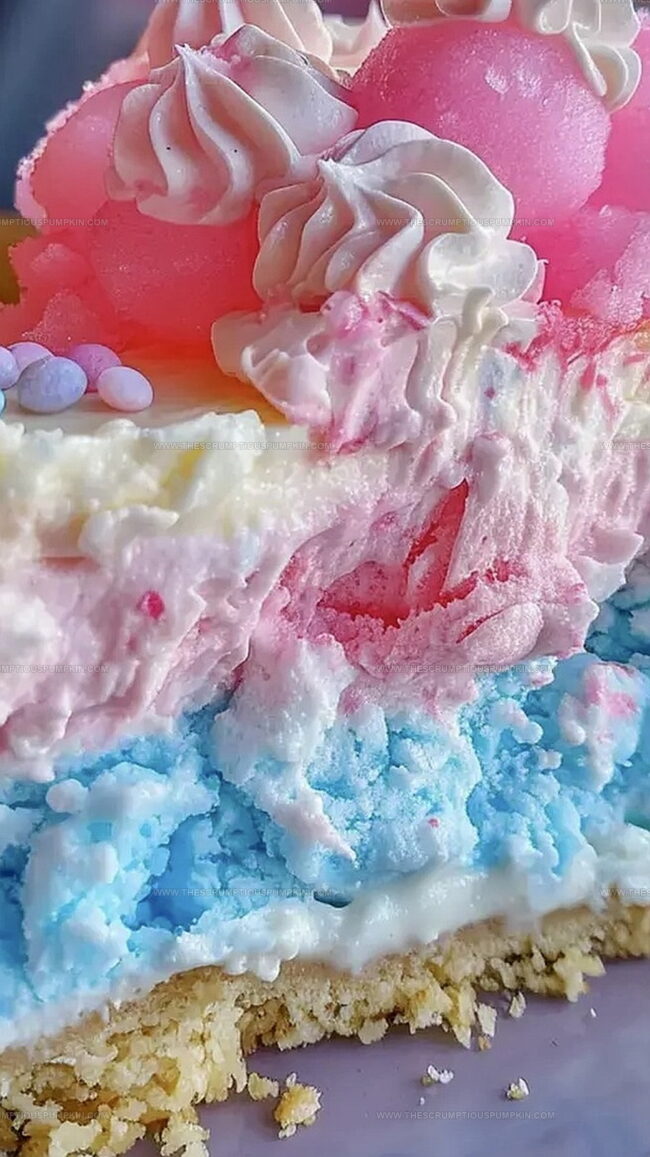
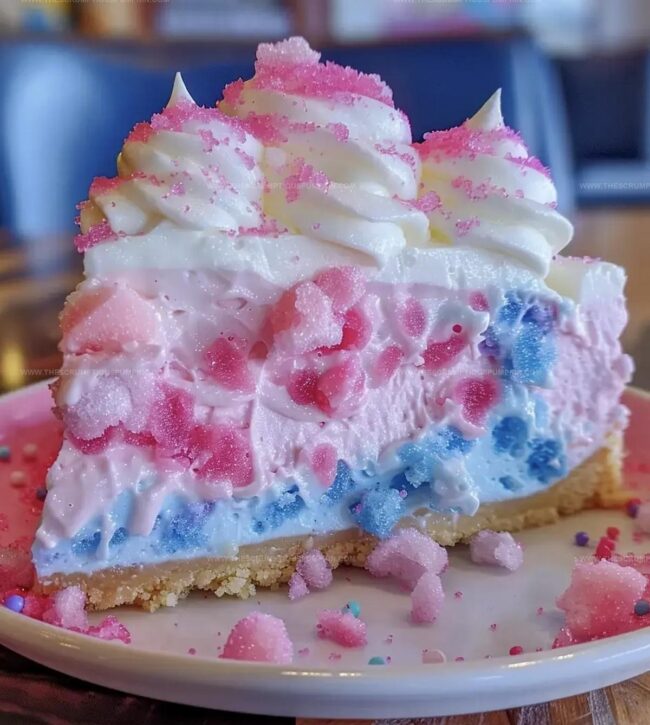
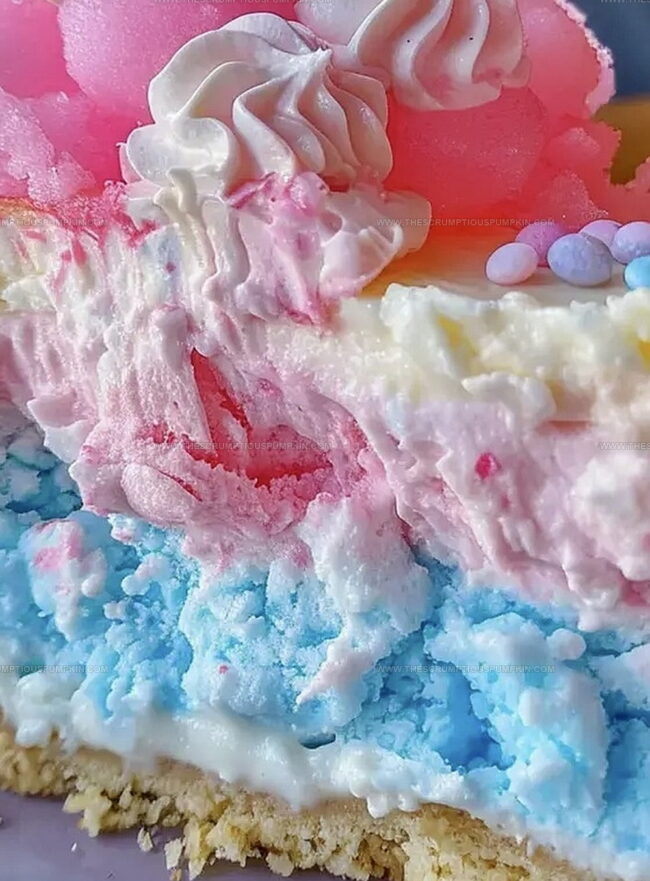
Clouds of sugary nostalgia dance across a creamy landscape of indulgence.
Childhood memories swirl through each decadent bite, inviting you to rediscover joy.
Pastel-colored magic transforms an ordinary dessert into an extraordinary experience.
Layers of whimsy blend smoothly with rich cream cheese foundations.
Delicate flavors whisper tales of fairground excitement and innocent pleasures.
You can create this magical treat that sparkles with playful imagination and love.
Cotton Candy Cheesecake For A Whimsical Treat
All The Ingredients For Cotton Candy Cheesecake
Crust Ingredients:Cheesecake Filling Ingredients:Flavor and Topping Ingredients:Steps To Make Creamy Cotton Candy Cheesecake
Step 1: Prepare the Baking Station
Grab your baking tools and get ready to create a whimsical dessert.
Warm up the oven to a cozy 325F (160C).
Lightly grease a 9-inch springform pan to ensure easy removal later.
Step 2: Craft the Crunchy Crust
In a mixing bowl, combine:Press the mixture firmly into the bottom of the pan, creating a solid foundation for your dreamy cheesecake.
Step 3: Bake the Crust
Pop the crust into the oven for 8-10 minutes.
Let it cool completely, allowing it to set perfectly.
Step 4: Whip Up the Cream Cheese Base
In a large mixing bowl, beat cream cheese and sugar until smooth and creamy.
The mixture should look silky and luxurious.
Step 5: Enhance the Flavor Profile
Gently fold in:Mix until everything is beautifully combined and consistent.
Step 6: Incorporate the Eggs
Add eggs one at a time, mixing thoroughly after each addition.
This creates a rich, velvety texture.
Step 7: Add Magical Cotton Candy Twist
Stir in cotton candy flavoring or syrup for an extra burst of playful sweetness and vibrant color.
Step 8: Pour and Smooth
Carefully pour the cheesecake filling over the cooled crust.
Use a spatula to create a perfectly smooth top.
Step 9: Bake to Perfection
Place the pan on a baking sheet and bake for 50-60 minutes.
Look for set edges with a slightly jiggly center.
Step 10: Gentle Cooling Process
Turn off the oven and crack the door open.
Let the cheesecake cool inside for one hour, preventing cracks.
Step 11: Room Temperature Rest
Remove the cheesecake and allow it to cool completely at room temperature.
Step 12: Chill and Set
Refrigerate for at least 4 hours, or ideally overnight, to achieve the perfect texture.
Step 13: Decorate with Whimsy
Before serving, crown your cheesecake with:Step 14: Serve and Delight
Carefully release the cheesecake from the springform pan.
Slice and serve chilled, watching eyes light up with each bite!
Pro Tips For Colorful Cotton Candy Cheesecake
Unique Cotton Candy Cheesecake Flavors To Try
How To Serve Cotton Candy Cheesecake Creatively
Storing Cotton Candy Cheesecake For Best Results
FAQs
Use a water bath by placing the springform pan in a larger pan filled with hot water during baking. This helps create a more even, gentle heat and prevents surface cracking.
Yes, this cheesecake is perfect for making in advance. You can prepare it up to 3 days before serving and keep it refrigerated until ready to eat.
You can substitute with vanilla extract and add a few drops of pink or blue food coloring to create a similar fun effect. The vanilla will still provide a delicious flavor profile.
Print
Cotton Candy Cheesecake Recipe
- Total Time: 1 hour 30 minutes
- Yield: 12 1x
Description
Sweet dreams melt into reality with Cotton Candy Cheesecake, a whimsical dessert that dances between childhood nostalgia and gourmet elegance. Pastel swirls and creamy richness invite you to savor a slice of pure delightful indulgence.
Ingredients
Main Ingredients:
- 24 ounces (680 grams) cream cheese, softened
- 4 large eggs
- 1 cup (240 milliliters) sour cream
- 1 1/2 cups (180 grams) graham cracker crumbs
- 1/2 cup (113 grams) unsalted butter, melted
Sweeteners and Flavorings:
- 1 1/4 cups (250 grams) granulated sugar
- 1 teaspoon vanilla extract
- Optional: cotton candy flavoring or cotton candy syrup
Decorative Ingredients:
- Optional: cotton candy
- Optional: sprinkles
Instructions
- Prepare the oven to 325F (160C) and coat a 9-inch springform pan with grease for optimal baking performance.
- Combine graham cracker crumbs, sugar, and melted butter in a mixing bowl, pressing the mixture firmly into the pan’s bottom to create a compact crust foundation.
- Bake the crust for 8-10 minutes, allowing it to cool completely and set a sturdy base for the cheesecake.
- In a large mixing bowl, whip cream cheese and sugar until achieving a silky, uniform texture without lumps.
- Incorporate sour cream and vanilla extract, blending thoroughly to enhance the cheesecake’s creamy consistency.
- Gently introduce eggs one at a time, ensuring each is fully integrated before adding the next to maintain a smooth mixture.
- For an authentic cotton candy experience, fold in cotton candy flavoring or syrup, creating a vibrant and whimsical flavor profile.
- Carefully transfer the cheesecake filling over the cooled crust, using a spatula to create an even, glossy surface.
- Position the pan on a baking sheet and bake for 50-60 minutes, watching for set edges and a slightly wobbly center.
- Switch off the oven, leaving the cheesecake inside with the door slightly ajar for one hour to prevent cracking.
- Extract the cheesecake and allow it to reach room temperature, promoting gradual cooling and stabilization.
- Refrigerate for a minimum of 4 hours or overnight to achieve optimal flavor and texture development.
- Before serving, garnish with delicate cotton candy wisps and optional colorful sprinkles for a playful presentation.
- Carefully release the cheesecake from the springform pan, slice into elegant portions, and serve chilled for maximum enjoyment.
Notes
- Use room temperature ingredients to ensure smooth, lump-free cream cheese mixture and even baking.
- Wrap the springform pan’s exterior with aluminum foil to prevent water seepage during baking and ensure even heat distribution.
- Avoid overmixing eggs to prevent air bubbles that can cause cracking on the cheesecake surface.
- Customize flavor by experimenting with different cotton candy syrups or adding pastel food coloring for a more vibrant presentation.
- Prep Time: 20 minutes
- Cook Time: 1 hour 10 minutes
- Category: Desserts
- Method: Baking
- Cuisine: American
Nutrition
- Serving Size: 12
- Calories: 430 kcal
- Sugar: 32 g
- Sodium: 230 mg
- Fat: 29 g
- Saturated Fat: 17 g
- Unsaturated Fat: 11 g
- Trans Fat: 0.5 g
- Carbohydrates: 33 g
- Fiber: 1 g
- Protein: 7 g
- Cholesterol: 110 mg
Lucas Bennett
Founder & Recipe Developer
Expertise
Education
Blue Ridge Community College – Certificate in Culinary Arts
Focused on seasonal cooking, sustainable kitchen practices, and farm-to-table techniques.
Appalachian State University – B.A. in English
Built critical thinking and analysis through diverse texts. Guided by faculty, it prepares graduates for publishing and more.
Growing up in the rolling hills of North Carolina, Lucas learned early that some of life’s best memories start around a kitchen table. After studying English at Appalachian State University and honing his culinary skills at Blue Ridge Community College, he dreamed of blending storytelling with rustic, seasonal cooking, and The Scrumptious Pumpkin was born.
Lucas focuses on easy, single-serving recipes that turn fresh, local ingredients into something special. His style is simple, heartfelt, and rooted in the beauty of the seasons. When he’s not testing a new dish, you’ll probably find him hiking in the Blue Ridge Mountains, browsing farmers’ markets, or scribbling food stories in a notebook.