The Ultimate Red Velvet Cheesecake Bites Recipe: Heavenly Swirls
Crafting these delightful red velvet cheesecake bites will transport you to a world of pure indulgence.
Sweet magic happens when classic dessert flavors collide in one irresistible treat.
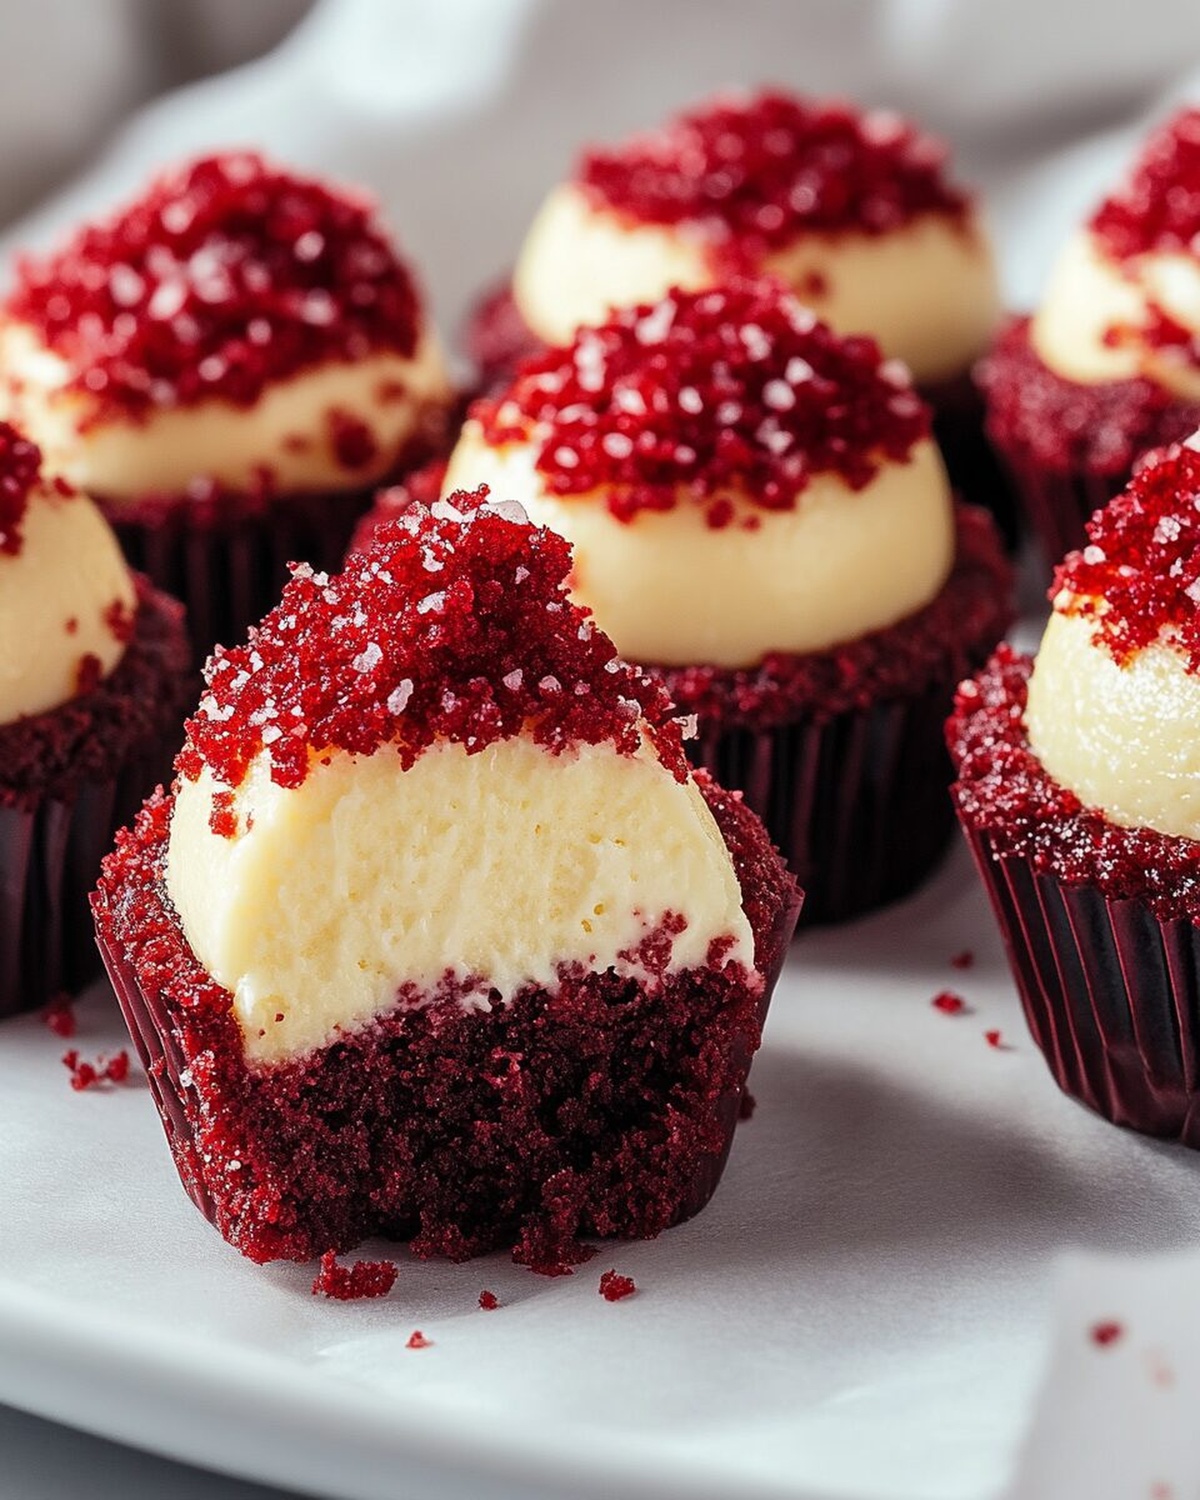
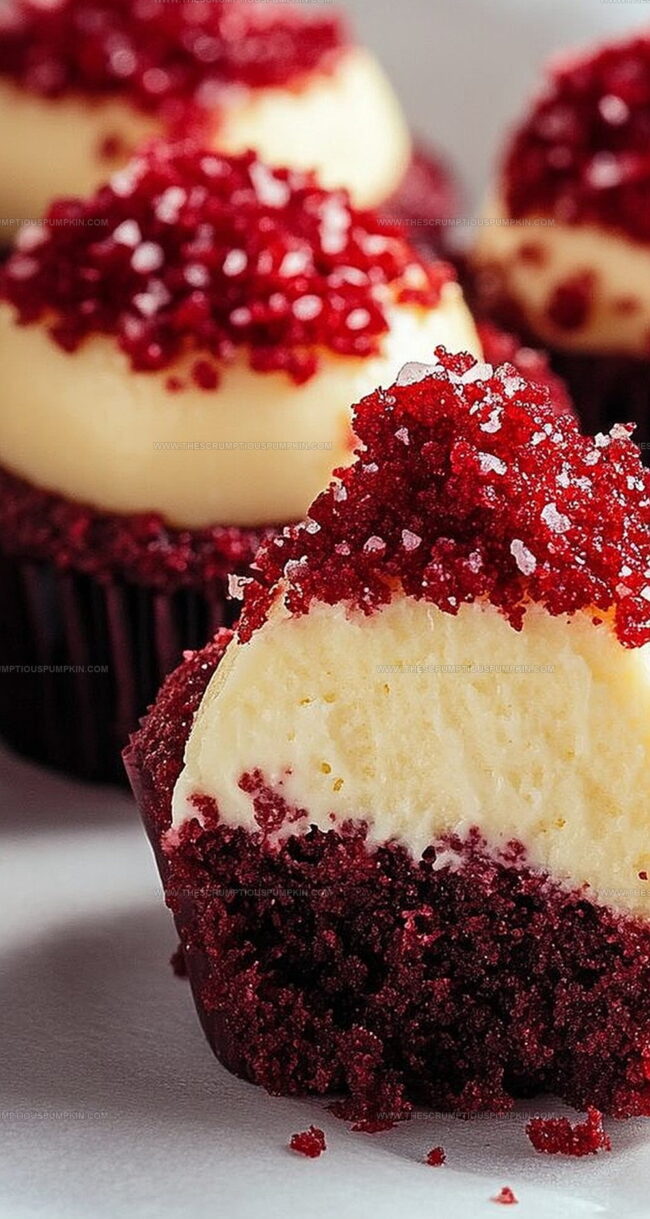
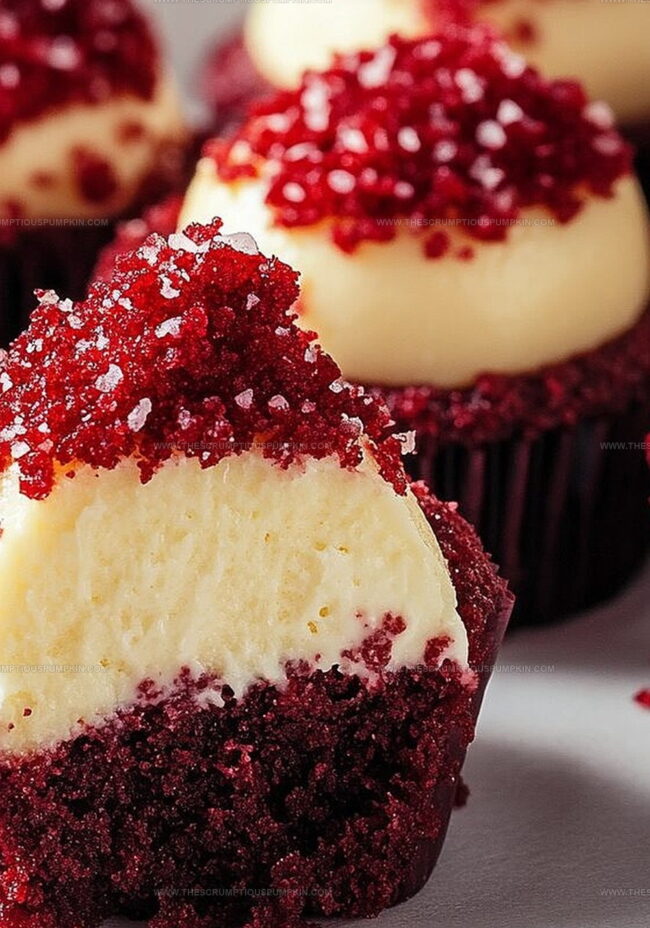
Velvety smooth textures mingle with rich, deep crimson hues that promise a sensational experience.
Rich cream cheese swirls dance through each delicate morsel, creating layers of intense flavor.
Chocolate undertones add depth and complexity to these miniature masterpieces.
Small yet powerful, these bites pack an incredible punch of decadence.
Come explore this simple yet spectacular dessert that will make you the star of any gathering.
Why Red Velvet Cheesecake Bites Steal the Dessert Table
What You’ll Need for These Swirly Red Velvet Treats
Base Ingredients:Coating Ingredients:Preparation Ingredients:How to Whip Up Red Velvet Bites With Ease
Step 1: Whip Up the Decadent Base
Grab a spacious mixing bowl and toss in crumbled red velvet cake, silky cream cheese, powdery confectioners’ sugar, and a splash of fragrant vanilla extract. Blend these ingredients together until they form a luxurious, smooth dough that’s irresistibly creamy.
Step 2: Shape Adorable Bite-Sized Treats
Using your hands, roll the mixture into cute little orbs roughly the size of a walnut. Gently place these delightful spheres onto a parchment-lined baking sheet.
Pop the tray into the refrigerator and let them chill for half an hour to become perfectly firm.
Step 3: Melt Creamy White Chocolate
Select a microwave-safe bowl and transform white chocolate into a luscious, glossy liquid.
Zap in short 20-second bursts, stirring between each interval until the chocolate becomes completely smooth and velvety.
Step 4: Coat with Heavenly White Chocolate
Remove the chilled balls from the refrigerator.
Carefully dunk each one into the molten white chocolate, ensuring a complete and elegant coating. Let excess chocolate drip off before placing them back on the parchment sheet.
Step 5: Add Playful Decorative Touches
While the chocolate coating remains wet, sprinkle red velvet crumbs or colorful sprinkles across the surface for a whimsical finish.
Step 6: Final Chilling and Setting
Return the chocolate-covered bites to the refrigerator.
Allow them to rest for a minimum of one hour until the chocolate transforms into a perfectly crisp shell.
Sweet Tricks for Cheesecake Bite Perfection
Red Velvet Cheesecake Styles You’ll Want to Try
Sweet Sips and Bites to Pair With These Cheesecake Bites
How to Store Red Velvet Bites Without Losing Flavor
Red Velvet Bites Questions—We’ve Got You Covered
Yes, you can use a store-bought red velvet cake to save time. Just ensure the cake is fresh and crumbled finely for the best texture.
Keep the cream cheese cold and use full-fat cream cheese. Add powdered sugar gradually and mix until the consistency is firm enough to form balls.
Use high-quality white chocolate and melt it slowly in short microwave intervals. Stir frequently and avoid overheating. If it starts to look grainy, add a teaspoon of vegetable oil to help smooth it out.
Print
Decadent Red Velvet Cheesecake Bites with Cream Cheese Swirl Recipe
- Total Time: 1 hour 30 minutes
- Yield: 12 1x
Description
Red velvet cheesecake bites combine rich, velvety chocolate with silky cream cheese in a perfect dessert fusion. Small squares of pure indulgence will delight guests and satisfy intense sweet cravings with minimal effort.
Ingredients
Main Ingredients:
- 1.5 cups crushed red velvet cake
- 1 cup cream cheese, softened
- 1 cup white chocolate
Binding and Sweetening Ingredients:
- 0.5 cup powdered sugar
Flavoring Ingredients:
- 1 teaspoon vanilla extract
Optional Decorative Ingredients:
- Red velvet crumbs or sprinkles
Instructions
- Crush the red velvet cake into fine crumbs, ensuring a consistent texture that will blend smoothly with cream cheese.
- Combine cake crumbs with cream cheese, powdered sugar, and vanilla extract in a mixing bowl, blending until the mixture forms a cohesive, pliable dough.
- Shape the mixture into uniform, petite spheres approximately one inch in diameter, placing them carefully on a parchment-lined baking tray.
- Refrigerate the formed balls for 30 minutes at 40°F to solidify their structure and enhance handling.
- Prepare white chocolate for coating by melting in a microwave-safe bowl, using 20-second intervals and stirring between each to prevent burning.
- Carefully immerse each chilled ball into the melted white chocolate, ensuring complete and even coverage while allowing excess chocolate to gently drip away.
- While chocolate remains liquid, sprinkle red velvet crumbs or decorative sprinkles across the surface for added visual appeal and texture.
- Return the chocolate-coated bites to the refrigerator for 1 hour at 40°F, allowing the chocolate to completely set and harden.
Notes
- Ensure cream cheese is at room temperature to achieve a smooth, lump-free mixture for easy blending.
- Use a small cookie scoop or melon baller for consistently sized and perfectly round cheesecake bites.
- Freeze the rolled balls for 15 minutes before dipping in chocolate to prevent crumbling and create a cleaner coating.
- Drizzle contrasting chocolate or add edible glitter for a more festive and elegant presentation that elevates the dessert’s visual appeal.
- Prep Time: 30 minutes
- Cook Time: 1 hour
- Category: Desserts, Snacks
- Method: Rolling
- Cuisine: American
Nutrition
- Serving Size: 12
- Calories: 230
- Sugar: 15g
- Sodium: 150mg
- Fat: 12g
- Saturated Fat: 7g
- Unsaturated Fat: 3g
- Trans Fat: 0g
- Carbohydrates: 29g
- Fiber: 1g
- Protein: 3g
- Cholesterol: 30mg
Mia Thompson
Pastry Chef & Content Creator
Expertise
Education
Portland Community College – Baking and Pastry Arts Program
Specialized in artisanal bread, seasonal desserts, and sustainable baking methods.
National University of Natural Medicine – Bachelor of Science in Nutrition (BScN)
Focused on “Food as Medicine” philosophy, with core threads in nutrition.
Mia’s love affair with baking began in her grandmother’s kitchen, where sneaking spoonfuls of batter first sparked her curiosity. She refined her skills through Portland Community College’s Baking and Pastry Arts Program and her expertise at the National University of Natural Medicine, earning a B.Sc. in Nutrition.
At The Scrumptious Pumpkin, Mia reimagines classics with effortless seasonal treats, healthier twists on old favorites, and playful confections that feel like pure joy. Beyond the oven, she nurtures her urban garden, forages local ingredients around Portland, and leads hands‑on nutrition workshops for her community.