Irresistible Dirt Cake Recipe: Garden-Inspired Sweet Treat
Creamy chocolate dirt cake brings nostalgia racing back to childhood birthday parties with its playful presentation.
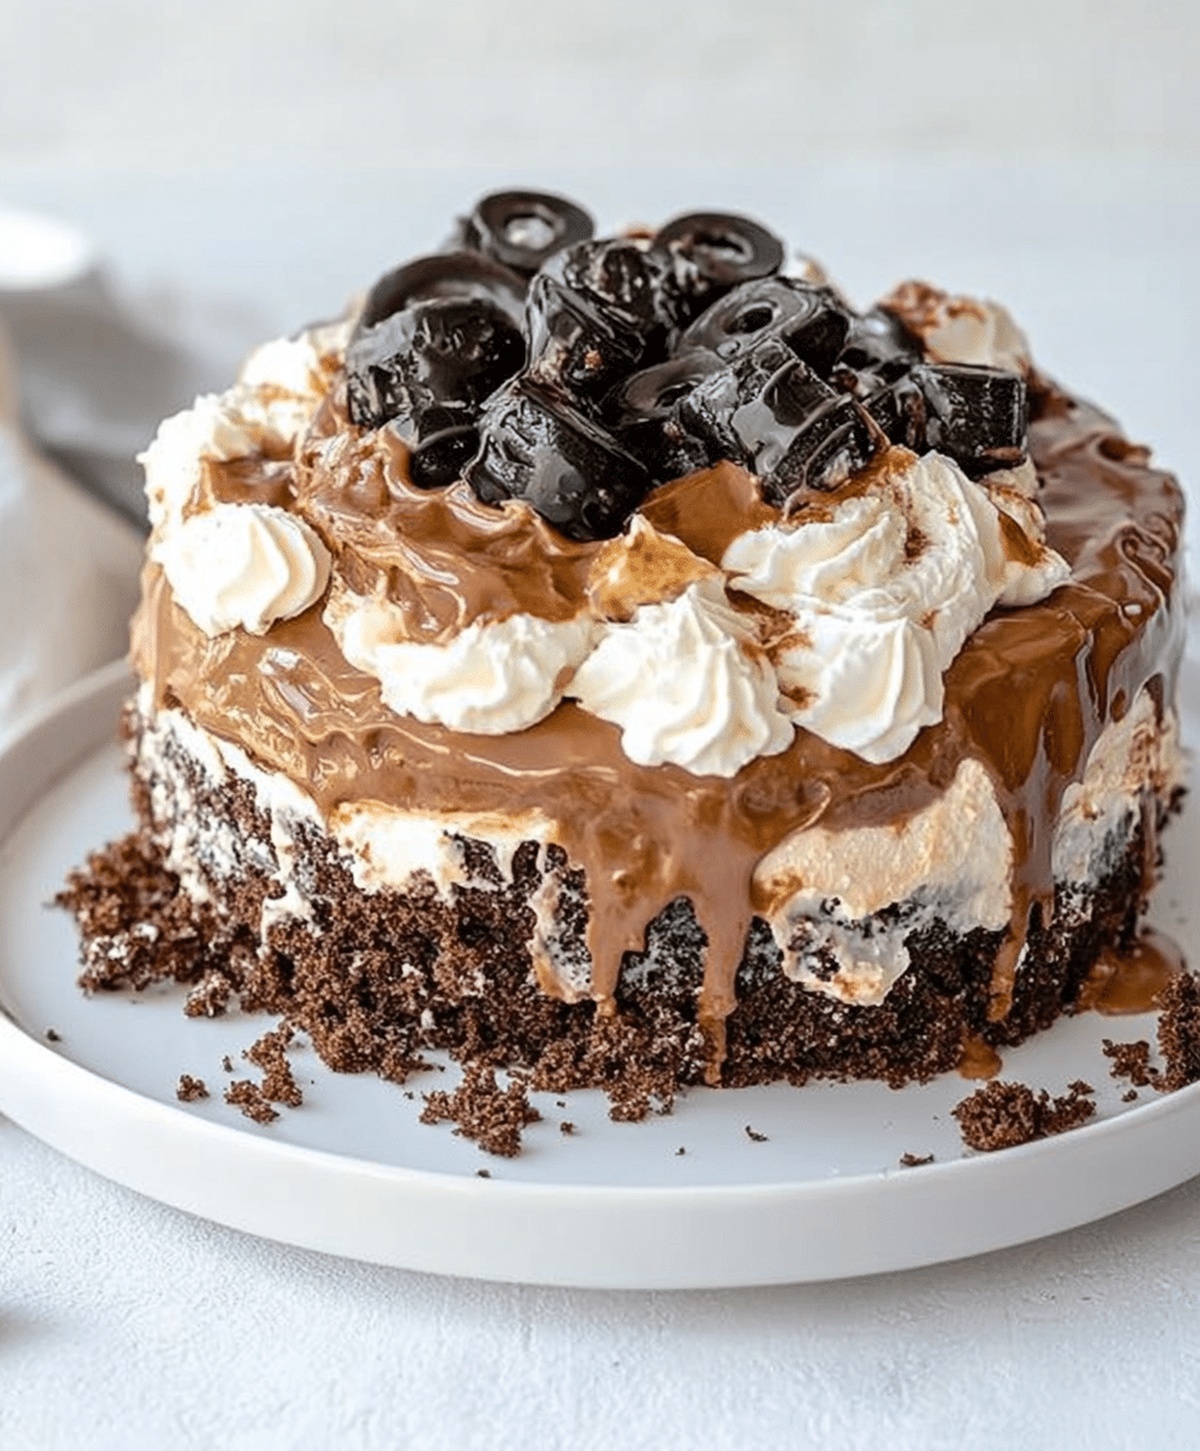
Layers of crushed cookies and pudding create a whimsical dessert that delights both kids and adults.
Chocolate crumbs mimic soil while gummy worms peek through, making each bite a delightful surprise.
Minimal ingredients and simple assembly mean you can whip this treat together quickly.
Cool and refreshing, this no-bake dessert requires zero cooking skills to master.
Chocolate lovers will adore the rich, decadent flavors that dance across their taste buds.
Dirt Cake Recipe Overview And Details
Ingredients For Dirt Cake
Base Ingredients:Creamy Ingredients:Decorative Ingredients:How To Prepare Dirt Cake
Step 1: Crush Cookies
Use a food processor or place Oreos in a sealed bag and crush with a rolling pin until they become fine crumbs.
Set aside some crumbs for the final topping.
Step 2: Prepare Pudding Mixture
Whisk milk and instant pudding mix in a mixing bowl until the mixture becomes thick and smooth.
Let it sit to set slightly.
Step 3: Blend Cream Cheese
In a separate bowl, use an electric mixer to beat cream cheese until it becomes creamy and free of lumps.
Gradually add powdered sugar and blend until fully incorporated.
Step 4: Create Fluffy Layer
Gently fold whipped topping into the cream cheese mixture, creating a light and airy texture.
Be careful not to deflate the mixture while mixing.
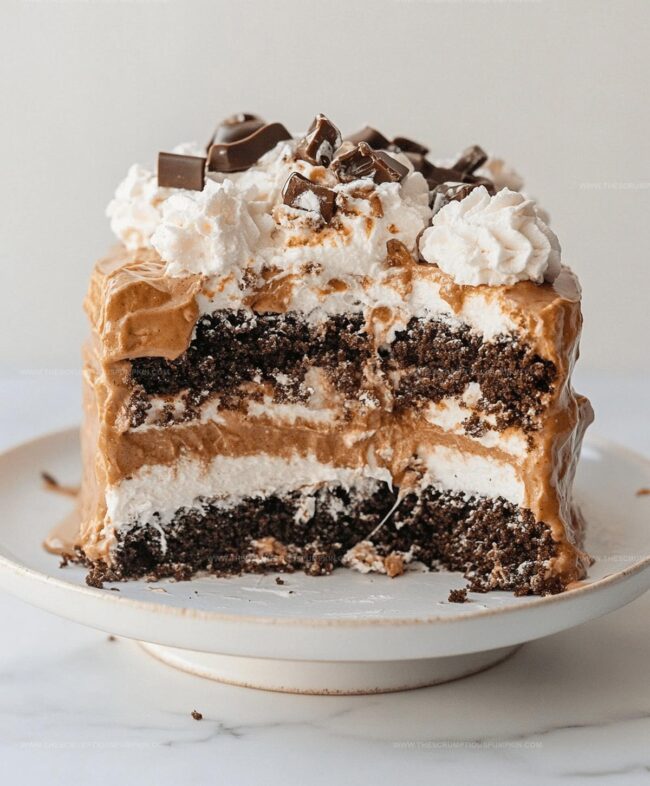
Step 5: Build Delicious Layers
In a clear serving dish, create alternating layers:Repeat the layering process 2-3 times for a visually appealing dessert.
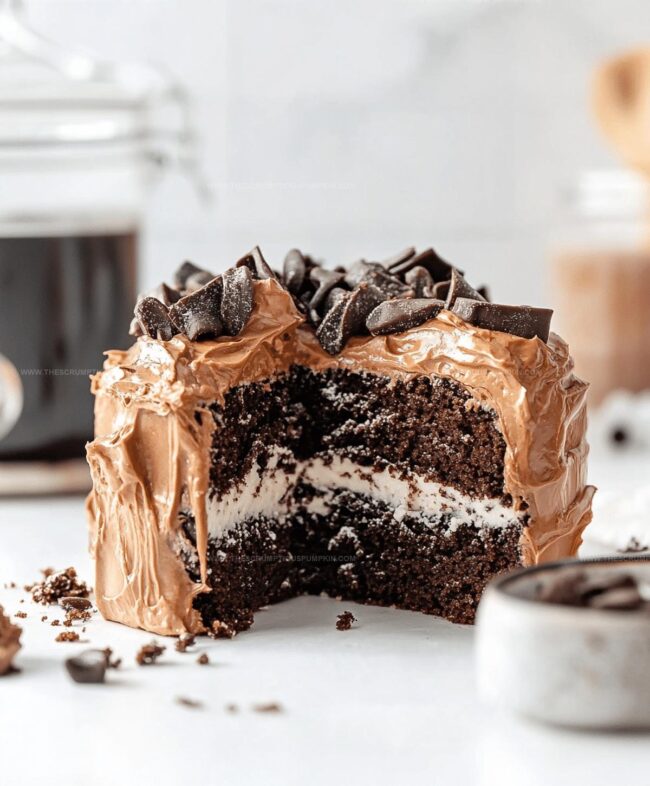
Step 6: Add Playful Decorations
Sprinkle the reserved Oreo crumbs on top of the final layer.
Scatter gummy worms across the surface for a fun, whimsical touch.
Step 7: Chill and Serve
Refrigerate the dessert for at least one hour to allow layers to set and flavors to meld.
Serve cold and enjoy the creamy, crunchy treat.
Pro Tips For Dirt Cake Success
Variations For Dirt Cake Recipe
Serving Suggestions For Dirt Cake
Dirt Cake Serving Suggestions:Storage Advice For Dirt Cake Recipe
FAQs
You can substitute Oreos with graham crackers or chocolate wafers for a similar texture and flavor profile.
Absolutely! Kids love the playful presentation with gummy worms and the creamy, sweet layers that make it fun to eat.
You can make dirt cake up to 2 days ahead of time, keeping it refrigerated until ready to serve, which actually helps the flavors meld together.
Yes, use gluten-free chocolate sandwich cookies and ensure your pudding mix is gluten-free to create a delicious alternative version.
Print
Dirt Cake Recipe
- Total Time: 1 hour 20 minutes
- Yield: 8 1x
Description
Childhood memories bloom with this nostalgic Dirt Cake dessert, blending creamy pudding and crushed cookies into a playful treat. Chocolate crumbles and whipped layers create a whimsical landscape you’ll savor with pure delight.
Ingredients
Cake Ingredients:
- 1 package (15.35 ounces / 435 grams) Oreo cookies, crushed
- 1 package (3.9 ounces / 110 grams) instant chocolate pudding mix
Dairy Ingredients:
- 2 cups (480 milliliters) cold milk
- 1 cup (240 milliliters) whipped topping
- 8 ounces (226 grams) cream cheese, softened
- 1 cup (120 grams) powdered sugar
Garnish:
- Gummy worms, for topping
Instructions
- Pulverize Oreo cookies into a fine powder, reserving a portion for the final garnish.
- Whisk milk and pudding mix in a mixing vessel until the mixture reaches a thick, creamy consistency.
- Prepare the cream cheese base by beating until silky smooth, then incorporate powdered sugar until fully integrated.
- Gently incorporate whipped topping into the cream cheese blend, creating a light and airy texture.
- Construct the dessert in a clear glass container, alternating layers: first a foundation of cookie crumbs, then a spread of cream cheese mixture, followed by a layer of prepared pudding.
- Repeat the layering process until the container is filled, ensuring each stratum is evenly distributed.
- Crown the dessert with the remaining Oreo crumb powder, creating a textured surface.
- Playfully arrange gummy worms across the top to mimic a soil-like appearance.
- Refrigerate the dessert for a minimum of 60 minutes to allow flavors to meld and texture to set.
- Serve chilled, revealing the whimsical, multi-layered treat that resembles an edible garden landscape.
Notes
- Customize the texture by adjusting the fineness of Oreo crumbs for a more rustic or smoother mouthfeel.
- Use dairy-free alternatives like coconut whipped cream and vegan cream cheese to make this dessert suitable for plant-based diets.
- Create individual servings in clear glasses to showcase beautiful layers and make portion control easier.
- Elevate presentation by using decorative chocolate cookie crumbs or chocolate shavings instead of standard Oreo crumbs for a more gourmet touch.
- Prep Time: 20 minutes
- Cook Time: 1 hour
- Category: Desserts, Snacks
- Method: Chilling
- Cuisine: American
Nutrition
- Serving Size: 8
- Calories: 357 kcal
- Sugar: 37 g
- Sodium: 180 mg
- Fat: 18 g
- Saturated Fat: 10 g
- Unsaturated Fat: 6 g
- Trans Fat: 0.5 g
- Carbohydrates: 46 g
- Fiber: 1.5 g
- Protein: 4 g
- Cholesterol: 30 mg
Lucas Bennett
Founder & Recipe Developer
Expertise
Education
Blue Ridge Community College – Certificate in Culinary Arts
Focused on seasonal cooking, sustainable kitchen practices, and farm-to-table techniques.
Appalachian State University – B.A. in English
Built critical thinking and analysis through diverse texts. Guided by faculty, it prepares graduates for publishing and more.
Growing up in the rolling hills of North Carolina, Lucas learned early that some of life’s best memories start around a kitchen table. After studying English at Appalachian State University and honing his culinary skills at Blue Ridge Community College, he dreamed of blending storytelling with rustic, seasonal cooking, and The Scrumptious Pumpkin was born.
Lucas focuses on easy, single-serving recipes that turn fresh, local ingredients into something special. His style is simple, heartfelt, and rooted in the beauty of the seasons. When he’s not testing a new dish, you’ll probably find him hiking in the Blue Ridge Mountains, browsing farmers’ markets, or scribbling food stories in a notebook.