Heavenly Homemade Cream Puffs Recipe: Light & Fluffy Treats
Whipping up delightful cream puffs at home sounds like a magical culinary adventure waiting to happen.
Pastry chefs might make these look complicated, but anyone can master this delicate dessert with some patience.
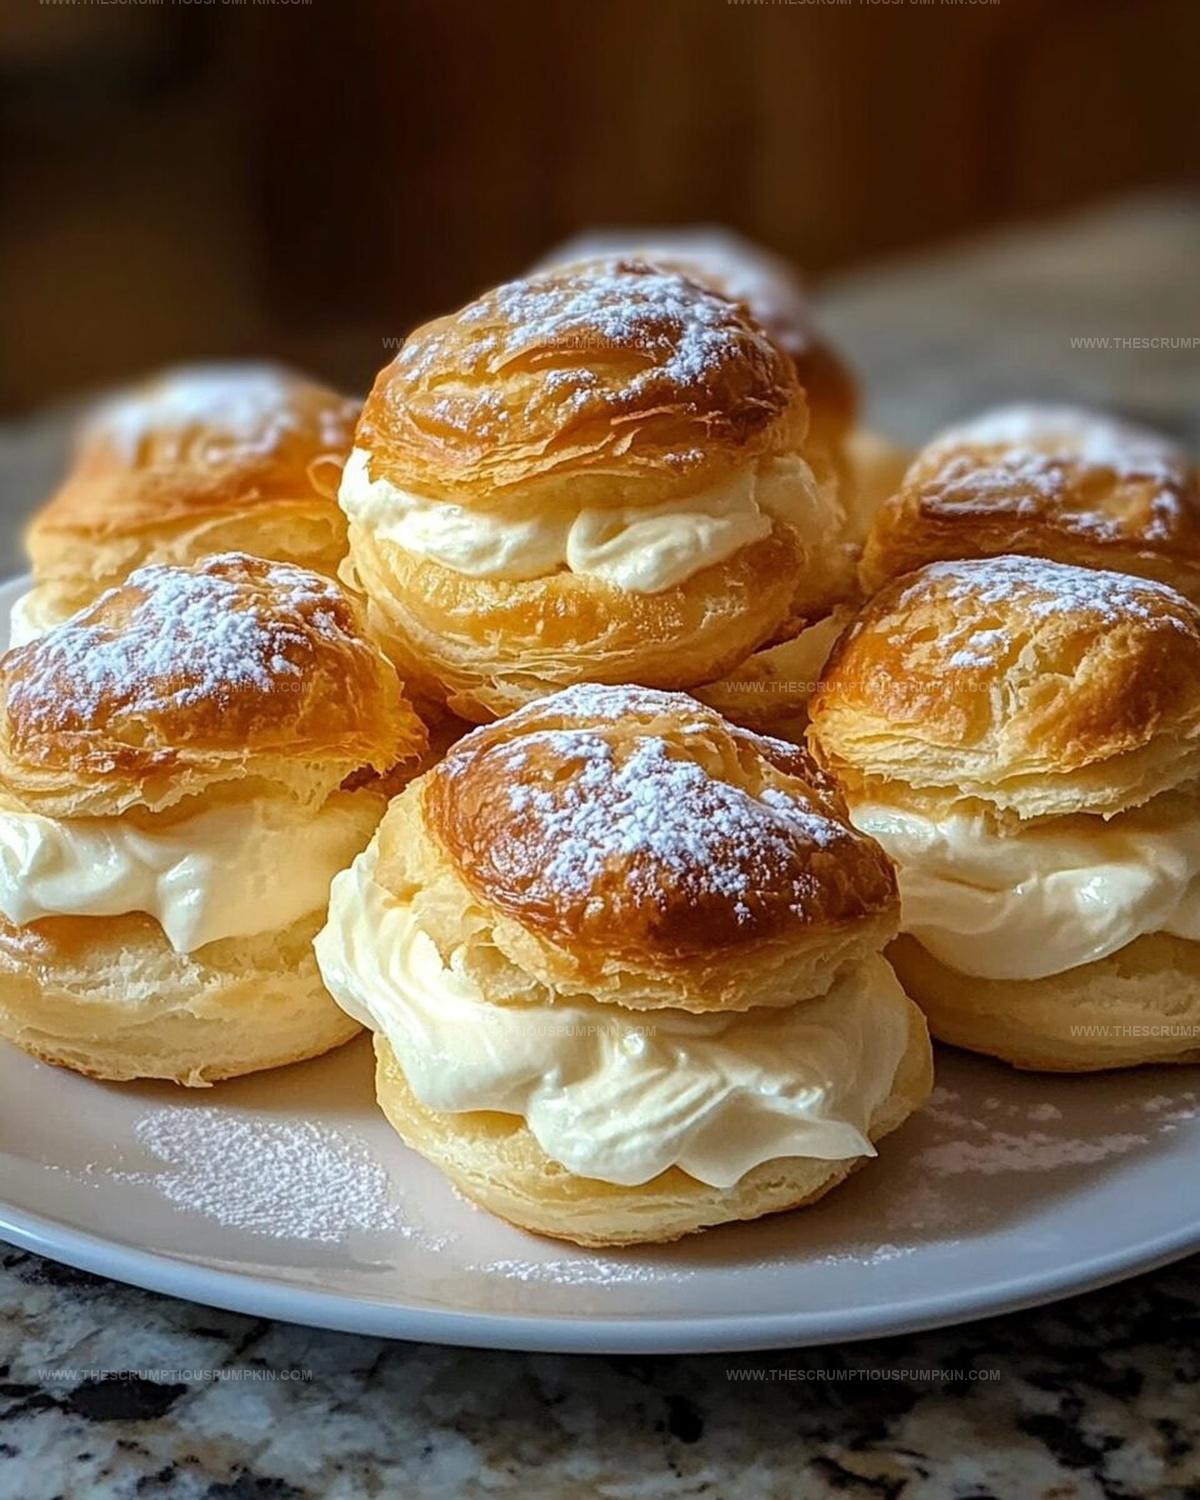
Crisp and airy shells filled with luscious cream create a sweet symphony that melts in your mouth.
French patisserie techniques become surprisingly simple when you break down each step carefully.
Delicate puff pastry requires just a few basic ingredients and some careful technique to transform into something extraordinary.
Light, elegant, and impressively delicious, these cream puffs will make you feel like a professional baker in your own kitchen.
Follow this straightforward recipe, and you will impress everyone with your newfound pastry skills.
What Makes Easy Homemade Cream Puffs So Addictive
Ingredients to Craft Easy Homemade Cream Puffs
Base Ingredients:Dairy and Cream Filling:Optional Finishing Touches:Easy Steps to Master Cream Puffs at Home
Step 1: Prepare Baking Surface
Line a baking sheet with parchment paper or silicone mat. Set your oven to preheat at 425°F.
Step 2: Create Pastry Base
In a medium saucepan, combine:Heat the mixture until butter melts and starts boiling. Reduce heat to low.
Step 3: Mix Dough Ingredients
Add flour to the butter mixture. Stir vigorously until the mixture forms a smooth ball that separates from the pan’s sides.
Remove from heat and let cool for 5 minutes.
Step 4: Incorporate Eggs
Add eggs one at a time, mixing thoroughly after each addition.
Continue until the dough looks smooth and glossy.
Step 5: Shape Cream Puff Shells
Transfer dough to a piping bag with a large round tip.
Pipe small, even mounds onto the prepared baking sheet.
Step 6: Bake Cream Puff Shells
Bake at 425°F for 15 minutes.
Then reduce temperature to 375°F and continue baking for 15-20 minutes until shells turn golden brown and puffy. Allow to cool completely.
Step 7: Prepare Creamy Filling
Whip together:Whip until stiff peaks form.
Step 8: Assemble Cream Puffs
Slice cooled puffs horizontally.
Fill with whipped cream. Replace the tops.
Optional: Dust with powdered sugar or drizzle with chocolate ganache.
Cream Puff Know-How for a Flawless Finish
Flavor Swaps for Easy Homemade Cream Puffs
What to Serve with Easy Homemade Cream Puffs
Storing Easy Homemade Cream Puffs the Right Way
Your Cream Puff Questions, Answered
The key is not opening the oven during baking. Temperature stability and proper mixing of eggs ensure your puffs rise and stay puffy.
Yes, you can prepare the choux pastry dough and refrigerate it for a few hours before piping and baking. Just bring it to room temperature before using.
Stir the flour vigorously and quickly when adding it to the water-butter mixture. Mix eggs one at a time until fully incorporated for a glossy, smooth dough.
The dough should form a smooth ball that pulls away from the pan’s sides and look glossy after adding eggs.
Print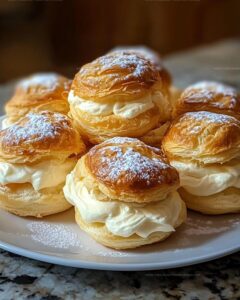
Easy Homemade Cream Puffs Recipe
- Total Time: 50-55 minutes
- Yield: 8 1x
Description
Delightful French cream puffs elevate your dessert game with elegant choux pastry filled with silky vanilla cream. Crisp exterior and luxurious interior promise a heavenly experience you’ll savor with pure culinary joy.
Ingredients
Main Ingredients:
- 1/2 cup (120 ml) water
- 1/4 cup (57 grams) unsalted butter
- 1/2 cup (60 grams) all-purpose flour
- 2 large eggs
- 1 cup (240 ml) heavy cream
Sweeteners and Flavor Enhancers:
- 2 tablespoons (15 grams) powdered sugar
- 1/2 teaspoon vanilla extract
Garnishes:
- Chocolate ganache
- Powdered sugar
Instructions
- Prepare the oven at 425°F and arrange a parchment-lined baking sheet.
- Combine water and butter in a saucepan, heating until the mixture reaches a rolling boil.
- Lower the heat, swiftly incorporate flour, stirring continuously until the mixture transforms into a cohesive, smooth dough ball that separates from the pan’s sides. Allow to rest for 5 minutes.
- Integrate eggs one at a time, thoroughly mixing after each addition to create a glossy, uniform pastry base.
- Load the dough into a piping bag fitted with a large round tip, carefully creating uniform circular mounds on the prepared baking sheet.
- Initiate baking at 425°F for 15 minutes, then reduce temperature to 375°F and continue baking for 15-20 minutes until achieving a rich golden color and pronounced puffiness. Allow complete cooling.
- Whip heavy cream with powdered sugar and vanilla extract until forming sturdy, defined peaks.
- Delicately slice cooled puffs horizontally, generously fill with whipped cream, and reassemble. Optionally embellish with a light powdered sugar dusting or elegant chocolate ganache drizzle.
Notes
- Ensure precise butter and water measurements for perfect choux pastry consistency.
- Mix dough vigorously to develop gluten and create a smooth, elastic texture.
- Use room temperature eggs to prevent dough separation and achieve smooth incorporation.
- Pipe uniform mounds for consistent cream puff size and even baking.
- Allow complete cooling before filling to prevent cream from melting.
- Experiment with different fillings like pastry cream, chocolate mousse, or savory options.
- Store cream puffs in an airtight container to maintain crispness for up to 2 days.
- Gluten-free alternative: Replace wheat flour with almond or gluten-free flour blend.
- Prep Time: 20 minutes
- Cook Time: 30-35 minutes
- Category: Desserts, Snacks
- Method: Baking
- Cuisine: French
Nutrition
- Serving Size: 8
- Calories: 228
- Sugar: 2 g
- Sodium: 77 mg
- Fat: 17 g
- Saturated Fat: 10 g
- Unsaturated Fat: 7 g
- Trans Fat: 0 g
- Carbohydrates: 18 g
- Fiber: 0 g
- Protein: 3 g
- Cholesterol: 68 mg
Mia Thompson
Pastry Chef & Content Creator
Expertise
Education
Portland Community College – Baking and Pastry Arts Program
Specialized in artisanal bread, seasonal desserts, and sustainable baking methods.
National University of Natural Medicine – Bachelor of Science in Nutrition (BScN)
Focused on “Food as Medicine” philosophy, with core threads in nutrition.
Mia’s love affair with baking began in her grandmother’s kitchen, where sneaking spoonfuls of batter first sparked her curiosity. She refined her skills through Portland Community College’s Baking and Pastry Arts Program and her expertise at the National University of Natural Medicine, earning a B.Sc. in Nutrition.
At The Scrumptious Pumpkin, Mia reimagines classics with effortless seasonal treats, healthier twists on old favorites, and playful confections that feel like pure joy. Beyond the oven, she nurtures her urban garden, forages local ingredients around Portland, and leads hands‑on nutrition workshops for her community.