
Fluffy Frosted Sugar Cookie Bars Recipe: A Sweet Treat Marvel
Sugar cookie bars with a delightful frosted twist have become my absolute go-to dessert for casual gatherings.
Soft, buttery textures melt perfectly in each delectable bite.
Homemade treats always spark more joy than store-bought alternatives.
These bars deliver sweet comfort without complicated preparation steps.
Quick mixing and minimal cleanup make this recipe a total winner for busy home bakers.
Simple ingredients from your pantry create magic in less than an hour.
Buckle up for a delicious adventure that will have everyone asking for seconds!
Why Frosted Sugar Cookie Bars Are a Hit
Frosted Sugar Cookie Bars Ingredients
Cookie Base Ingredients:Liquid Ingredients:Frosting Ingredients:Decorative Ingredients:How to Make Frosted Sugar Cookie Bars
Step 1: Warm Up the Oven
Get your oven ready by setting it to the perfect temperature.
Line a baking pan with parchment paper, making sure it covers the bottom and sides completely for easy removal later.
Step 2: Create a Creamy Base
In a large mixing bowl, whip together butter and sugar until they transform into a light, fluffy cloud-like mixture.
Gently fold in eggs, vanilla extract, and milk, blending until smooth and well combined.
Step 3: Mix Dry Ingredients
Combine the following dry ingredients:Slowly incorporate these into the wet mixture, stirring carefully to create a consistent dough that’s not too thick or too thin.
Step 4: Prepare the Baking Pan
Carefully press the dough evenly into the prepared pan, using your fingers or a spatula to create a smooth, uniform layer that will bake into delicious bars.
Step 5: Bake to Perfection
Place the pan in the preheated oven and bake until the edges turn golden and the center looks set.
The bars should have a slight bounce when touched.
Step 6: Cool Down
Remove the pan from the oven and let the cookie bars cool completely.
This is crucial for creating the perfect texture and making frosting easier.
Step 7: Whip Up the Frosting
In a clean bowl, blend together:Mix until the frosting becomes smooth and spreadable.
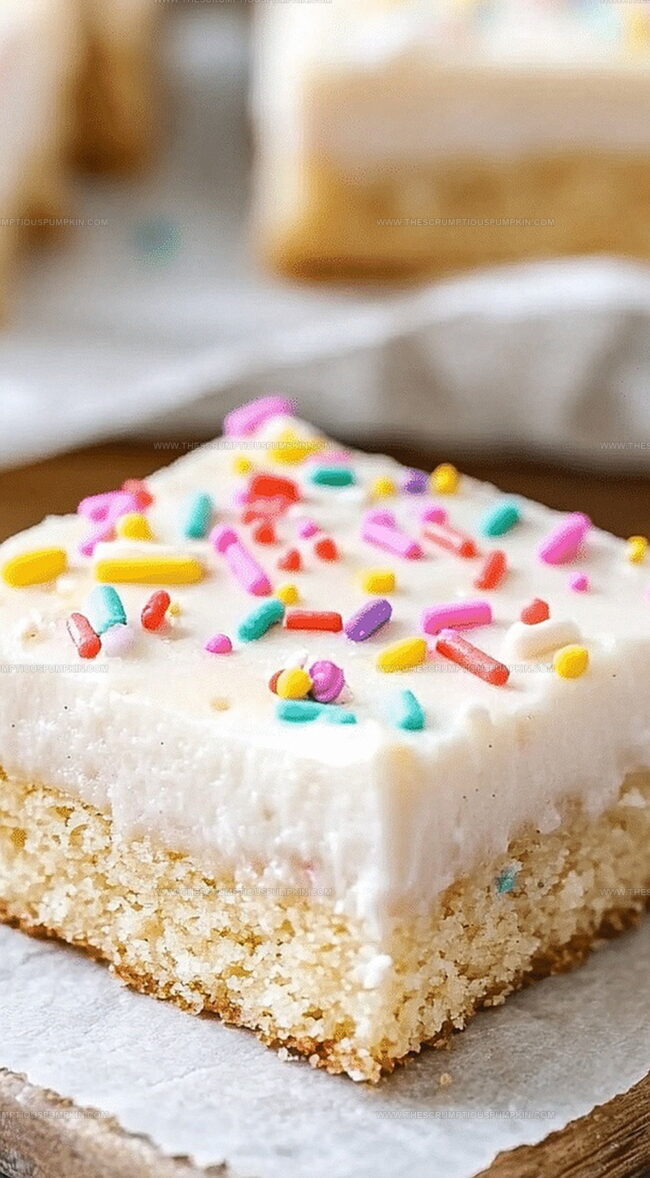
Step 8: Decorate and Finish
Spread the frosting generously over the cooled cookie bars.
Add a splash of color with food coloring or sprinkle with colorful decorations for extra fun.
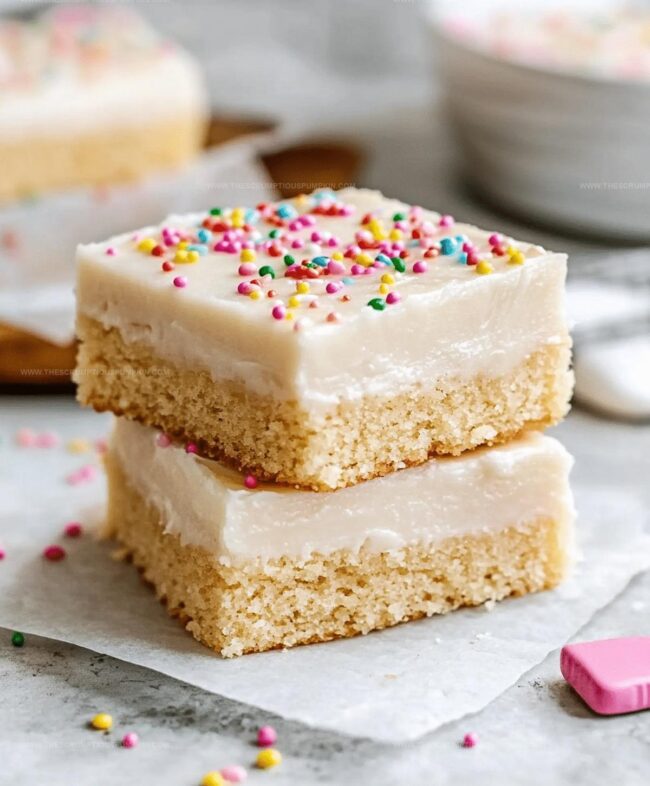
Step 9: Slice and Serve
Cut the frosted bars into squares or rectangles.
Serve and watch everyone’s faces light up with delicious excitement!
Tips for Frosted Sugar Cookie Bars

Variations of Frosted Sugar Cookie Bars
Serving Frosted Sugar Cookie Bars
Storing Frosted Sugar Cookie Bars
FAQs
Yes, but reduce or omit any additional salt in the recipe to prevent the bars from becoming too salty.
The edges will be lightly golden, and the center will look set but still slightly soft. A toothpick inserted should come out with a few moist crumbs.
Substitute the all-purpose flour with a gluten-free flour blend designed for baking. Make sure to use a blend that includes xanthan gum for better texture.
Chill the frosted bars in the refrigerator for 30 minutes before cutting. Use a sharp knife and wipe it clean between cuts for smooth edges.
Print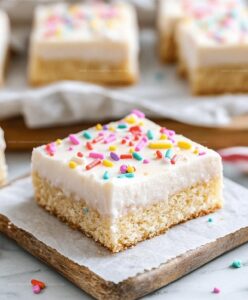
Frosted Sugar Cookie Bars Recipe
- Total Time: 40 minutes
- Yield: 16 1x
Description
Indulgent frosted sugar cookie bars bring classic bakery charm straight to home kitchens with irresistible sweetness. Sweet layers of buttery cookie base topped with creamy frosting promise delightful moments of pure comfort and nostalgic joy you can savor bite by bite.
Ingredients
Main Ingredients:
- 2 1/4 cups (281 grams) all-purpose flour
- 1/2 teaspoon baking powder
- 1/4 teaspoon salt
- 1 cup (227 grams) unsalted butter
- 1 1/2 cups (300 grams) granulated sugar
- 2 large eggs
Flavor and Liquid Ingredients:
- 1 teaspoon vanilla extract
- 2 tablespoons milk
Frosting Ingredients:
- 2 cups (240 grams) powdered sugar
- Food coloring (optional)
Instructions
- Prepare a 9×13-inch baking pan by lining with parchment paper and heating the oven to 350°F.
- Whip softened butter and granulated sugar in a mixer until pale and airy, incorporating eggs, vanilla extract, and milk until smooth.
- Sift together flour, baking powder, and salt, then gradually fold into the wet mixture until a consistent dough forms.
- Transfer the soft dough into the prepared pan, gently pressing and spreading evenly with a spatula to create a uniform layer.
- Bake for 18-22 minutes, watching for edges to turn golden and center to appear set but not overly browned.
- Remove from oven and allow to cool completely on a wire rack for approximately 45-60 minutes.
- Create the frosting by blending room temperature butter with powdered sugar and vanilla, beating until silky and spreadable.
- Once bars are fully cooled, generously spread the frosting across the surface using an offset spatula.
- Enhance presentation by adding colorful sprinkles or food-safe decorations if desired.
- Slice into rectangular bars and serve at room temperature, storing any leftovers in an airtight container.
Notes
- Swap butter with coconut oil for a dairy-free version that maintains rich flavor and tender texture.
- Use gluten-free flour blend to make these bars accessible for those with wheat sensitivities.
- Experiment with almond or oat milk as alternative liquid ingredients to enhance subtle nutty undertones.
- Chill the dough for 30 minutes before baking to prevent excessive spreading and ensure thick, uniform bars.
- Prep Time: 20 minutes
- Cook Time: 20 minutes
- Category: Desserts, Snacks
- Method: Baking
- Cuisine: American
Nutrition
- Serving Size: 16
- Calories: 180 kcal
- Sugar: 12 g
- Sodium: 90 mg
- Fat: 8 g
- Saturated Fat: 5 g
- Unsaturated Fat: 3 g
- Trans Fat: 0.1 g
- Carbohydrates: 25 g
- Fiber: 0.5 g
- Protein: 2 g
- Cholesterol: 30 mg
Lucas Bennett
Founder & Recipe Developer
Expertise
Education
Blue Ridge Community College – Certificate in Culinary Arts
Focused on seasonal cooking, sustainable kitchen practices, and farm-to-table techniques.
Appalachian State University – B.A. in English
Built critical thinking and analysis through diverse texts. Guided by faculty, it prepares graduates for publishing and more.
Growing up in the rolling hills of North Carolina, Lucas learned early that some of life’s best memories start around a kitchen table. After studying English at Appalachian State University and honing his culinary skills at Blue Ridge Community College, he dreamed of blending storytelling with rustic, seasonal cooking, and The Scrumptious Pumpkin was born.
Lucas focuses on easy, single-serving recipes that turn fresh, local ingredients into something special. His style is simple, heartfelt, and rooted in the beauty of the seasons. When he’s not testing a new dish, you’ll probably find him hiking in the Blue Ridge Mountains, browsing farmers’ markets, or scribbling food stories in a notebook.