
Spooky Halloween Monster Cookies Recipe – Fun & Sweet Treats
Creepy crawly halloween monster cookies bring spine-tingling delight to your seasonal baking adventure.
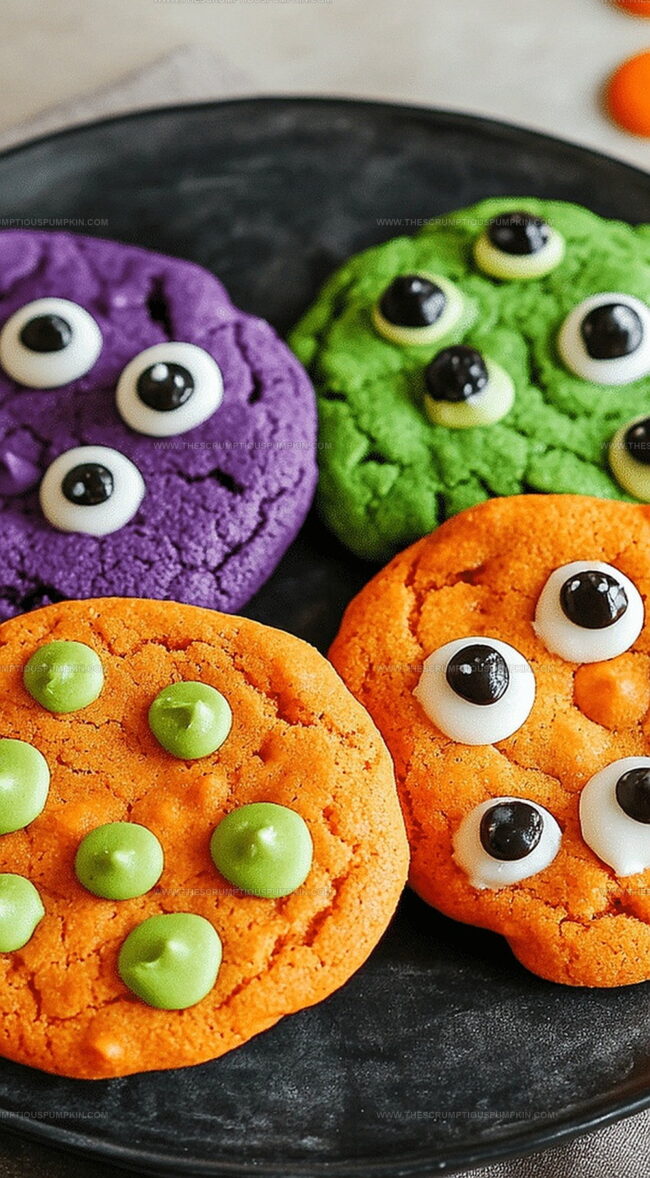
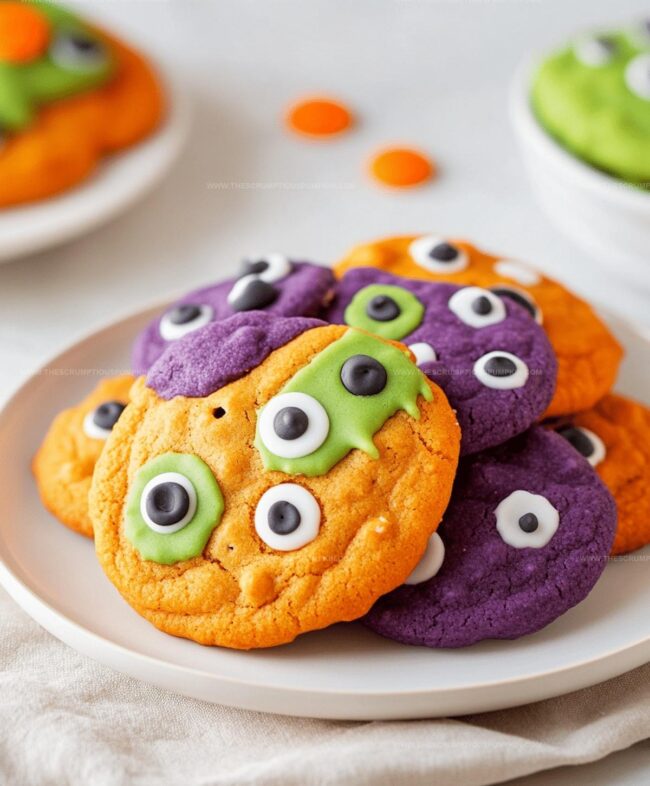
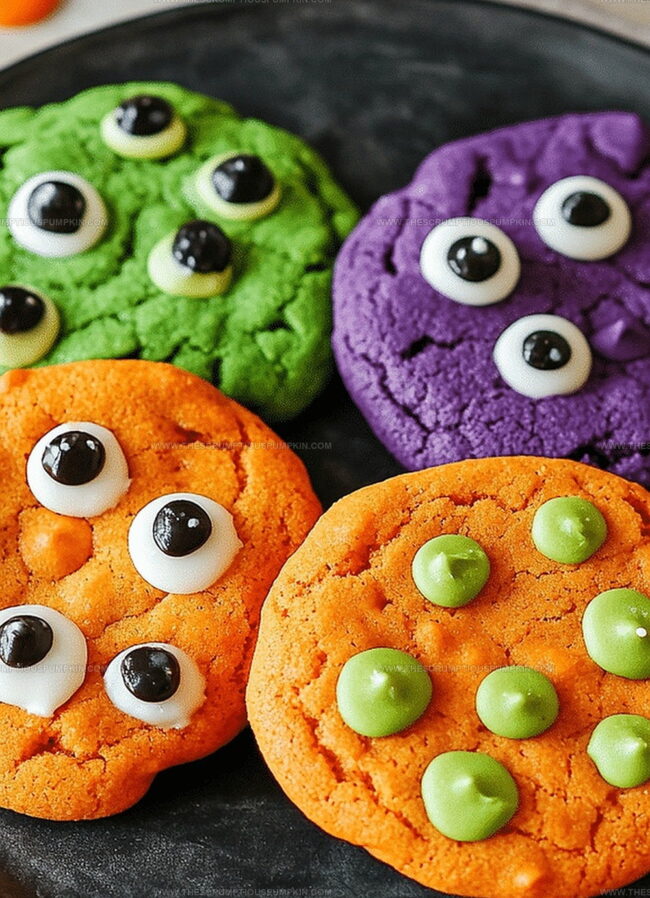
Monsters emerge from sugary landscapes with colorful personalities and wild chocolate chip eyes.
Candy corn teeth and marshmallow fangs create playful personalities on each delectable treat.
Wild colors splash across soft cookie surfaces, promising unexpected flavor combinations.
Kitchen creativity reaches new heights when whimsical decorations transform simple cookies into fantastical creatures.
Scary-cute designs make these treats perfect for Halloween parties and spooky gatherings.
You’ll love unleashing your inner cookie monster with these wickedly fun sweets.
Why Halloween Monster Cookies Are Festive
Halloween Monster Cookies Ingredients
Base Ingredients:Wet Ingredients:Decorative and Mix-In Ingredients:How to Make Halloween Monster Cookies
Step 1: Prepare Baking Workspace
Grab your baking sheets and line them with parchment paper.
Set your oven to roast at 350°F (175°C) so it’s nice and toasty for your monster treats.
Step 2: Mix Dry Ingredients
Whisk together your flour and baking soda in a medium bowl until they’re perfectly blended and free of any lumpy troublemakers.
Step 3: Cream Sugary Goodness
In a separate large bowl, beat butter with granulated and brown sugars until the mixture becomes light, fluffy, and looks like a delicious cloud of sweetness.
Step 4: Add Egg Magic
Crack eggs into the sugar mixture one at a time, beating thoroughly after each addition.
Pour in vanilla extract and mix until everything looks smooth and dreamy.
Step 5: Combine Cookie Base
Slowly incorporate the dry ingredient mixture into the wet ingredients.
Gently fold in your spooky mix-ins:Step 6: Shape Monstrous Cookies
Scoop out cookie dough onto prepared baking sheets.
Use your hand to slightly flatten each dough ball, creating the perfect monster cookie shape.
Step 7: Bake to Perfection
Pop the cookies into the preheated oven and bake for 10-12 minutes.
Look for golden brown edges that signal your monsters are ready to emerge.
Step 8: Add Spooky Eyes
Immediately after removing from the oven, press candy eyes into the warm cookies.
Work quickly while they’re still soft and pliable.
Step 9: Decorate with Halloween Flair
Sprinkle additional Halloween-themed decorations over the cookies while they’re cooling.
Pro Tips for Halloween Monster Cookies
Variations of Halloween Monster Cookies
Serving Halloween Monster Cookies
Storing Halloween Monster Cookies
FAQs
Press candy eyes onto warm cookies right after baking. Use different colored sprinkles or small candies to create funny monster faces and decorations.
Absolutely! Kids can help mix ingredients, scoop dough, and especially decorate the cookies with candy eyes and sprinkles. It’s a fun Halloween baking activity.
M&Ms, candy corn, candy eyes, colored sprinkles, and small Halloween-themed candies work great. Choose bright and fun colors that look playful and spooky.
Warm cookies are slightly soft, allowing candy eyes to stick easily without falling off. The residual heat helps the decorations set into the cookie surface.
Print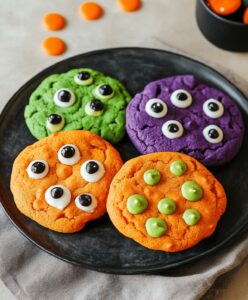
Halloween Monster Cookies Recipe
- Total Time: 32 minutes
- Yield: 24 1x
Description
Spooky monster cookies bring frightful fun to Halloween celebrations, blending playful creativity with delicious chocolate and colorful candy eyes. Sweet treats become ghoulish delights that will thrill guests and make party memories unforgettable.
Ingredients
Main Ingredients:
- 2 1/4 cups (270 grams) all-purpose flour
- 1/2 teaspoon baking soda
- 1 cup (226 grams) unsalted butter, softened
- 1/2 cup (100 grams) granulated sugar
- 1 cup (220 grams) brown sugar, packed
- 2 large eggs
Flavoring and Add-ins:
- 2 teaspoons vanilla extract
- 1 1/2 cups (255 grams) chocolate chips or M&Ms
Decorations:
- Candy eyes
- Assorted sprinkles or candy decorations
Instructions
- Warm the oven to 350F and prepare baking sheets with parchment paper for monster cookie creation.
- Combine flour and baking soda in a mixing vessel, ensuring even distribution of dry ingredients.
- Using an electric mixer, blend butter with granulated and brown sugars until the mixture becomes airy and pale.
- Incorporate eggs individually, thoroughly mixing after each addition, then blend in vanilla extract for enhanced flavor.
- Slowly integrate the flour mixture into the wet ingredients, stirring until just combined. Gently fold chocolate chips or M&Ms throughout the dough.
- Portion cookie dough onto prepared baking sheets, using gentle hand pressure to slightly flatten each rounded mound.
- Slide the baking sheets into the preheated oven, allowing cookies to transform for 10-12 minutes until golden edges emerge.
- Immediately after removing from oven, while cookies remain warm and malleable, strategically position candy eyes onto each cookie surface.
- Embellish the freshly baked monsters with festive sprinkles or additional candies while they cool, creating playful Halloween-themed treats.
Notes
- Swap regular chocolate chips with Halloween-themed colored candy melts for extra festive vibes.
- Use gluten-free flour blend to make these cookies suitable for those with wheat sensitivities.
- Chill dough for 30 minutes before baking to prevent excessive spreading and create thicker cookies.
- Press candy eyes gently to ensure they stick without sinking too deep into the warm cookie surface.
- Prep Time: 20 minutes
- Cook Time: 12 minutes
- Category: Snacks, Desserts
- Method: Baking
- Cuisine: American
Nutrition
- Serving Size: 24
- Calories: 176
- Sugar: 14 g
- Sodium: 85 mg
- Fat: 8 g
- Saturated Fat: 5 g
- Unsaturated Fat: 3 g
- Trans Fat: 0 g
- Carbohydrates: 24 g
- Fiber: 1 g
- Protein: 2 g
- Cholesterol: 30 mg
Lucas Bennett
Founder & Recipe Developer
Expertise
Education
Blue Ridge Community College – Certificate in Culinary Arts
Focused on seasonal cooking, sustainable kitchen practices, and farm-to-table techniques.
Appalachian State University – B.A. in English
Built critical thinking and analysis through diverse texts. Guided by faculty, it prepares graduates for publishing and more.
Growing up in the rolling hills of North Carolina, Lucas learned early that some of life’s best memories start around a kitchen table. After studying English at Appalachian State University and honing his culinary skills at Blue Ridge Community College, he dreamed of blending storytelling with rustic, seasonal cooking, and The Scrumptious Pumpkin was born.
Lucas focuses on easy, single-serving recipes that turn fresh, local ingredients into something special. His style is simple, heartfelt, and rooted in the beauty of the seasons. When he’s not testing a new dish, you’ll probably find him hiking in the Blue Ridge Mountains, browsing farmers’ markets, or scribbling food stories in a notebook.