
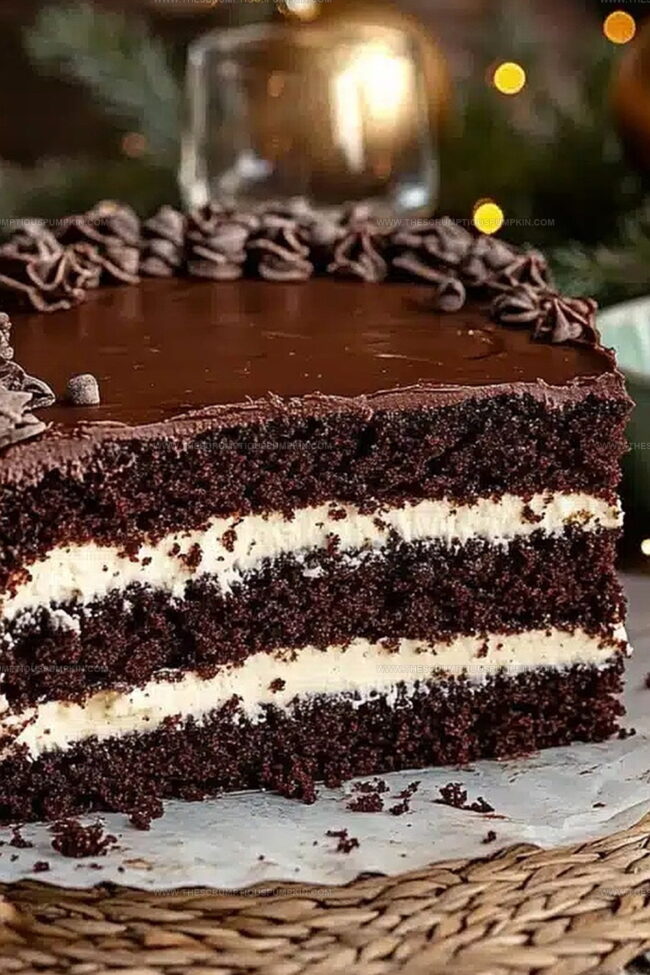
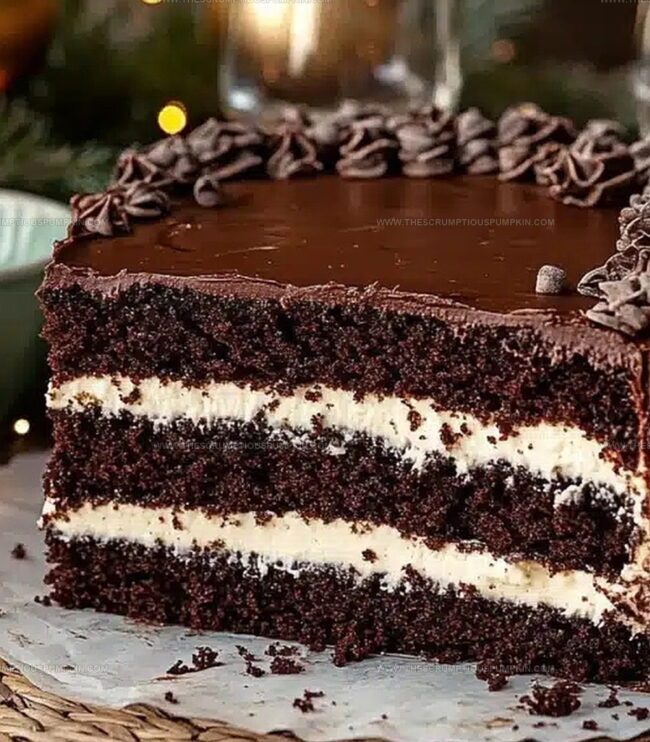
Dreamy Hersheys Chocolate Cake With Cream Cheese Filling Recipe
Rich, decadent hersheys chocolate cake sends chocolate lovers into pure bliss with its luxurious layers and creamy surprise.
Indulgent textures meld together in a dessert that promises pure satisfaction.
Smooth cream cheese nestled between moist chocolate layers creates an irresistible combination.
Cocoa’s deep, intense flavor transforms this classic treat into something extraordinary.
Bakers of all skill levels can craft this delightful dessert with confidence.
Every slice reveals a perfect balance of sweet, tangy, and chocolatey goodness.
Fall in love with this show-stopping cake that will make you the star of any gathering.
Why Hersheys Chocolate Cake With Cream Cheese Filling Stands Out
Hersheys Chocolate Cake With Cream Cheese Filling Ingredient List
For the Cake Dry Ingredients:For the Cake Wet Ingredients:For the Filling and Topping:How To Bake Hersheys Chocolate Cake With Cream Cheese Filling
Step 1: Prepare Baking Station
Warm up the oven to a cozy 350°F. Grab two round cake pans and coat them generously with cooking spray or butter to ensure your cake doesn’t stick.
Step 2: Mix Dry Ingredients
Combine your dry ingredients in a large mixing bowl:Sift everything together to break up any stubborn clumps and create a silky-smooth mixture.
Step 3: Blend Wet Ingredients
In a separate bowl, whisk together:Mix until the ingredients become a harmonious blend with a consistent texture.
Step 4: Create Chocolate Batter
Gently fold the wet ingredients into the dry ingredients. Stir carefully to avoid overmixing, which can make the cake tough. Stop when you have a rich, smooth chocolate batter.
Step 5: Fill Cake Pans
Divide the batter evenly between the two prepared pans. Use a spatula to smooth the tops, ensuring an even surface for perfect baking.
Step 6: Bake The Cake
Slide the pans into the preheated oven. Bake for 30-35 minutes, giving the pans a half-turn midway through to promote even cooking. Check doneness by inserting a toothpick – it should come out clean.
Step 7: Cool The Cake Layers
Let the cakes rest in their pans for 10 minutes. Then transfer to a wire rack to cool completely. Patience is key for the perfect cake texture.
Step 8: Prepare Cream Cheese Filling
Whip softened cream cheese and butter until light and fluffy. Gradually add powdered sugar and vanilla, creating a luscious, creamy filling.
Step 9: Assemble Cake Layers
Once cooled, spread the cream cheese filling between the cake layers. Aim for an even, smooth interior that promises delightful flavor in every bite.
Step 10: Create Chocolate Ganache
Heat heavy cream and pour over chocolate chips. Stir until you achieve a glossy, smooth ganache that looks like liquid silk.
Step 11: Finish With Ganache
Pour the ganache over the cake’s top, letting it cascade beautifully down the sides in elegant drips.
Step 12: Add Final Touches
Sprinkle chocolate shavings across the top and dust lightly with cocoa powder for a professional bakery look.
Step 13: Chill And Serve
Refrigerate the cake for at least an hour to let the filling and ganache set perfectly. Slice, serve, and watch everyone swoon!
Pro Tips For Hersheys Chocolate Cake With Cream Cheese Filling
Hersheys Chocolate Cake With Cream Cheese Filling Recipe Swaps
Tasty Pairings For Hersheys Chocolate Cake With Cream Cheese Filling
Best Way To Store Hersheys Chocolate Cake With Cream Cheese Filling
Hersheys Chocolate Cake With Cream Cheese Filling Q&A
Sifting helps break up any lumps in flour, cocoa powder, and other dry ingredients, ensuring a smoother, more uniform cake texture and preventing clumpy or dense spots in the final bake.
Insert a toothpick into the center of the cake – if it comes out clean with no wet batter, the cake is done. Also, the cake should spring back lightly when gently pressed in the center.
Yes, you can bake the cake layers a day in advance. Wrap them tightly in plastic wrap and store at room temperature, or freeze for up to a month for longer storage.
Print
Hersheys Chocolate Cake With Cream Cheese Filling Recipe
- Total Time: 1 hour 65 minutes (2 hours and 5 minutes)
- Yield: 8 1x
Description
Rich Hershey’s chocolate cake nestles between layers of velvety cream cheese filling, creating a sinful dessert that melts hearts. Chocolate lovers will savor each luxurious bite of this indulgent masterpiece that promises pure bliss.
Ingredients
Main Ingredients:
- 2 cups all-purpose flour
- 2 cups granulated sugar
- 3/4 cup Hershey’s cocoa powder
- 2 large eggs
- 1 cup milk
- 1/2 cup vegetable oil
- 2 tsp vanilla extract
- 1 tsp baking soda
- 1/2 tsp salt
Cream Cheese Filling:
- 8 oz cream cheese, softened
- 1/4 cup unsalted butter, softened
- 2 cups powdered sugar
- 1 tsp vanilla extract
Frosting and Decoration:
- 1/2 cup Hershey’s chocolate chips
- 1/4 cup heavy cream
- 2 tbsp chocolate shavings
- 1 tbsp cocoa powder for dusting
Instructions
- Preheat the oven to 350°F and grease two 9-inch round cake pans, ensuring complete coverage to prevent sticking.
- Sift together flour, cocoa powder, baking soda, and salt in a large mixing bowl to eliminate any lumps and create a uniform dry mixture.
- In a separate bowl, whisk together sugar, eggs, milk, vegetable oil, and vanilla extract until the mixture becomes smooth and well-integrated.
- Gradually fold the wet ingredients into the dry ingredients, stirring gently until a uniform chocolate batter forms without overmixing.
- Divide the batter evenly between the prepared cake pans, smoothing the tops with a spatula for even baking.
- Bake for 30-35 minutes, rotating pans halfway through, until a toothpick inserted in the center comes out clean.
- Remove cakes from oven and let cool in pans for 10 minutes, then transfer to a wire rack to cool completely.
- For the cream cheese filling, beat softened cream cheese and butter until creamy and light, then gradually incorporate powdered sugar and vanilla.
- Once cakes are completely cooled, spread the cream cheese filling between the layers, creating an even, smooth interior.
- Prepare the chocolate ganache by heating heavy cream and pouring over chocolate chips, stirring until glossy and smooth.
- Pour the ganache over the top of the cake, allowing it to drip elegantly down the sides.
- Garnish with chocolate shavings and dust lightly with cocoa powder for an elegant finish.
- Refrigerate for at least 1 hour before serving to allow the filling and ganache to set properly.
Notes
- Ensure all ingredients are at room temperature for smoother mixing and better cake texture.
- Use Dutch-processed cocoa powder for a deeper, richer chocolate flavor that enhances the cake’s overall taste.
- For a gluten-free version, substitute all-purpose flour with a high-quality gluten-free flour blend and add xanthan gum for better structure.
- Reduce sugar content by 25% and replace with monk fruit sweetener for a lower-calorie alternative without compromising taste.
- Prep Time: 30 minutes
- Cook Time: 35 minutes
- Category: Desserts
- Method: Baking
- Cuisine: American
Nutrition
- Serving Size: 8
- Calories: 472
- Sugar: 51 g
- Sodium: 258 mg
- Fat: 22 g
- Saturated Fat: 10 g
- Unsaturated Fat: 12 g
- Trans Fat: 0 g
- Carbohydrates: 66 g
- Fiber: 2 g
- Protein: 6 g
- Cholesterol: 33 mg
Mia Thompson
Pastry Chef & Content Creator
Expertise
Education
Portland Community College – Baking and Pastry Arts Program
Specialized in artisanal bread, seasonal desserts, and sustainable baking methods.
National University of Natural Medicine – Bachelor of Science in Nutrition (BScN)
Focused on “Food as Medicine” philosophy, with core threads in nutrition.
Mia’s love affair with baking began in her grandmother’s kitchen, where sneaking spoonfuls of batter first sparked her curiosity. She refined her skills through Portland Community College’s Baking and Pastry Arts Program and her expertise at the National University of Natural Medicine, earning a B.Sc. in Nutrition.
At The Scrumptious Pumpkin, Mia reimagines classics with effortless seasonal treats, healthier twists on old favorites, and playful confections that feel like pure joy. Beyond the oven, she nurtures her urban garden, forages local ingredients around Portland, and leads hands‑on nutrition workshops for her community.