
The Ultimate Homemade Cheesy Garlic Breadsticks Recipe You’ll Love
Crafting delectable homemade cheesy garlic breadsticks can turn an ordinary meal into a memorable feast.
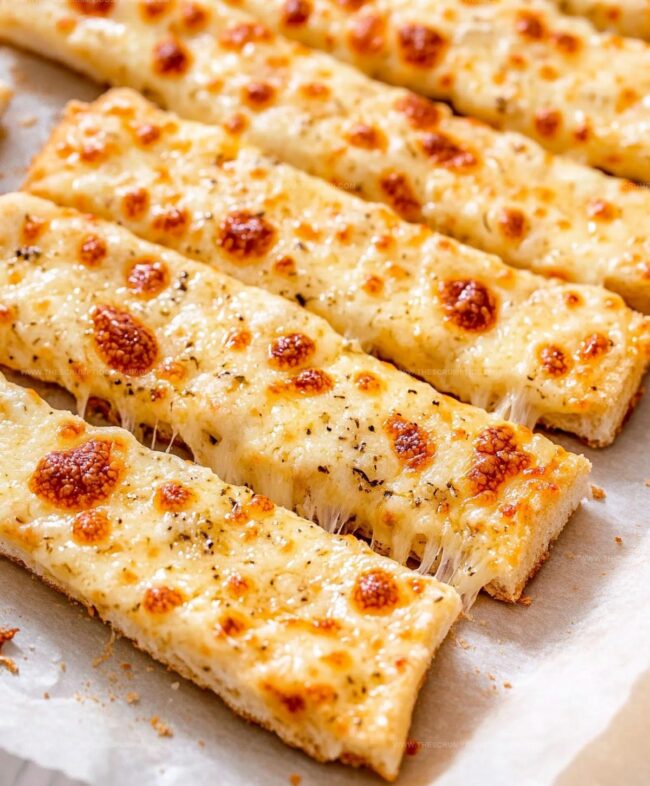
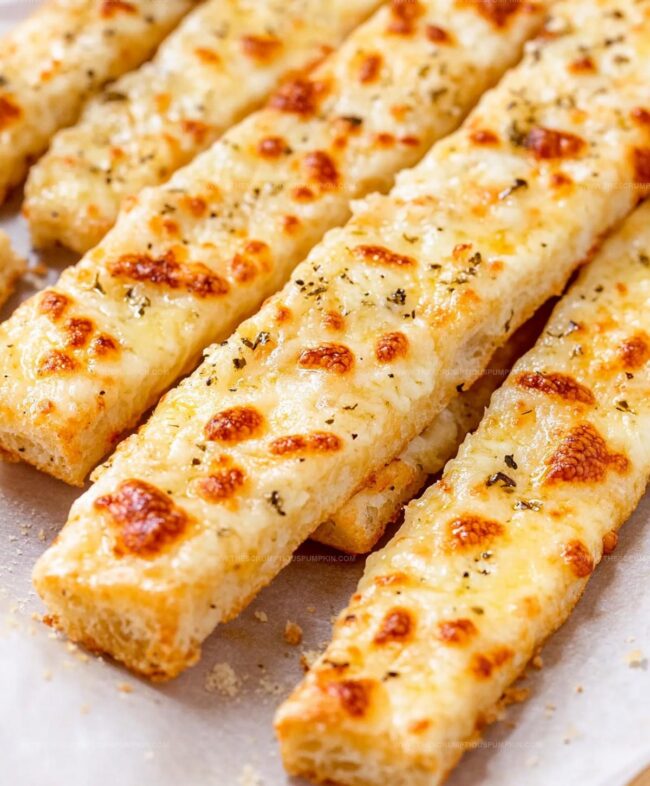
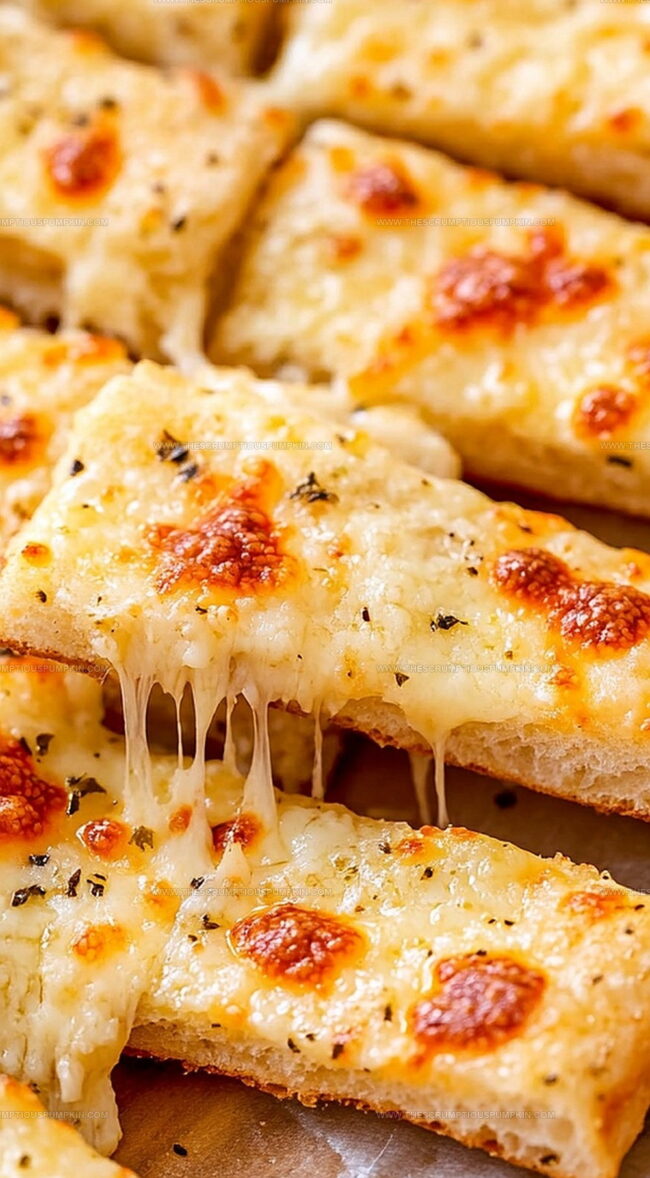
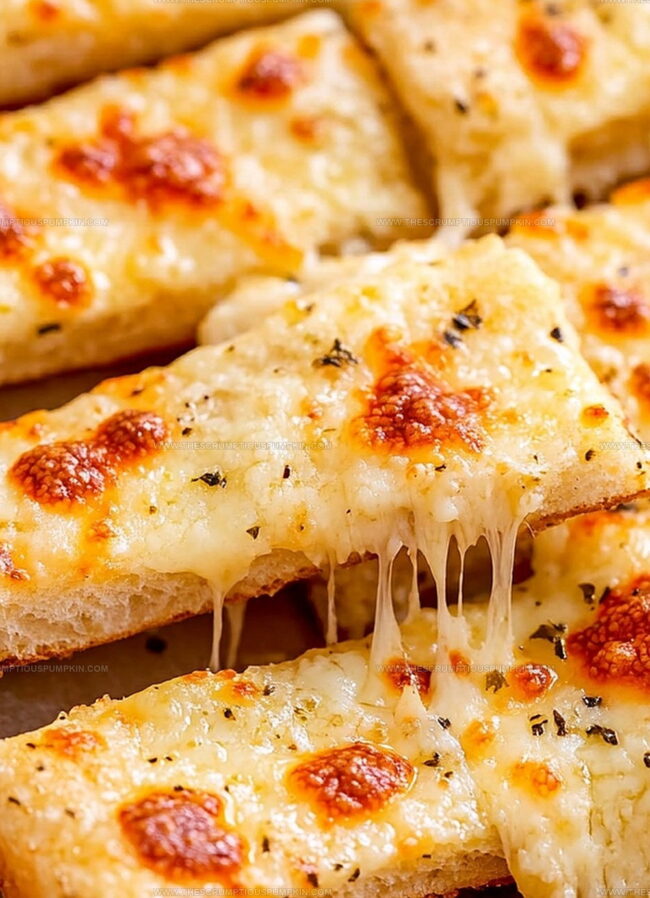
Crisp edges and gooey centers promise pure comfort on your plate.
Warm, golden-brown strips packed with robust flavor will make everyone lean in closer.
Pantry staples dance together, creating magic without complicated techniques.
Simple ingredients merge seamlessly, delivering restaurant-quality results right from your kitchen.
Cheese lovers and carb enthusiasts will absolutely adore these irresistible treats.
Prepare to impress with minimal effort and maximum deliciousness.
Why Homemade Cheesy Garlic Breadsticks Delight
Ingredients for Homemade Cheesy Garlic Breadsticks
Base Ingredients:Flavor Enhancers:Garnish and Optional Additions:How to Bake Homemade Cheesy Garlic Breadsticks
Step 1: Prepare the Baking Setup
Warm up the oven to 425°F (220°C).
Grab a baking sheet and line it with parchment paper to prevent sticking and make cleanup a breeze.
Step 2: Shape the Dough
Grab your pizza dough and roll it out into a lovely rectangular or circular shape.
Gently transfer the dough onto the prepared baking sheet, making sure it sits flat and even.
Step 3: Add Garlic Flavor
Mix together melted butter and finely chopped garlic in a small bowl.
Using a pastry brush, spread this aromatic mixture all over the surface of the dough, ensuring every inch gets coated with delicious garlic goodness.
Step 4: Load Up with Cheese
Sprinkle a generous layer of toppings across the dough:Step 5: Bake to Perfection
Slide the baking sheet into the preheated oven.
Bake for 12-15 minutes until the cheese transforms into a bubbly, golden-brown masterpiece and the edges turn crispy and golden.
Step 6: Slice and Garnish
Remove the breadsticks from the oven and let them cool for a few moments.
Slice into strips using a pizza cutter or sharp knife.
If you’d like, sprinkle some fresh chopped parsley on top for extra color and flavor.
Step 7: Serve and Enjoy
Plate the warm breadsticks and serve alongside marinara sauce or your favorite dipping sauce.
Watch as everyone dives in and enjoys these irresistible cheesy garlic breadsticks!
Tips for Perfect Cheesy Garlic Breadsticks
Flavorful Twists for Cheesy Garlic Breadsticks
Serving Suggestions for Cheesy Garlic Breadsticks
Party Appetizer Delight: Slice these cheesy garlic breadsticks into smaller bite-sized pieces perfect for game nights, cocktail parties, or casual gatherings with friends.
Dipping Sauce Extravaganza: Pair with classic marinara, creamy ranch, spicy arrabiata sauce, or zesty garlic aioli to enhance the flavor profile and add exciting variety.
Family Meal Companion: Serve alongside pasta dishes, soups, salads, or as a delicious side for pizza night to complement your main course and add extra comfort to the meal.
Movie Night Snack: Cut into fun shapes, stack on a platter, and enjoy while watching films – an irresistible crowd-pleaser that everyone will love munching on during entertainment time.
Best Storage Tips for Cheesy Garlic Breadsticks
FAQs
Yes, pre-made pizza dough works perfectly and saves time in preparing these cheesy garlic breadsticks.
You can substitute with a mix of dried oregano, basil, and thyme or use dried herbs you have on hand.
Look for golden brown edges and fully melted cheese. The dough should look crisp and slightly puffy when ready.
You can prepare the dough and add toppings in advance, then bake just before serving to ensure maximum freshness and crispy texture.
Print
Homemade Cheesy Garlic Breadsticks Recipe
- Total Time: 25 minutes
- Yield: 8 1x
Description
Homemade cheesy garlic breadsticks bring warmth and comfort straight from Italian kitchens to your dining table. Crisp edges, melted cheese, and aromatic garlic create a delightful starter or side dish you’ll crave again and again.
Ingredients
Main Ingredients:
- 1 pizza dough (store-bought or homemade)
- 1 1/2 cups shredded mozzarella cheese
Cheese Topping:
- 2 tablespoons grated Parmesan cheese
Seasoning and Flavor Enhancers:
- 2 tablespoons unsalted butter, melted
- 2 cloves garlic, minced
- 1 teaspoon Italian seasoning
- Salt to taste
Instructions
- Prepare the oven by heating to 425F (220C) and line a baking sheet with parchment paper to prevent sticking.
- Stretch and flatten the pizza dough into a rectangular shape, ensuring an even thickness across the surface.
- Create a garlic butter mixture by combining melted butter with finely chopped garlic, whisking until well incorporated.
- Generously coat the entire dough surface with the aromatic garlic butter using a pastry brush, reaching all edges.
- Lavishly scatter mozzarella and Parmesan cheeses across the dough, ensuring even distribution.
- Sprinkle Italian seasoning and a pinch of salt over the cheese layer to enhance the flavor profile.
- Transfer the prepared breadstick base to the preheated oven and bake for 12-15 minutes until the cheese melts completely and the edges turn a golden-brown color.
- Remove from the oven and allow to cool for a few minutes to set the cheese and prevent burning.
- Slice the baked cheese bread into uniform sticks using a sharp pizza cutter or knife.
- Optional: Garnish with freshly chopped parsley for added color and herbaceous flavor.
- Serve immediately while warm, accompanied by marinara sauce or your preferred dipping sauce for a delightful appetizer or side dish.
Notes
- Select pizza dough with minimal moisture to prevent soggy breadsticks and ensure crispy edges.
- Experiment with different cheese blends like sharp cheddar or provolone for unique flavor profiles.
- Adjust garlic intensity by roasting fresh garlic beforehand for deeper, mellower taste without overwhelming sharpness.
- Transform recipe into gluten-free version by using cauliflower or almond flour-based pizza dough alternatives.
- Prep Time: 10 minutes
- Cook Time: 15 minutes
- Category: Appetizer, Snacks, Dinner
- Method: Baking
- Cuisine: Italian
Nutrition
- Serving Size: 8
- Calories: 220 kcal
- Sugar: 1 g
- Sodium: 300 mg
- Fat: 12 g
- Saturated Fat: 6 g
- Unsaturated Fat: 5 g
- Trans Fat: 0 g
- Carbohydrates: 20 g
- Fiber: 1 g
- Protein: 10 g
- Cholesterol: 25 mg
Lucas Bennett
Founder & Recipe Developer
Expertise
Education
Blue Ridge Community College – Certificate in Culinary Arts
Focused on seasonal cooking, sustainable kitchen practices, and farm-to-table techniques.
Appalachian State University – B.A. in English
Built critical thinking and analysis through diverse texts. Guided by faculty, it prepares graduates for publishing and more.
Growing up in the rolling hills of North Carolina, Lucas learned early that some of life’s best memories start around a kitchen table. After studying English at Appalachian State University and honing his culinary skills at Blue Ridge Community College, he dreamed of blending storytelling with rustic, seasonal cooking, and The Scrumptious Pumpkin was born.
Lucas focuses on easy, single-serving recipes that turn fresh, local ingredients into something special. His style is simple, heartfelt, and rooted in the beauty of the seasons. When he’s not testing a new dish, you’ll probably find him hiking in the Blue Ridge Mountains, browsing farmers’ markets, or scribbling food stories in a notebook.