
The Perfect Homemade Cherry Pie Recipe for Sweet Summer Bliss
Sweet summer memories dance through every slice of this classic homemade cherry pie that captures pure nostalgia.
Ripe cherries burst with vibrant flavor, transforming simple ingredients into a delectable dessert.
Baking this treat connects us to generations of home cooks who perfected their craft.
Crisp pastry and juicy fruit create a harmony of textures that feels both comforting and exciting.
Fresh cherries picked at peak ripeness make all the difference in creating an extraordinary pie.
Warm from the oven, each golden-crusted slice promises a moment of pure deliciousness that might just become your new favorite summer tradition.
Let’s bake something magical together.
What Makes Homemade Cherry Pie So Irresistible
Fresh Ingredients for Classic Homemade Cherry Pie
Pie Crust:Fruit Filling:Flavor Enhancers:Step-by-Step Directions to Bake Homemade Cherry Pie
Step 1: Prepare The Oven
Heat your oven to a toasty 425F (220C) to ensure a perfectly golden crust.
Step 2: Cook The Cherry Filling
In a saucepan, combine:Simmer the mixture over medium heat, stirring consistently until the filling transforms into a thick, glossy consistency.
This should take about 10 minutes.
Step 3: Craft The Pie Base
Gently roll out the first pie crust and carefully transfer it into a 9-inch pie pan.
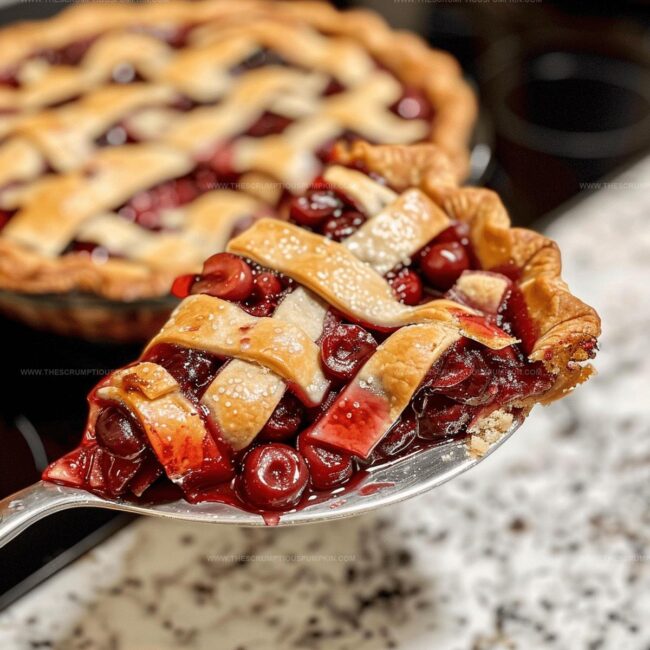
Pour the luscious cherry filling into the prepared crust.
Step 4: Add Buttery Goodness
Strategically dot the cherry filling with small butter pieces to enhance the flavor and richness.
Step 5: Create The Pie Top
Roll out the second pie crust and drape it over the filled pie.
Carefully crimp the edges to create a tight seal.
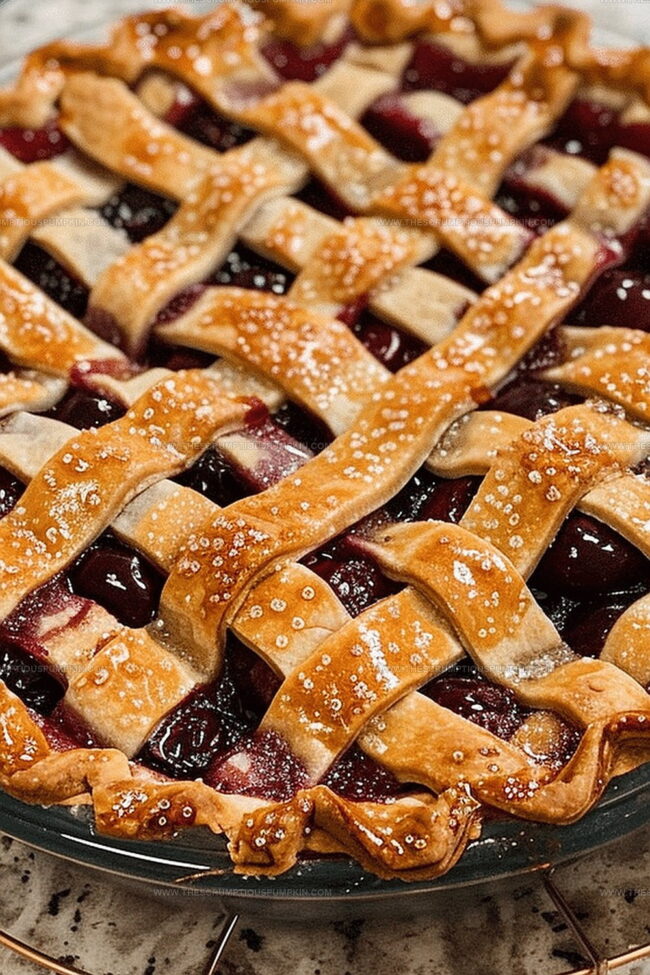
Cut several decorative slits across the top to allow steam to escape during baking.
Step 6: Apply A Gorgeous Glaze
Brush the top crust with beaten egg to achieve a beautiful, glossy golden-brown finish.
Step 7: Bake To Perfection
Slide the pie into the preheated oven and bake for 45-50 minutes.
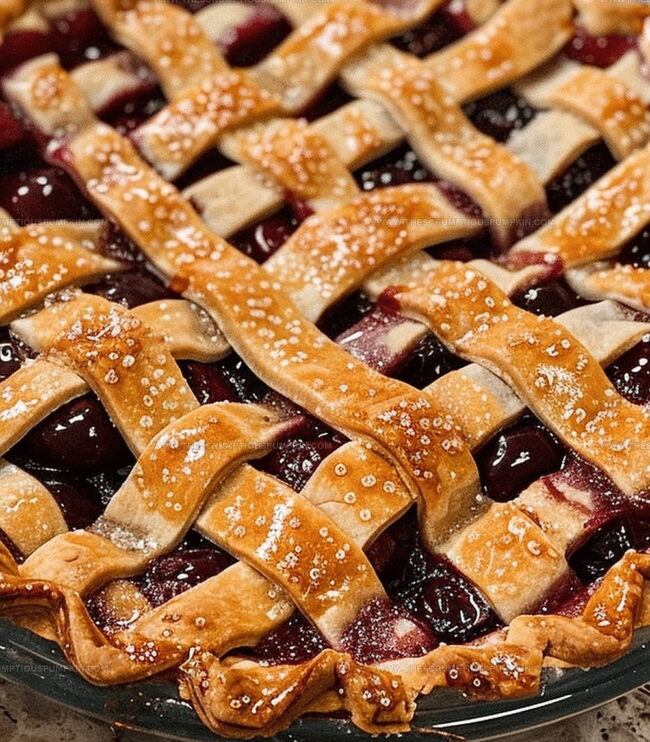
Look for a rich golden-brown crust and bubbling filling as signs of completion.
Step 8: Cool And Serve
Allow the pie to cool completely before slicing and serving to let the filling set properly.
Expert Tips for a Flawless Homemade Cherry Pie
Creative Twists to Elevate Your Cherry Pie
Serving Ideas to Show Off Your Homemade Cherry Pie
How to Keep Homemade Cherry Pie Fresh and Delicious
FAQs
Yes, frozen cherries work great. Thaw and drain them before cooking to prevent excess liquid in the pie filling.
Blind bake the bottom crust for 10 minutes before adding the filling, and sprinkle a thin layer of breadcrumbs or ground nuts to absorb moisture.
Substitute with vanilla extract or use a bit of amaretto liqueur for a similar depth of flavor. If you prefer, you can also skip the extract entirely.
The filling should coat the back of a spoon and leave a clear path when you run your finger through it. It will continue to thicken as it cools.
Print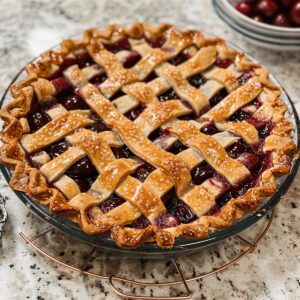
Homemade Cherry Pie Recipe
- Total Time: 1 hour 10 minutes
- Yield: 8 1x
Description
Grandma’s classic cherry pie blends sweet-tart cherries with buttery, flaky crust in a nostalgic dessert. Generations of family memories emerge with each delectable slice served warm from the oven.
Ingredients
Fruits:
- 2 cups (473 milliliters) fresh or frozen pitted cherries
Dry Ingredients:
- 1 cup (200 grams) granulated sugar
- 1/4 cup (30 grams) cornstarch
- 1/4 teaspoon salt
Flavor Enhancers and Wash:
- 1/4 teaspoon almond extract
- 1 teaspoon lemon juice
- 1 tablespoon butter
- 2 pie crusts (homemade or store-bought)
- 1 egg (for egg wash)
Instructions
- Heat the oven to a searing 425F (220C), preparing for a delectable cherry pie creation.
- In a heavy-bottomed saucepan, blend fresh cherries with sugar, cornstarch, almond extract, lemon juice, and a pinch of salt, stirring constantly over medium heat until the mixture transforms into a luscious, thick compote, approximately 10 minutes.
- Gently drape the first pastry crust into a 9-inch pie dish, ensuring smooth coverage of the pan’s interior.
- Pour the glossy cherry filling into the prepared crust, spreading it evenly across the surface.
- Scatter small nuggets of butter strategically across the filling for added richness.
- Carefully lay the second pastry crust atop the filling, artfully crimping the edges to create a tight seal and elegantly slice several steam vents into the top layer.
- Delicately brush the pie’s surface with beaten egg, creating a radiant, golden sheen.
- Slide the pie into the preheated oven and bake for 45-50 minutes, watching for a burnished golden crust and effervescent filling.
- Remove from the oven and allow the pie to rest and settle, letting the flavors meld and intensify before serving.
Notes
- Adjust sweetness by tasting cherries before cooking, as some varieties are naturally sweeter or more tart.
- For a gluten-free version, swap traditional pie crust with almond flour or gluten-free pastry dough to accommodate dietary restrictions.
- Create decorative lattice top by cutting strips and weaving them over filling for a classic, professional-looking pie presentation.
- Prevent soggy bottom crust by sprinkling ground almonds or breadcrumbs before adding cherry filling, which helps absorb excess moisture.
- Prep Time: 20 minutes
- Cook Time: 50 minutes
- Category: Desserts
- Method: Baking
- Cuisine: American
Nutrition
- Serving Size: 8
- Calories: 291 kcal
- Sugar: 30 g
- Sodium: 180 mg
- Fat: 12 g
- Saturated Fat: 5 g
- Unsaturated Fat: 6 g
- Trans Fat: 0.2 g
- Carbohydrates: 42 g
- Fiber: 2 g
- Protein: 3 g
- Cholesterol: 30 mg
Mia Thompson
Pastry Chef & Content Creator
Expertise
Education
Portland Community College – Baking and Pastry Arts Program
Specialized in artisanal bread, seasonal desserts, and sustainable baking methods.
National University of Natural Medicine – Bachelor of Science in Nutrition (BScN)
Focused on “Food as Medicine” philosophy, with core threads in nutrition.
Mia’s love affair with baking began in her grandmother’s kitchen, where sneaking spoonfuls of batter first sparked her curiosity. She refined her skills through Portland Community College’s Baking and Pastry Arts Program and her expertise at the National University of Natural Medicine, earning a B.Sc. in Nutrition.
At The Scrumptious Pumpkin, Mia reimagines classics with effortless seasonal treats, healthier twists on old favorites, and playful confections that feel like pure joy. Beyond the oven, she nurtures her urban garden, forages local ingredients around Portland, and leads hands‑on nutrition workshops for her community.