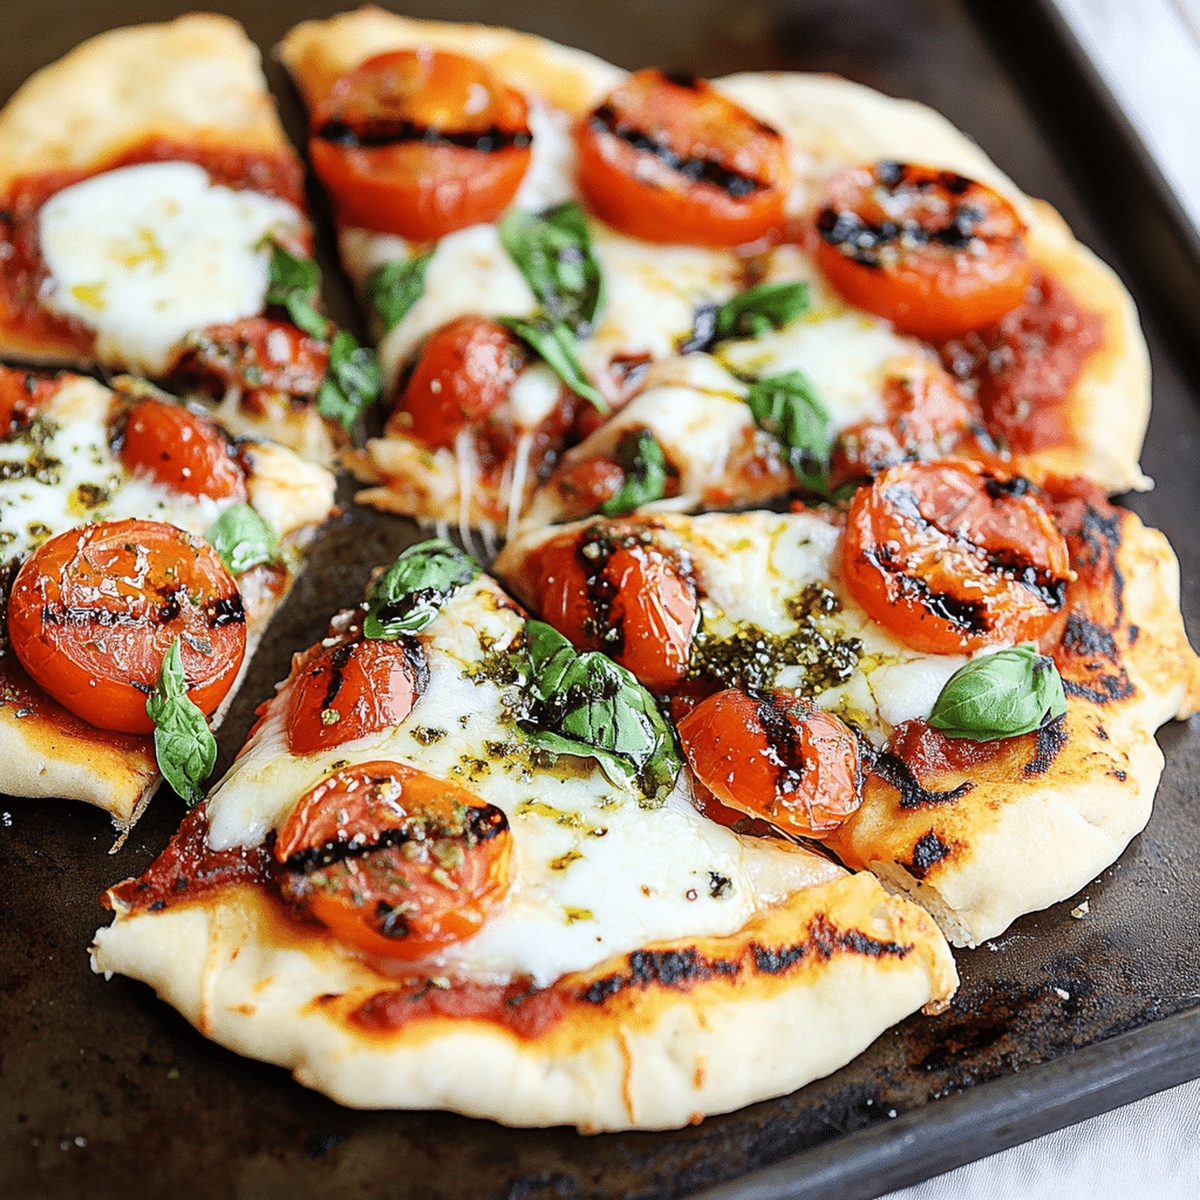
Sizzling Homemade Grilled Pizza Recipe: Backyard Flavor Magic
Pizza nights reach new heights when you master this homemade grilled pizza technique that breaks traditional kitchen boundaries.
Crispy crusts develop incredible flavor from direct flame contact.
Backyard cooking transforms simple ingredients into restaurant-quality masterpieces.
Fresh herbs and seasonal toppings create personalized culinary experiences.
Charcoal and wood chips infuse smoky nuances into every slice.
Weekend cooking becomes an adventure with this method.
Why Homemade Grilled Pizza Is a Hit
Ingredients for Homemade Grilled Pizza
Pizza Dough Base:Grilling and Cooking Ingredients:Optional Toppings:How to Grill Pizza at Home
Step 1: Activate the Yeast
In a spacious mixing bowl, combine warm water, sugar, and yeast.
Gently stir until the yeast dissolves completely.
Allow the mixture to rest for 5-10 minutes, watching it transform into a bubbly, foamy concoction that signals the yeast is alive and ready.
Step 2: Form the Pizza Dough
Sprinkle salt into the yeast mixture and gradually incorporate flour.
Mix thoroughly until a cohesive dough begins to take shape.
The ingredients will slowly blend into a unified mass that’s ready for the next stage of transformation.
Step 3: Knead the Dough to Perfection
Transfer the dough onto a flour-dusted surface.
Begin kneading with purpose, working the dough for 8-10 minutes.
Your goal is a smooth, elastic texture that feels soft and pliable beneath your hands.
The dough should become silky and responsive to your touch.
Step 4: Let the Dough Rise
Place the kneaded dough into a lightly oiled bowl.
Drape a damp cloth over the top to create a nurturing environment.
Position the bowl in a warm, draft-free spot and allow the dough to expand and rise for 1-1.5 hours.
You’ll know it’s ready when the dough has doubled in size.
Step 5: Prepare the Grill
Fire up the grill to medium-high heat.
Ensure the cooking surface is clean and well-prepared for your pizza adventure.
Step 6: Shape the Pizza Bases
Punch down the risen dough to release trapped air.
Divide the dough into individual portions.
Roll out each section on a flour-covered surface, creating your desired pizza shape and thickness.
Step 7: Grill the First Side
Brush one side of each dough base with olive oil.
Carefully place the oiled side directly on the grill grates.
Cook for 2-3 minutes until crispy grill marks appear and the bottom turns golden brown.
Step 8: Flip and Finish the Base
Brush the top side with olive oil.
Flip the pizza base and continue grilling for an additional 2-3 minutes.
The goal is a perfectly crisp, slightly charred foundation.
Step 9: Add Toppings and Final Cooking
Remove the grilled bases and add your favorite toppings:Return the topped pizzas to the grill’s indirect heat zone.
Cook until the cheese melts and toppings are heated through, creating a mouthwatering masterpiece.
Tips for Perfect Grilled Pizza
Flavor Variations for Grilled Pizza
Serving Homemade Grilled Pizza
Storing Grilled Pizza Leftovers
FAQs
Mix the yeast with warm water and sugar. If it becomes foamy and bubbly after 5-10 minutes, your yeast is alive and ready to use. If nothing happens, the yeast might be old or expired.
Yes, you can prepare the dough a day before. After kneading, place it in an oiled bowl, cover with plastic wrap, and refrigerate. Let it come to room temperature before grilling.
Set your grill to medium-high heat, around 450-500°F. This ensures a crispy crust and nice grill marks without burning the dough.
Print
Homemade Grilled Pizza Recipe
- Total Time: 1 hour 30 minutes
- Yield: 8 1x
Description
Irresistible homemade grilled pizza brings Italian street flavor right to backyard cookouts. Crispy crust, melted cheese, and fresh toppings create a perfect summer meal you’ll want to savor again and again.
Ingredients
Pizza Dough:
- 4 cups all-purpose flour
- 1 1/4 cups warm water (95-110°F / 35-43°C)
- 2 tablespoons active dry yeast
- 3 tablespoons sugar
- 1 teaspoon salt
Grilling and Finishing:
- 1/2 cup olive oil (for brushing before grilling)
Instructions
- Activate the yeast by mixing warm water, sugar, and yeast in a large bowl. Allow the mixture to become frothy and bubbly for 5-10 minutes.
- Incorporate salt and flour into the activated yeast, stirring until a cohesive dough forms.
- Transfer the dough to a floured surface and knead vigorously for 8-10 minutes, developing a smooth and elastic texture.
- Coat a clean bowl with light olive oil, place the dough inside, and drape with a damp cloth. Let the dough rise in a warm environment for 1-1.5 hours until it doubles in volume.
- Heat the grill to medium-high temperature, creating an ideal cooking surface around 400-450°F.
- Deflate the risen dough by gently pressing down, then separate into individual portions.
- Stretch and roll each dough portion on a floured surface, creating thin, even circles.
- Brush one surface of each dough circle with olive oil and carefully position the oiled side directly on the grill grates.
- Grill the first side for 2-3 minutes until golden brown grill marks appear, then oil the opposite side and flip.
- Cook the second side for an additional 2-3 minutes, then transfer to indirect heat zone.
- Quickly add preferred toppings and continue grilling until cheese melts and ingredients are thoroughly heated.
Notes
- Check yeast freshness by ensuring it becomes foamy and bubbly, indicating active fermentation for perfect pizza dough rise.
- Work dough on a well-floured surface to prevent sticking and achieve smooth, elastic texture that stretches easily without tearing.
- Use high-heat resistant toppings like pre-cooked meats, quick-melting cheeses, and thinly sliced vegetables to prevent burning during grilling.
- Clean grill grates thoroughly and oil lightly to prevent sticking and create beautiful char marks without tearing delicate pizza crust.
- Prep Time: 1 hour 20 minutes
- Cook Time: 10 minutes
- Category: Lunch, Dinner, Snacks
- Method: Grilling
- Cuisine: Italian
Nutrition
- Serving Size: 8
- Calories: 198
- Sugar: 4.5 g
- Sodium: 150 mg
- Fat: 3 g
- Saturated Fat: 0.4 g
- Unsaturated Fat: 2.6 g
- Trans Fat: 0 g
- Carbohydrates: 41 g
- Fiber: 1.3 g
- Protein: 5.5 g
- Cholesterol: 0 mg
Lucas Bennett
Founder & Recipe Developer
Expertise
Education
Blue Ridge Community College – Certificate in Culinary Arts
Focused on seasonal cooking, sustainable kitchen practices, and farm-to-table techniques.
Appalachian State University – B.A. in English
Built critical thinking and analysis through diverse texts. Guided by faculty, it prepares graduates for publishing and more.
Growing up in the rolling hills of North Carolina, Lucas learned early that some of life’s best memories start around a kitchen table. After studying English at Appalachian State University and honing his culinary skills at Blue Ridge Community College, he dreamed of blending storytelling with rustic, seasonal cooking, and The Scrumptious Pumpkin was born.
Lucas focuses on easy, single-serving recipes that turn fresh, local ingredients into something special. His style is simple, heartfelt, and rooted in the beauty of the seasons. When he’s not testing a new dish, you’ll probably find him hiking in the Blue Ridge Mountains, browsing farmers’ markets, or scribbling food stories in a notebook.