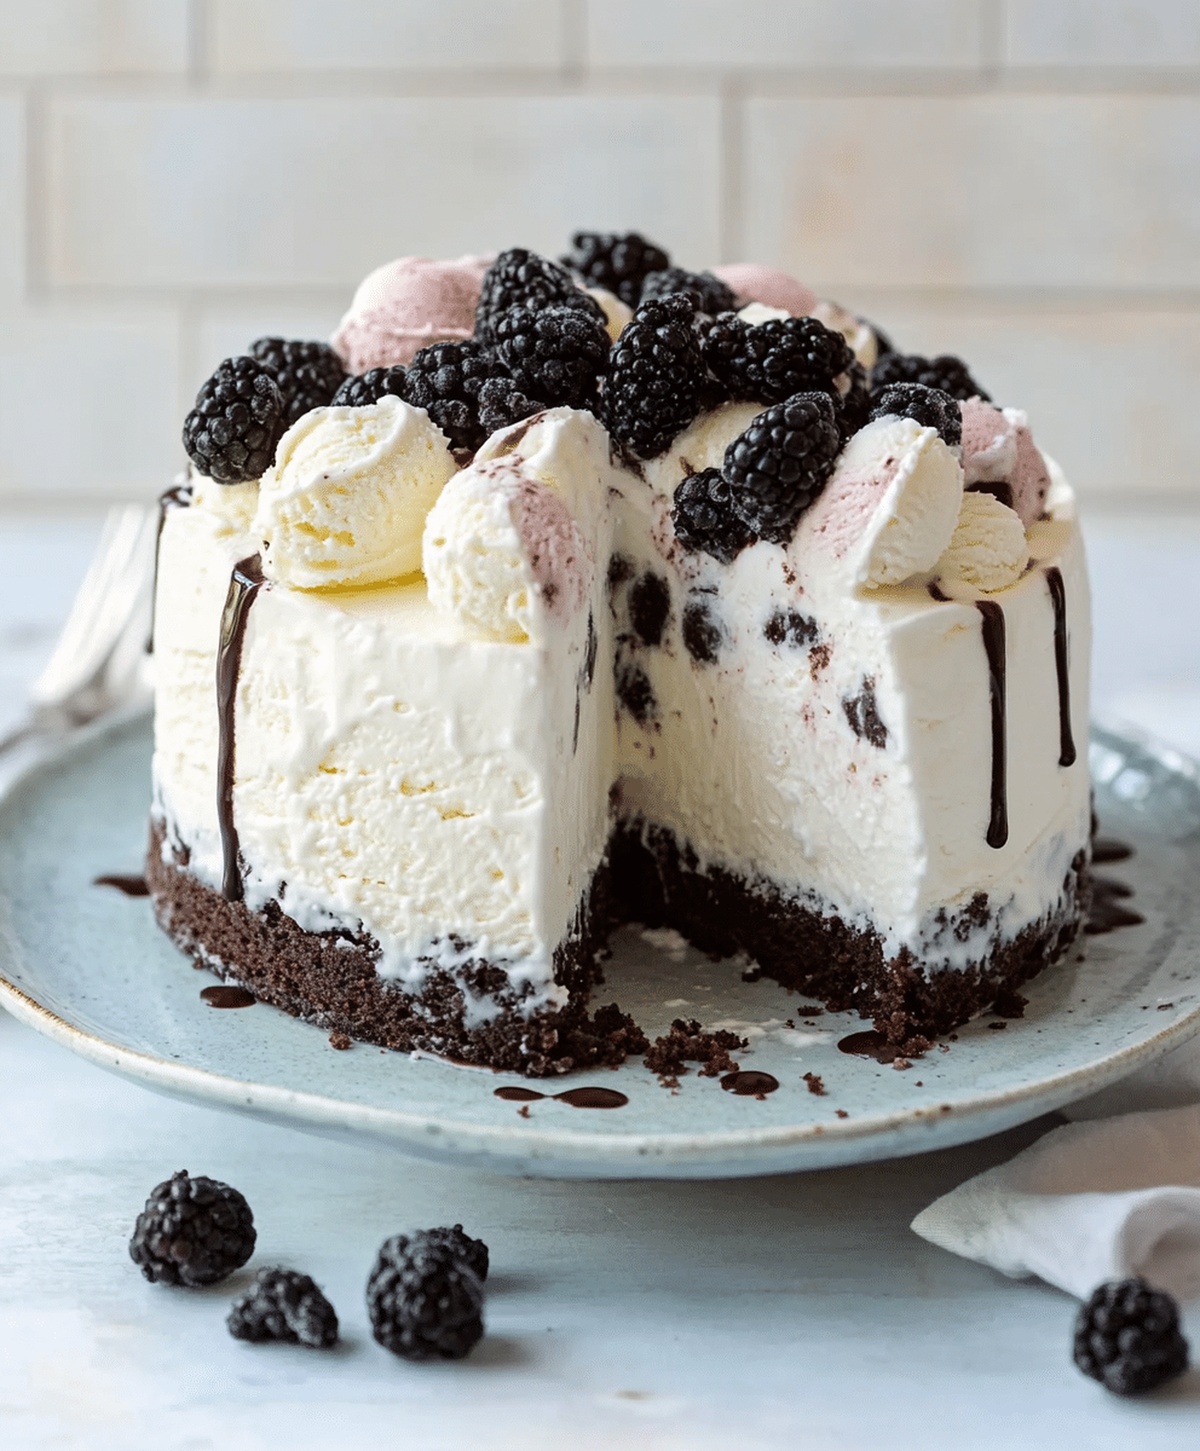
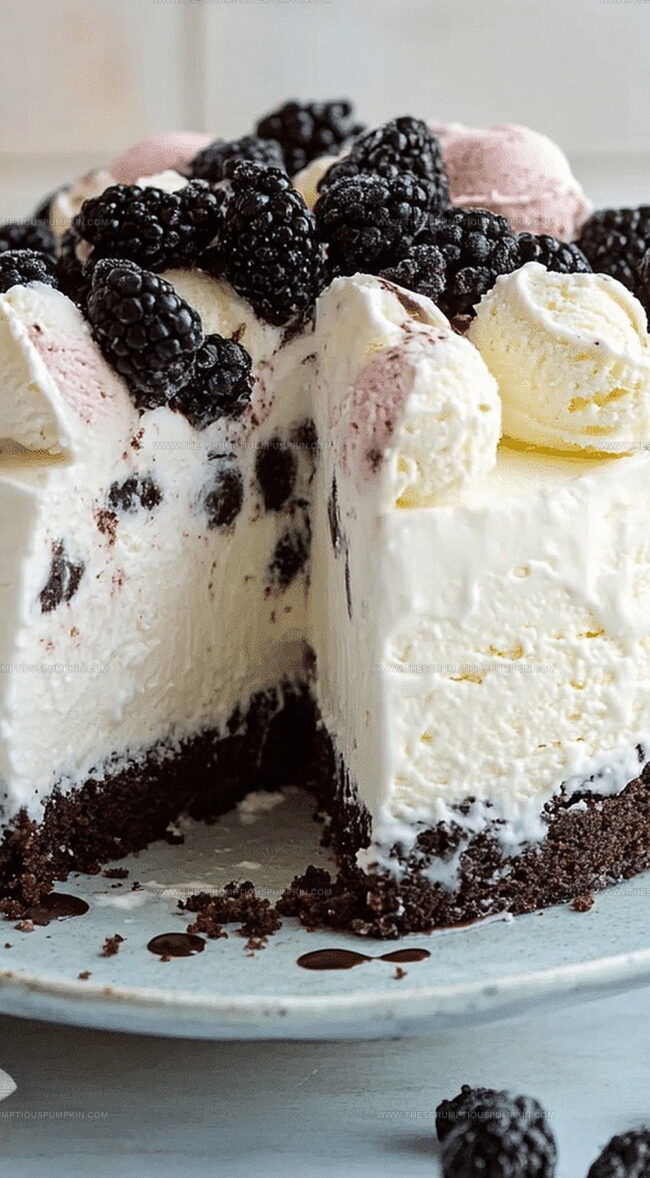
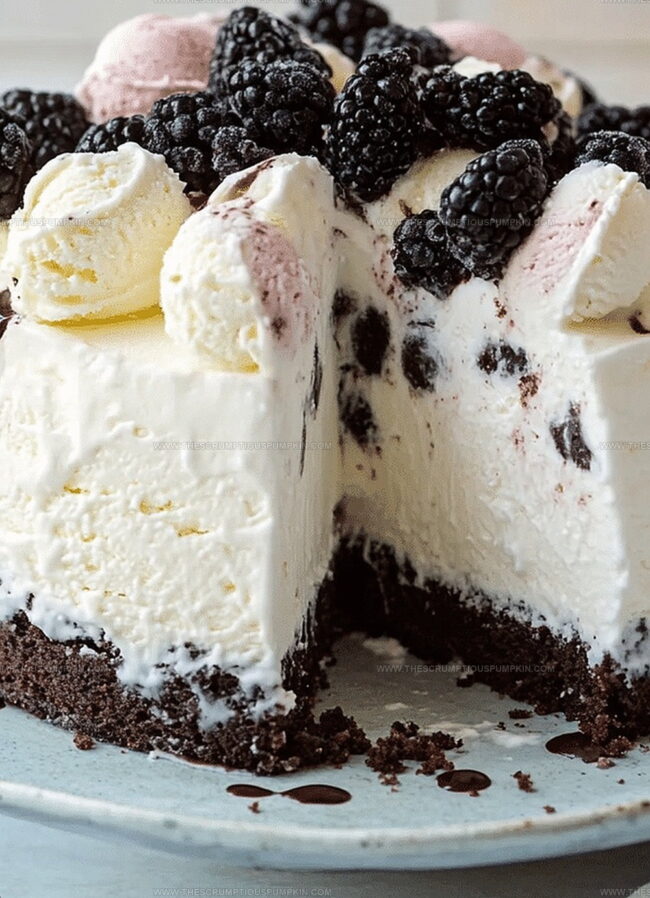
Dreamy Homemade Ice Cream Cake Recipe: A Sweet Summer Treat
Crafting the perfect ice cream cake brings pure joy to summer celebrations.
Layers of creamy delight await your culinary adventure.
Cool desserts like this create magical moments that spark smiles.
Chocolate and vanilla dance together in delightful harmony.
Sweet ingredients blend seamlessly, promising a delectable experience.
Smooth textures and rich flavors will make your gathering unforgettable.
You can become a dessert hero with this simple yet impressive treat.
Why Ice Cream Cake Is Always a Favorite
Ice Cream Cake Ingredients
Ice Cream Base:Crunch Layer:Topping and Decoration:How to Make Ice Cream Cake
Step 1: Prep the Ice Cream
Remove ice cream from the freezer and let it sit at room temperature for about 10 minutes to soften slightly.
This will make spreading much easier and prevent the cake from becoming too hard.
Step 2: Create the First Ice Cream Layer
Open the springform pan and carefully spread the first flavor of ice cream evenly across the bottom.
Use a spatula to smooth the surface and ensure an even layer that reaches the edges of the pan.
Step 3: Add Cookie Crunch
Sprinkle a generous layer of crushed cookies over the ice cream.
Choose your favorite cookies like:Gently press the cookie crumbs to create a compact layer that will add texture to the cake.
Step 4: Spread Creamy Topping
Cover the cookie layer with a smooth layer of whipped topping.
Use a clean spatula to spread it evenly, creating a consistent surface that complements the ice cream and cookies.
Step 5: Build Additional Layers
Repeat the process with another flavor of ice cream, carefully spreading it over the whipped topping.
Add another layer of crushed cookies and more whipped topping if desired.
Step 6: Freeze and Set
Place the cake in the freezer for at least 4 hours, or ideally overnight.
This allows the layers to set and become firm, creating a perfect slice-able dessert.
Step 7: Decorate and Serve
Before serving, get creative with decorations.
Sprinkle colorful candy, drizzle chocolate or caramel sauce, or add additional whipped topping.
Remove the springform pan sides, slice, and enjoy your homemade ice cream cake!
Tips for Ice Cream Cake
Variations of Ice Cream Cake
Serving Ice Cream Cake
Storing Ice Cream Cake
FAQs
Yes, you can make fresh whipped cream by whipping heavy cream with a bit of sugar until stiff peaks form.
Graham crackers, chocolate sandwich cookies, or vanilla wafers are excellent choices that add great texture and flavor to the ice cream cake.
You can prepare the cake up to 3-4 days before serving, keeping it tightly covered in the freezer to maintain its quality and prevent freezer burn.
A springform pan is ideal, but you can also use a regular cake pan lined with plastic wrap for easy removal.
Print
Ice Cream Cake Recipe
- Total Time: 20 minutes
- Yield: 8 1x
Description
Indulgent Ice Cream Cake brings layers of creamy delight and nostalgic charm to dessert lovers everywhere. Sweet memories melt together with rich frosting and cool cake textures, creating a perfect celebration centerpiece you’ll want to savor slice by slice.
Ingredients
Main Ingredients:
- 1 quart (0.95 liters) ice cream
- 2 cups (473 milliliters) crushed cookies or cookie crumbs
Binding/Topping Ingredients:
- 2 cups (473 milliliters) whipped topping
Garnish Ingredients:
- 1/4 cup (59 milliliters) chocolate sauce
- 1/4 cup (59 milliliters) caramel sauce
- 2 tablespoons (30 milliliters) sprinkles
Instructions
- Remove ice cream from freezer and let soften at room temperature for 10-15 minutes until spreadable.
- Line a springform pan with parchment paper for easy removal.
- Carefully spread the first ice cream flavor evenly across the bottom of the pan, creating a smooth base layer about 1-inch thick.
- Crush cookies into fine crumbs and sprinkle them uniformly over the first ice cream layer, creating a delicate crunchy texture.
- Gently spread whipped topping over the cookie crumb layer, ensuring complete coverage and a uniform thickness.
- Add the second ice cream flavor, carefully spreading to maintain distinct layers and avoiding mixing.
- Repeat the cookie crumb and whipped topping process for additional texture and flavor complexity.
- Cover the pan with plastic wrap and transfer to the freezer for 4-6 hours or ideally overnight to allow complete setting.
- Before serving, remove from freezer and let sit at room temperature for 3-5 minutes to slightly soften.
- Garnish with colorful sprinkles, chocolate sauce, or additional whipped topping for a festive presentation.
- Slice with a heated knife for clean, precise servings and enjoy immediately.
Notes
- Let the ice cream sit at room temperature for 5-10 minutes to achieve the perfect spreadable consistency without melting completely.
- Use a spatula or the back of a spoon to create smooth, even layers that look professionally crafted.
- Select complementary cookie flavors that enhance the overall taste, like chocolate cookies with vanilla ice cream or graham crackers with coffee-flavored ice cream.
- For a gluten-free version, replace regular cookies with gluten-free alternatives like almond flour cookies or crushed rice crackers.
- Prep Time: 20 minutes
- Cook Time: 0 minutes
- Category: Desserts
- Method: Freezing
- Cuisine: American
Nutrition
- Serving Size: 8
- Calories: 250 kcal
- Sugar: 20 g
- Sodium: 100 mg
- Fat: 12 g
- Saturated Fat: 7 g
- Unsaturated Fat: 4 g
- Trans Fat: 0.5 g
- Carbohydrates: 30 g
- Fiber: 1 g
- Protein: 3 g
- Cholesterol: 40 mg
Lucas Bennett
Founder & Recipe Developer
Expertise
Education
Blue Ridge Community College – Certificate in Culinary Arts
Focused on seasonal cooking, sustainable kitchen practices, and farm-to-table techniques.
Appalachian State University – B.A. in English
Built critical thinking and analysis through diverse texts. Guided by faculty, it prepares graduates for publishing and more.
Growing up in the rolling hills of North Carolina, Lucas learned early that some of life’s best memories start around a kitchen table. After studying English at Appalachian State University and honing his culinary skills at Blue Ridge Community College, he dreamed of blending storytelling with rustic, seasonal cooking, and The Scrumptious Pumpkin was born.
Lucas focuses on easy, single-serving recipes that turn fresh, local ingredients into something special. His style is simple, heartfelt, and rooted in the beauty of the seasons. When he’s not testing a new dish, you’ll probably find him hiking in the Blue Ridge Mountains, browsing farmers’ markets, or scribbling food stories in a notebook.