The Perfect Ice Cream Cake With Cookie Crunch Recipe for Summer
Crafting a delectable ice cream cake with cookie crunch promises pure dessert magic for anyone seeking a cool, sweet indulgence.
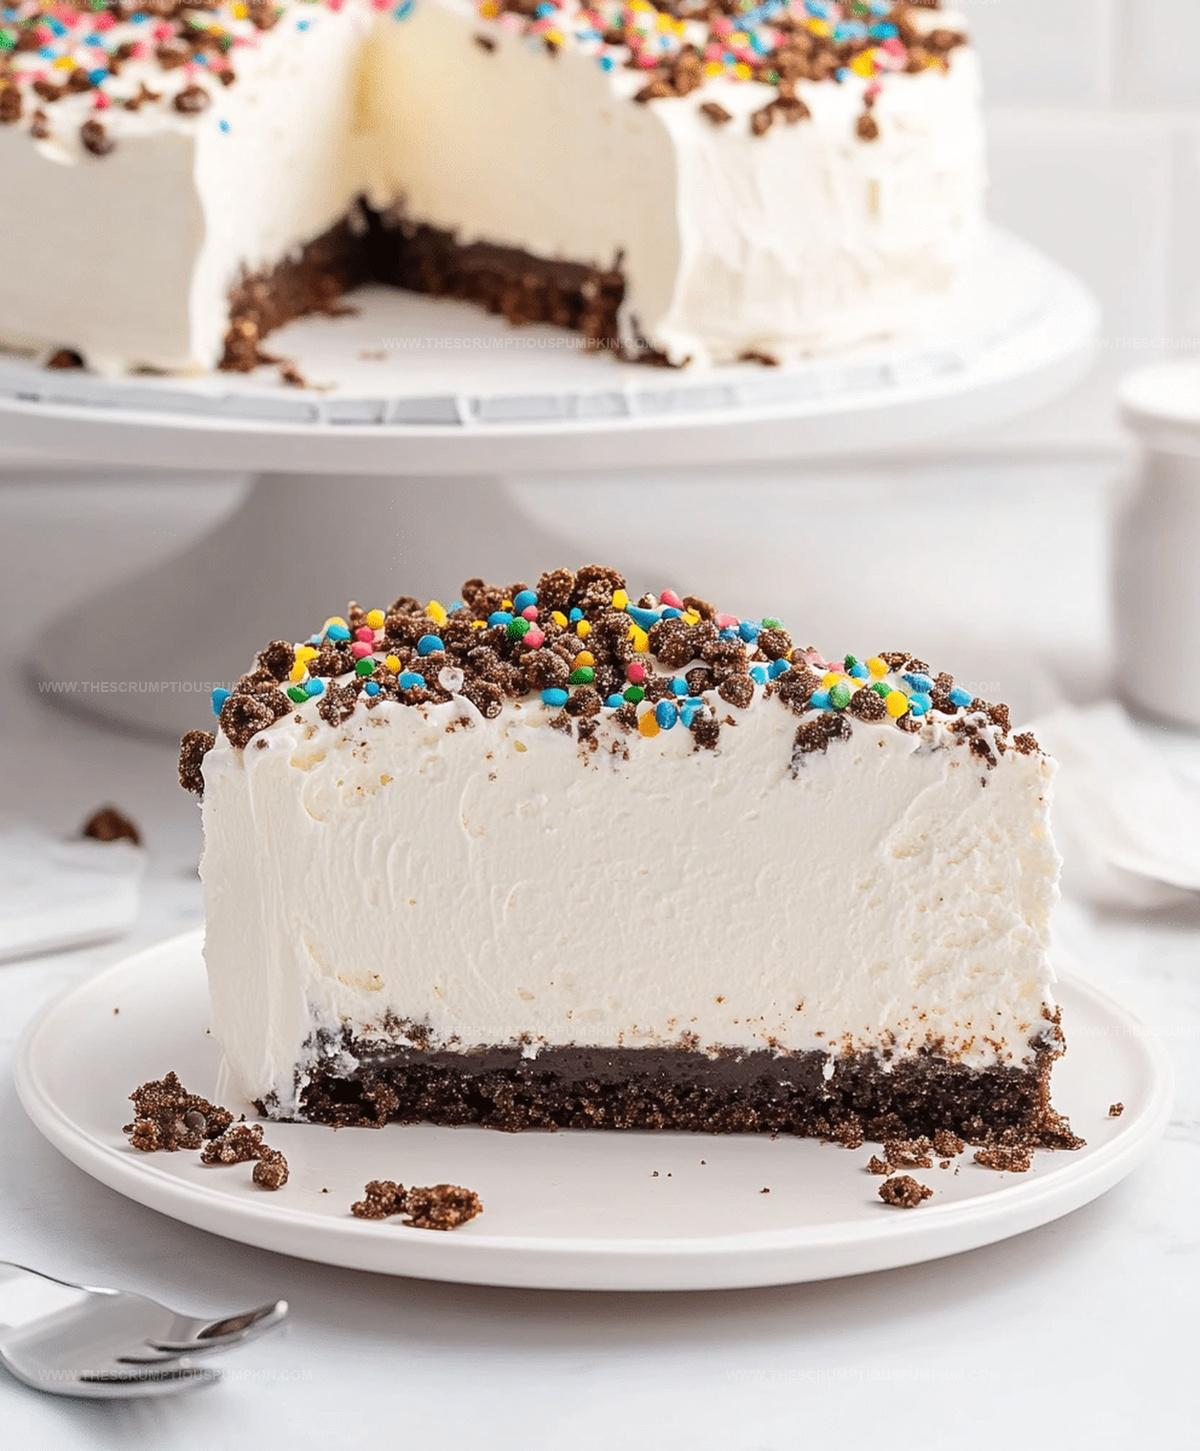
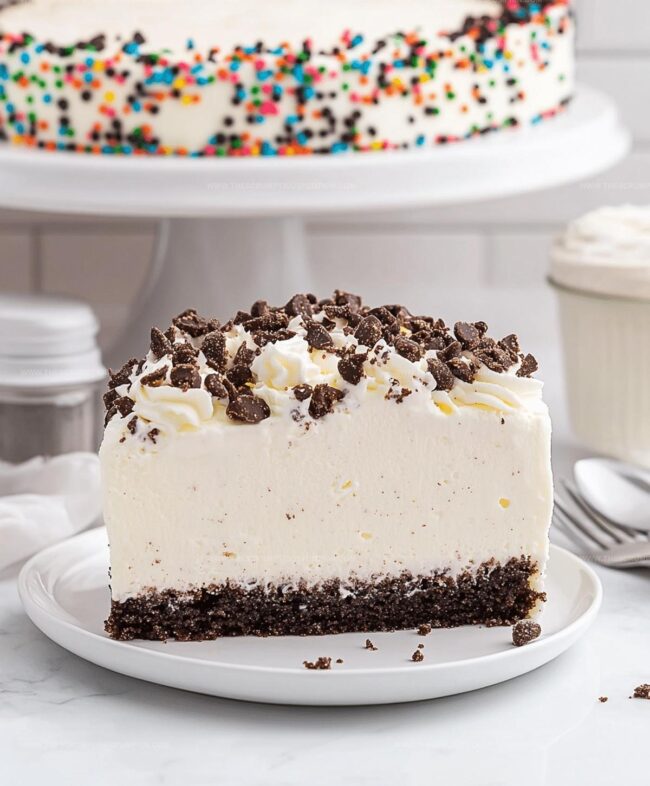
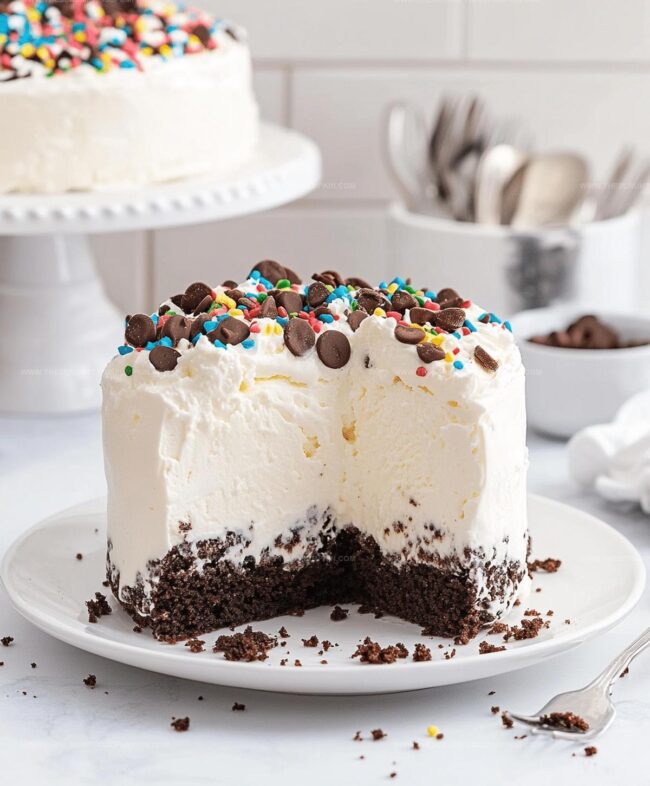
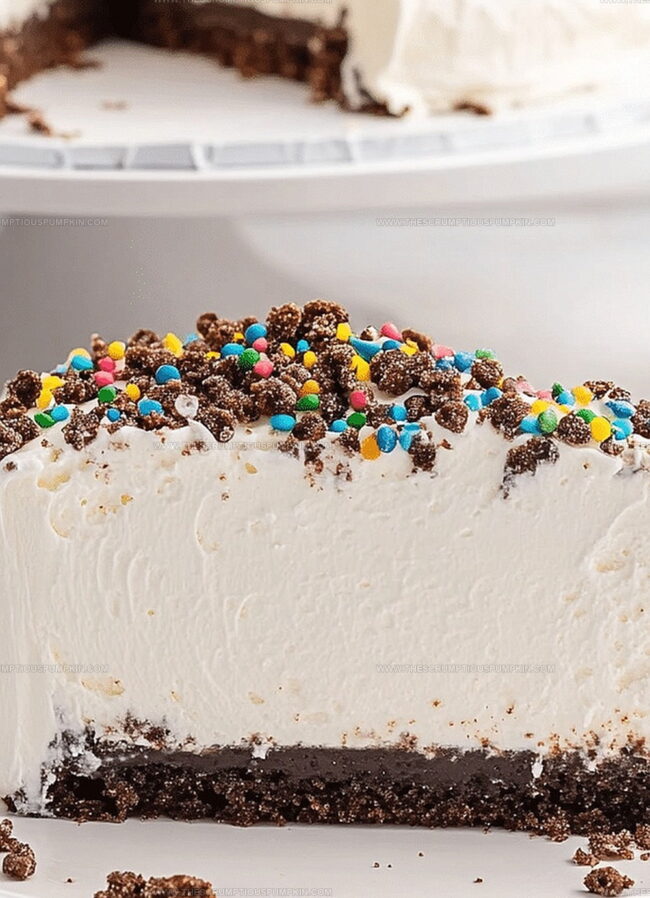
Layers of creamy delight meld perfectly with crisp, buttery cookie fragments that add delightful texture.
Each slice promises a symphony of contrasting sensations that dance across your palate.
Unexpected combinations elevate this classic treat beyond ordinary expectations.
Childhood memories blend seamlessly with sophisticated flavor profiles in this simple yet impressive dessert.
Crisp cookies nestled between smooth ice cream create a sensational experience that feels both nostalgic and contemporary.
Prepare to become the star baker among friends with this irresistible recipe that transforms ordinary ingredients into extraordinary moments.
What Makes Cookie Crunch Ice Cream Cake Unique
Ingredients for Ice Cream Cake with Cookie Crunch
Base:Ice Cream Layers:Sauce and Toppings:How to Assemble Ice Cream Cake with Cookie Crunch
Step 1: Prepare Cake Pan
Line a 9-inch springform pan with parchment paper, ensuring the paper covers the bottom and sides completely for easy removal later.
Step 2: Create Cookie Crust
Crush chocolate sandwich cookies into fine crumbs and mix with melted butter.
Press the mixture firmly into the bottom of the prepared pan, creating an even layer.
Place the pan in the freezer for 10 minutes to set the crust.
Step 3: Add Chocolate Ice Cream Layer
Remove the pan from the freezer and spread softened chocolate ice cream evenly over the cookie crust.
Use a spatula to create a smooth surface.
Return the pan to the freezer for 30 minutes to firm up the layer.
Step 4: Drizzle First Fudge Layer
Pour half of the hot fudge sauce over the chocolate ice cream layer, creating a delicious swirl pattern.
Place the pan back in the freezer for 10 minutes to partially set the fudge.
Step 5: Create Vanilla Ice Cream Layer
Spread softened vanilla ice cream over the fudge layer, carefully smoothing the top with a spatula.
Ensure the layer is even and covers the entire surface.
Step 6: Final Freezing
Freeze the entire cake for at least 4 hours or overnight to allow all layers to set completely and blend flavors.
Step 7: Unmold and Decorate
Carefully remove the cake from the springform pan by releasing the sides and lifting the bottom.
Drizzle the remaining hot fudge sauce over the top of the cake.
Step 8: Serve and Enjoy
Optional: Garnish with whipped cream and chocolate shavings.
Slice the cake with a knife dipped in hot water for clean, smooth cuts.
Serve immediately and enjoy the delicious layers of cookie crunch, ice cream, and fudge.
Tips for Smooth Ice Cream Cake Assembly

Fun Variations on Cookie Crunch Ice Cream Cake
Serving Ideas for Cookie Crunch Ice Cream Cake
How to Keep Ice Cream Cake Fresh and Creamy
FAQs
Yes, you can substitute graham crackers, Oreos, or any crunchy cookie you prefer. Just make sure to crush them finely for a consistent base.
The cake can be stored in the freezer for up to 1 week if wrapped tightly in plastic wrap or placed in an airtight container to prevent freezer burn.
You’ll need a 9-inch springform pan, parchment paper, and a freezer. A mixer or spatula helps with spreading ice cream layers smoothly.
Absolutely! You can prepare the entire cake up to 3-4 days in advance and keep it frozen until you’re ready to serve.
Print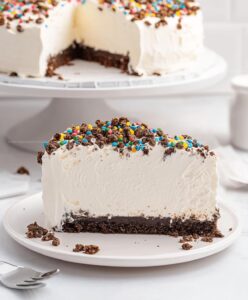
Ice Cream Cake With Cookie Crunch Recipe
- Total Time: 20 minutes
- Yield: 8 1x
Description
Creamy homemade ice cream cake with cookie crunch delivers a spectacular dessert experience that balances smooth textures and delightful crumbled cookie layers. Guests will crave each cool, rich slice packed with irresistible sweetness and satisfying crunch.
Ingredients
Ice Cream Base:
- 1.5 quarts (1.4 liters) vanilla ice cream, softened
- 1.5 quarts (1.4 liters) chocolate ice cream, softened
Cookie Crust:
- 1 package chocolate sandwich cookies, crushed
- 1/4 cup (60 milliliters) unsalted butter, melted
Topping:
- 1 cup (240 milliliters) hot fudge sauce
- Whipped cream (optional)
Instructions
- Prepare a 9-inch springform pan by lining the bottom and sides with parchment paper for easy removal.
- Crush cookies into fine crumbs and combine with melted butter, creating a compact base. Press mixture firmly into the pan’s bottom and chill in the freezer for 10 minutes to set.
- Allow chocolate ice cream to soften at room temperature for 5-7 minutes, then carefully spread an even layer over the cookie crust, ensuring complete coverage. Return to freezer for 30 minutes to firm.
- Gently warm hot fudge sauce and drizzle half the amount across the chocolate ice cream layer, creating an artistic pattern. Freeze for an additional 10 minutes to stabilize.
- Soften vanilla ice cream slightly, then spread smoothly over the fudge layer, creating a uniform surface. Use a spatula to ensure an even top.
- Cover the cake with plastic wrap and freeze for 4-6 hours, or preferably overnight, to allow complete setting and flavor melding.
- Remove cake from freezer 5 minutes before serving to slightly soften. Carefully release from springform pan and transfer to serving plate.
- Drizzle remaining hot fudge sauce across the top, allowing it to cascade down the sides.
- Optional: Garnish with dollops of whipped cream and delicate chocolate shavings for an elegant finish. Slice with a warm knife for clean cuts and serve immediately.
Notes
- Let the ice cream soften at room temperature for 10-15 minutes before spreading to ensure smooth, easy layering without tearing the previous layer.
- Use a hot knife (run under hot water and quickly dry) when cutting through the frozen cake to get clean, precise slices without cracking.
- For a gluten-free version, swap regular cookies with gluten-free graham crackers or almond flour-based cookies to maintain the same crunchy texture.
- Create flavor variations by experimenting with different ice cream combinations like mint chip, cookies and cream, or salted caramel to personalize your dessert.
- Prep Time: 20 minutes
- Cook Time: 0 minutes
- Category: Desserts
- Method: Freezing
- Cuisine: American
Nutrition
- Serving Size: 8
- Calories: 460 kcal
- Sugar: 38 g
- Sodium: 150 mg
- Fat: 24 g
- Saturated Fat: 14 g
- Unsaturated Fat: 8 g
- Trans Fat: 0.5 g
- Carbohydrates: 55 g
- Fiber: 2 g
- Protein: 5 g
- Cholesterol: 45 mg
Lucas Bennett
Founder & Recipe Developer
Expertise
Education
Blue Ridge Community College – Certificate in Culinary Arts
Focused on seasonal cooking, sustainable kitchen practices, and farm-to-table techniques.
Appalachian State University – B.A. in English
Built critical thinking and analysis through diverse texts. Guided by faculty, it prepares graduates for publishing and more.
Growing up in the rolling hills of North Carolina, Lucas learned early that some of life’s best memories start around a kitchen table. After studying English at Appalachian State University and honing his culinary skills at Blue Ridge Community College, he dreamed of blending storytelling with rustic, seasonal cooking, and The Scrumptious Pumpkin was born.
Lucas focuses on easy, single-serving recipes that turn fresh, local ingredients into something special. His style is simple, heartfelt, and rooted in the beauty of the seasons. When he’s not testing a new dish, you’ll probably find him hiking in the Blue Ridge Mountains, browsing farmers’ markets, or scribbling food stories in a notebook.