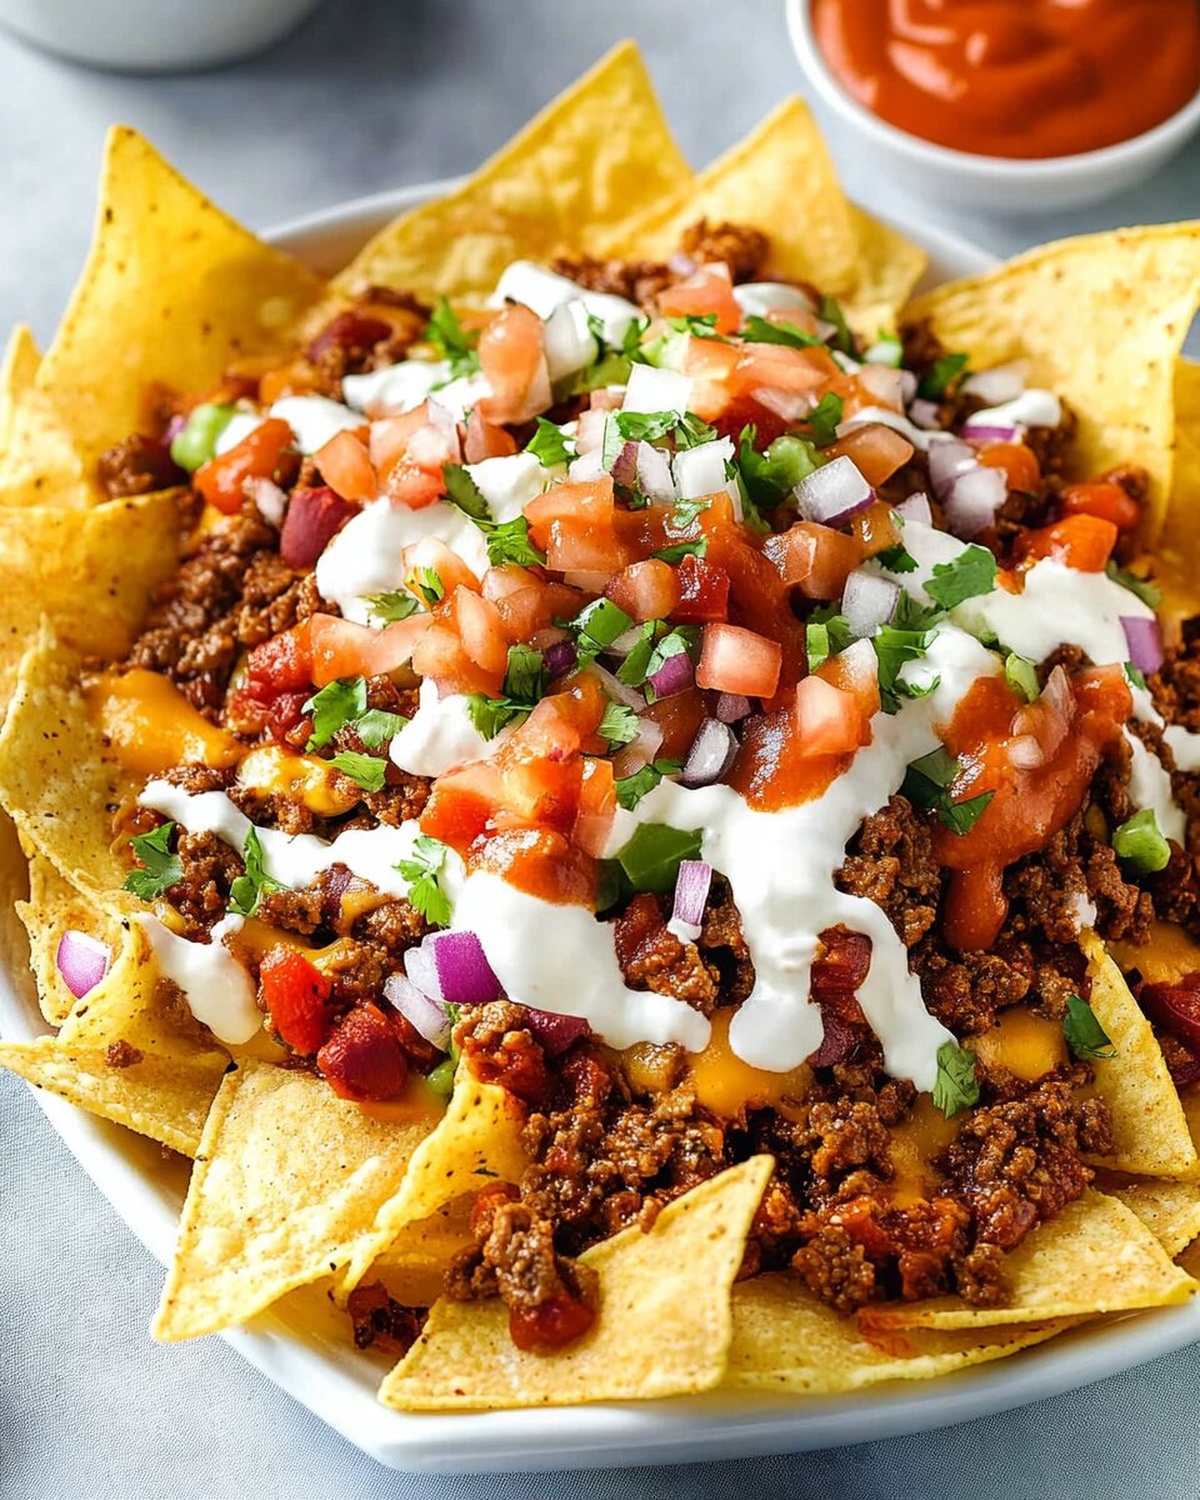
Sizzling Loaded Chili Nacho Platter Recipe for Game Day Fun
Crafting a loaded chili nacho platter promises pure comfort and excitement for your next gathering.
Layers of crispy tortilla chips beckon with savory, hearty goodness.
Melted cheese cascades over spicy ground beef, creating an irresistible canvas of flavor.
Fragrant spices dance through each bite, promising a memorable culinary experience.
Colorful toppings like fresh jalapeños, zesty salsa, and cool sour cream add vibrant complexity.
Quick to assemble and impossible to resist, this crowd-pleasing dish will have everyone reaching for seconds.
You won’t be able to stop at just one serving of this mouthwatering nacho extravaganza.
Why Loaded Chili Nacho Platter Is A Total Crowd-Pleaser
Ingredients List For Loaded Chili Nacho Platter
Base Ingredients:Cheese Group:Garnish and Topping Group:Optional Ingredients:Step-By-Step Guide For Loaded Chili Nacho Platter
Step 1: Prepare Baking Setup
Grab a baking sheet and line it with parchment paper. Turn on the oven and set the temperature to 350°F.
Step 2: Layer Tortilla Chips
Spread tortilla chips across the entire baking sheet, creating an even base for your loaded nachos.
Step 3: Add Hearty Chili
Spoon chili con carne generously over the chips, making sure each chip gets a delicious coating of meaty goodness.
Step 4: Melt Cheese Layer
Shower the nachos with shredded cheese, covering the chili and chips completely for maximum cheesy goodness.
Step 5: Bake to Perfection
Slide the baking sheet into the preheated oven.
Let the nachos bake for 4-5 minutes until the cheese transforms into a gooey, melted paradise.
Step 6: Warm Cheese Sauce
While the nachos are baking, heat up the nacho cheese sauce in the microwave until it becomes smooth and pourable.
Step 7: Create Nacho Masterpiece
Pull the nachos out of the oven. Drizzle with warm queso and add dollops of creamy sour cream across the top.
Step 8: Add Fresh Toppings
Sprinkle over the nachos:Step 9: Serve and Devour
Grab the platter and serve immediately. Get ready for a flavor explosion that’ll make your taste buds dance!
Kitchen Tips For Loaded Chili Nacho Platter
Fun Changes For Loaded Chili Nacho Platter
Side Picks For Loaded Chili Nacho Platter
How To Save Loaded Chili Nacho Platter For Later
Need-To-Know Details About Loaded Chili Nacho Platter
Yes, you can prepare the chili and chips separately in advance. Store chili in the refrigerator and assemble the nachos just before baking to keep the chips crispy.
Absolutely! Replace the meat chili with a bean-based chili or plant-based meat alternative to create a delicious vegetarian version of the loaded nachos.
Sturdy corn tortilla chips are ideal. Look for thick, restaurant-style chips that can hold the weight of the chili and toppings without breaking easily.
Add jalapeños, hot sauce, or use a spicy chili recipe. You can also sprinkle cayenne pepper or use pepper jack cheese to increase the heat level.
Print
Loaded Chili Nacho Platter Recipe
- Total Time: 15 minutes
- Yield: 4 1x
Description
Dive into a flavor-packed world with this loaded chili nacho platter, where crispy tortilla chips meet hearty meat and zesty toppings. Melted cheese, tangy salsa, and fresh garnishes create an irresistible feast you’ll crave again and again.
Ingredients
Meat and Protein:
- 1 cup chili con carne
Chips and Base:
- 1 10-12 ounces (280–340 grams) bag tortilla chips
Cheese and Dairy:
- 1 cup shredded cheddar cheese (or a mix of cheddar, Monterey Jack, and Pepper Jack)
- 1/2 cup nacho cheese sauce (queso), store-bought or homemade
- 1/2 cup sour cream
Garnishes and Toppings:
- 1/4 cup finely chopped red and green onions
- Sliced jalapeños
- Avocado slices
- Chopped cilantro
- Radishes
- Lime wedges
- Hot sauce
Instructions
- Prepare a baking sheet by lining it with parchment paper and preheat the oven to 350°F (175°C) for optimal chip and chili heating.
- Arrange tortilla chips in a single, even layer across the prepared baking sheet to ensure maximum coverage and consistent toppings.
- Generously distribute chili con carne over the chips, making sure each chip receives a hearty portion of the savory meat mixture.
- Liberally cover the chili-topped chips with shredded cheese, creating a complete layer that will melt beautifully.
- Place the loaded baking sheet in the preheated oven and bake for 4-5 minutes, watching for fully melted cheese and heated chili.
- While the nachos are baking, quickly warm the nacho cheese sauce in the microwave until it reaches a smooth, pourable consistency.
- Carefully remove the hot nachos from the oven and immediately drizzle with the warm queso, creating an enticing visual and flavor layer.
- Add a generous dollop of sour cream across the nachos for a cool, creamy contrast to the hot chili and melted cheese.
- Garnish with finely chopped red and green onions, distributing them evenly to provide a fresh, sharp flavor and vibrant color.
- Serve the loaded chili nacho platter immediately to enjoy the perfect balance of crispy, cheesy, and spicy flavors.
Notes
- Swap tortilla chips for healthier alternatives like baked corn chips or vegetable chips to reduce calories and add nutrition.
- Customize the chili’s spice level by adjusting the amount of chili powder or adding hot sauce for heat-loving guests.
- Prepare toppings in advance and keep them in separate containers to create a DIY nacho bar, letting everyone build their perfect plate.
- Make this dish vegetarian-friendly by substituting meat chili with black beans, lentils, or plant-based ground meat alternatives.
- Prep Time: 10 minutes
- Cook Time: 5 minutes
- Category: Appetizer, Snacks
- Method: Baking
- Cuisine: Mexican
Nutrition
- Serving Size: 4
- Calories: 650
- Sugar: 5 g
- Sodium: 900 mg
- Fat: 35 g
- Saturated Fat: 18 g
- Unsaturated Fat: 15 g
- Trans Fat: 0 g
- Carbohydrates: 60 g
- Fiber: 6 g
- Protein: 20 g
- Cholesterol: 70 mg


Mia Thompson
Pastry Chef & Content Creator
Expertise
Education
Portland Community College – Baking and Pastry Arts Program
Specialized in artisanal bread, seasonal desserts, and sustainable baking methods.
National University of Natural Medicine – Bachelor of Science in Nutrition (BScN)
Focused on “Food as Medicine” philosophy, with core threads in nutrition.
Mia’s love affair with baking began in her grandmother’s kitchen, where sneaking spoonfuls of batter first sparked her curiosity. She refined her skills through Portland Community College’s Baking and Pastry Arts Program and her expertise at the National University of Natural Medicine, earning a B.Sc. in Nutrition.
At The Scrumptious Pumpkin, Mia reimagines classics with effortless seasonal treats, healthier twists on old favorites, and playful confections that feel like pure joy. Beyond the oven, she nurtures her urban garden, forages local ingredients around Portland, and leads hands‑on nutrition workshops for her community.