
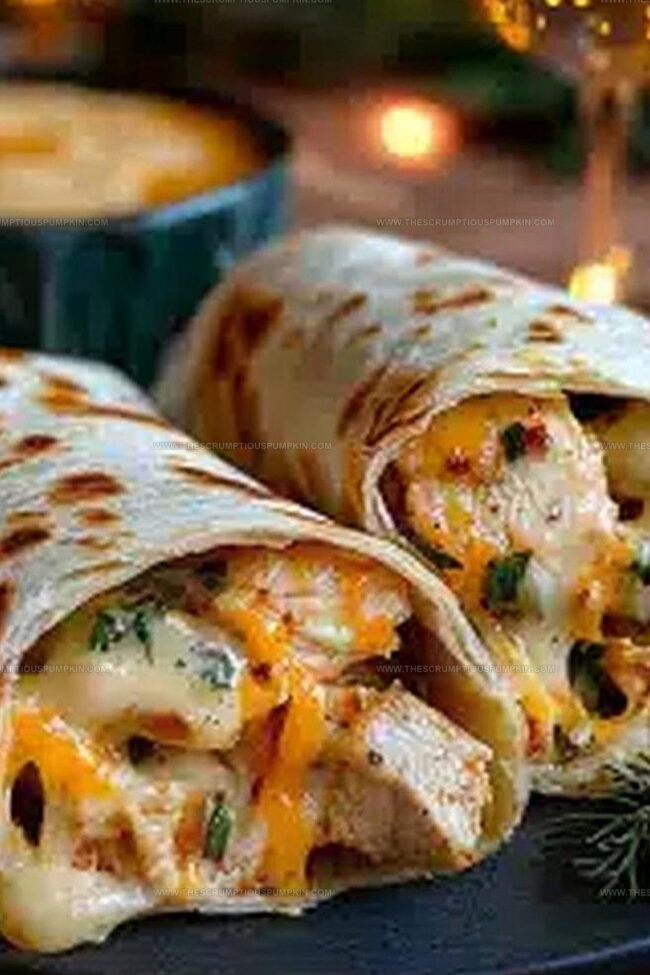
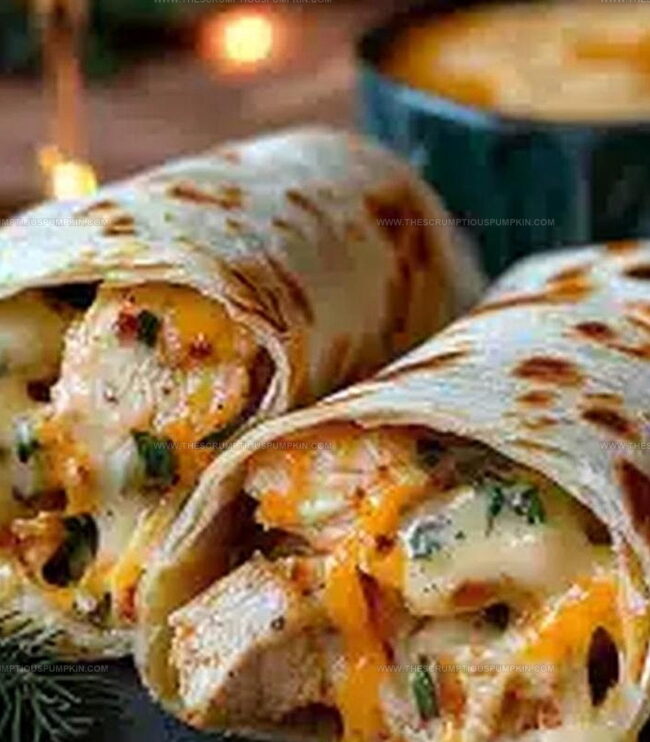
Easy Cheesy Garlic Chicken Wraps Recipe for Cozy Dinners
Crafting mouthwatering cheesy garlic chicken wraps sparks pure culinary excitement in my kitchen!
Weeknight dinners demand quick, delicious solutions that satisfy everyone’s hunger.
Savory aromas of melted cheese and roasted garlic promise an incredible meal ahead.
Tender chicken combines perfectly with creamy textures and bold seasonings.
Soft tortillas become magical vessels for this delightful combination of flavors.
Fresh ingredients transform ordinary ingredients into something spectacular.
Each bite promises a delectable journey through comfort and taste.
Come experience this simple yet irresistible recipe that will become your new dinner favorite!
Cheesy Garlic Chicken Wraps Reasons To Try
Cheesy Garlic Chicken Wraps Ingredient Lineup
For the Protein:For the Tortillas and Wrapping:For the Cheese:For the Seasonings:For the Moisture and Creaminess:For the Oils and Fats:For the Garnish and Freshness:For the Baking Preparation:Cheesy Garlic Chicken Wraps Step Guide
Step 1: Prep the Oven and Baking Surface
Warm the oven to 375°F and line a baking sheet with parchment paper for hassle-free cleanup.
Step 2: Season the Chicken
Create a flavor explosion by coating chicken breasts with:Ensure every inch of the chicken gets some love.
Step 3: Sear the Chicken
Fire up a large skillet with olive oil over medium-high heat. Cook chicken breasts until they develop a gorgeous golden-brown crust, about 3-4 minutes per side.
Step 4: Slice the Chicken
Transfer the seared chicken to a cutting board and slice into thin, even strips for perfect wrapping potential.
Step 5: Warm the Tortillas
Zap flour tortillas in the microwave for 15-20 seconds to make them super flexible and prevent any annoying cracking.
Step 6: Create the Base Layer
Spread a delicate layer of sour cream across each tortilla’s center, creating a creamy foundation that adds extra moisture and flavor.
Step 7: Add the Chicken
Distribute chicken strips evenly across the tortillas, leaving a bit of space at the edges for easy folding.
Step 8: Cheese It Up
Sprinkle a generous mountain of:Let the cheese work its melty magic.
Step 9: Fresh Finishing Touches
Scatter some chopped:Add a pop of color and burst of freshness.
Step 10: Roll and Wrap
Carefully roll the tortillas into tight wraps, tucking in the sides to keep all that deliciousness inside.
Step 11: Prepare for Baking
Place the wraps seam-side down on the prepared baking sheet.
Step 12: Bake to Perfection
Slide the baking sheet into the oven and bake for 12-15 minutes. Look for melted cheese and golden-crispy tortilla edges.
Step 13: Rest and Serve
Remove from the oven and let the wraps rest for 2-3 minutes. This helps the cheese set and prevents any tongue-burning mishaps.
Tips To Help With Cheesy Garlic Chicken Wraps
Fun Combos For Cheesy Garlic Chicken Wraps
What Matches With Cheesy Garlic Chicken Wraps
Storing Cheesy Garlic Chicken Wraps Easily
Cheesy Garlic Chicken Wraps FAQs
Yes, you can use boneless, skinless chicken thighs or even rotisserie chicken as alternatives to chicken breasts. Just ensure the meat is cooked and seasoned well.
Spread a thin layer of sour cream as a moisture barrier and avoid adding too many wet ingredients. Also, make sure to warm tortillas slightly to increase flexibility.
You can prepare the wraps in advance and store them in the refrigerator, covered, for up to 24 hours before baking. Just add a few extra minutes to the baking time when cooking from cold.
Use any combination of melting cheeses you have on hand.
Print
Melty Garlic Chicken Wraps Recipe
- Total Time: 35 minutes
- Yield: 6 1x
Description
Savory cheesy garlic chicken wraps deliver a mouthwatering blend of tender chicken, melted cheese, and zesty garlic in a perfectly rolled package. Each bite promises a delightful explosion of flavor you’ll crave again and again.
Ingredients
Protein:
- 2 lbs boneless, skinless chicken breasts
- 1 cup shredded cheddar cheese
- 1/2 cup mozzarella cheese
Aromatics and Seasonings:
- 4 cloves garlic, minced
- 1 tsp salt
- 1/2 tsp black pepper
- 1 tsp dried oregano
Wrap and Additional Ingredients:
- 6 large flour tortillas
- 2 tbsp olive oil
- 1/4 cup sour cream
- 2 tbsp fresh parsley, chopped
- 1/4 cup green onions, chopped
Instructions
- Preheat the oven to 375°F and prepare a baking sheet with parchment paper for easy cleanup.
- Season chicken breasts thoroughly with minced garlic, salt, black pepper, and dried oregano, ensuring even coating on all sides.
- Heat olive oil in a large skillet over medium-high heat and sear chicken breasts for 3-4 minutes per side until golden brown and slightly crisp.
- Transfer seared chicken to a cutting board and slice into thin, uniform strips to ensure consistent cooking and easy wrapping.
- Warm flour tortillas in the microwave for 15-20 seconds to increase flexibility and prevent cracking during rolling.
- Spread a thin layer of sour cream across the center of each tortilla, creating a moisture barrier and adding creamy texture.
- Distribute sliced chicken evenly across tortillas, leaving space at the edges for secure folding.
- Sprinkle generous amounts of shredded cheddar and mozzarella cheese over the chicken, allowing for maximum melting potential.
- Garnish with chopped green onions and fresh parsley for added flavor and visual appeal.
- Carefully roll tortillas into tight wraps, tucking in sides to prevent filling from falling out.
- Place wrapped tortillas seam-side down on the prepared baking sheet.
- Bake for 12-15 minutes until cheese is completely melted and tortilla edges turn crispy and golden brown.
- Remove from oven and let cool for 2-3 minutes before serving to allow cheese to set and prevent burning.
Notes
- Customize seasoning by experimenting with different herbs like thyme, rosemary, or smoked paprika for unique flavor profiles.
- Swap chicken with grilled tofu or shredded jackfruit for vegetarian-friendly version, maintaining similar texture and cooking technique.
- Use low-fat cheese and Greek yogurt instead of sour cream to reduce calorie content while keeping creamy consistency.
- Ensure chicken is sliced uniformly to promote even cooking and prevent dry or undercooked sections in the wrap.
- Prep Time: 15 minutes
- Cook Time: 20 minutes
- Category: Lunch, Dinner, Snacks
- Method: Baking
- Cuisine: American
Nutrition
- Serving Size: 6
- Calories: 490
- Sugar: 2 g
- Sodium: 810 mg
- Fat: 22 g
- Saturated Fat: 7 g
- Unsaturated Fat: 15 g
- Trans Fat: 0 g
- Carbohydrates: 41 g
- Fiber: 2 g
- Protein: 35 g
- Cholesterol: 95 mg
Mia Thompson
Pastry Chef & Content Creator
Expertise
Education
Portland Community College – Baking and Pastry Arts Program
Specialized in artisanal bread, seasonal desserts, and sustainable baking methods.
National University of Natural Medicine – Bachelor of Science in Nutrition (BScN)
Focused on “Food as Medicine” philosophy, with core threads in nutrition.
Mia’s love affair with baking began in her grandmother’s kitchen, where sneaking spoonfuls of batter first sparked her curiosity. She refined her skills through Portland Community College’s Baking and Pastry Arts Program and her expertise at the National University of Natural Medicine, earning a B.Sc. in Nutrition.
At The Scrumptious Pumpkin, Mia reimagines classics with effortless seasonal treats, healthier twists on old favorites, and playful confections that feel like pure joy. Beyond the oven, she nurtures her urban garden, forages local ingredients around Portland, and leads hands‑on nutrition workshops for her community.