Tangy Mini Fruit Tarts Recipe: Sweet Bites of Summer Joy
Crafting delightful mini fruit tarts brings pure joy to any kitchen adventure.
Sweet pastry shells cradle a creamy filling that promises delectable moments.
Delicate and elegant, these tiny treats capture everyone’s imagination with their charming appearance.
Fresh seasonal fruits add vibrant colors and natural sweetness to each bite-sized delight.
Light, crisp pastry provides the perfect canvas for your culinary creativity.
Simple ingredients combine to create something truly magical on your dessert plate.
You’ll fall in love with how effortlessly these miniature desserts become the star of any gathering.
Why Mini Fruit Tarts Are A Sweet Treat Anytime
What You’ll Need For Mini Fruit Tarts
Base Ingredients:Filling Ingredients:Topping Ingredients:How To Make Mini Fruit Tarts
Step 1: Create Buttery Pastry Base
Grab your food processor and toss in flour, powdered sugar, and a pinch of salt. Drop in chilled butter cubes and pulse until mixture looks like tiny peas.
Crack an egg and splash vanilla extract into the mix. Blend until a soft dough forms.
Wrap the dough in plastic and let it chill in the refrigerator for one hour to become firm.
Step 2: Shape and Prepare Tart Shells
Turn the oven to 350°F.
Dust your countertop with flour and roll out the chilled dough. Cut circular shapes that fit perfectly into mini tart pans.
Gently press the dough into each pan, creating delicate edges. Use a fork to poke small holes in the bottom.
Pop the tart shells into the freezer for 20 minutes to set their shape.
Step 3: Bake Golden Tart Crusts
Slide the tart shells into the preheated oven.
Bake for 15-20 minutes until they turn a beautiful golden brown. Remove and let them cool completely on a wire rack.
Step 4: Whip Up Creamy Vanilla Filling
Pour milk into a saucepan and add vanilla. Heat until steaming.
In a separate bowl, whisk together:Slowly pour a bit of hot milk into the egg mixture to warm it gently. Pour the tempered mixture back into the saucepan.
Cook over medium-low heat, stirring constantly until the cream thickens. Transfer to the refrigerator to cool.
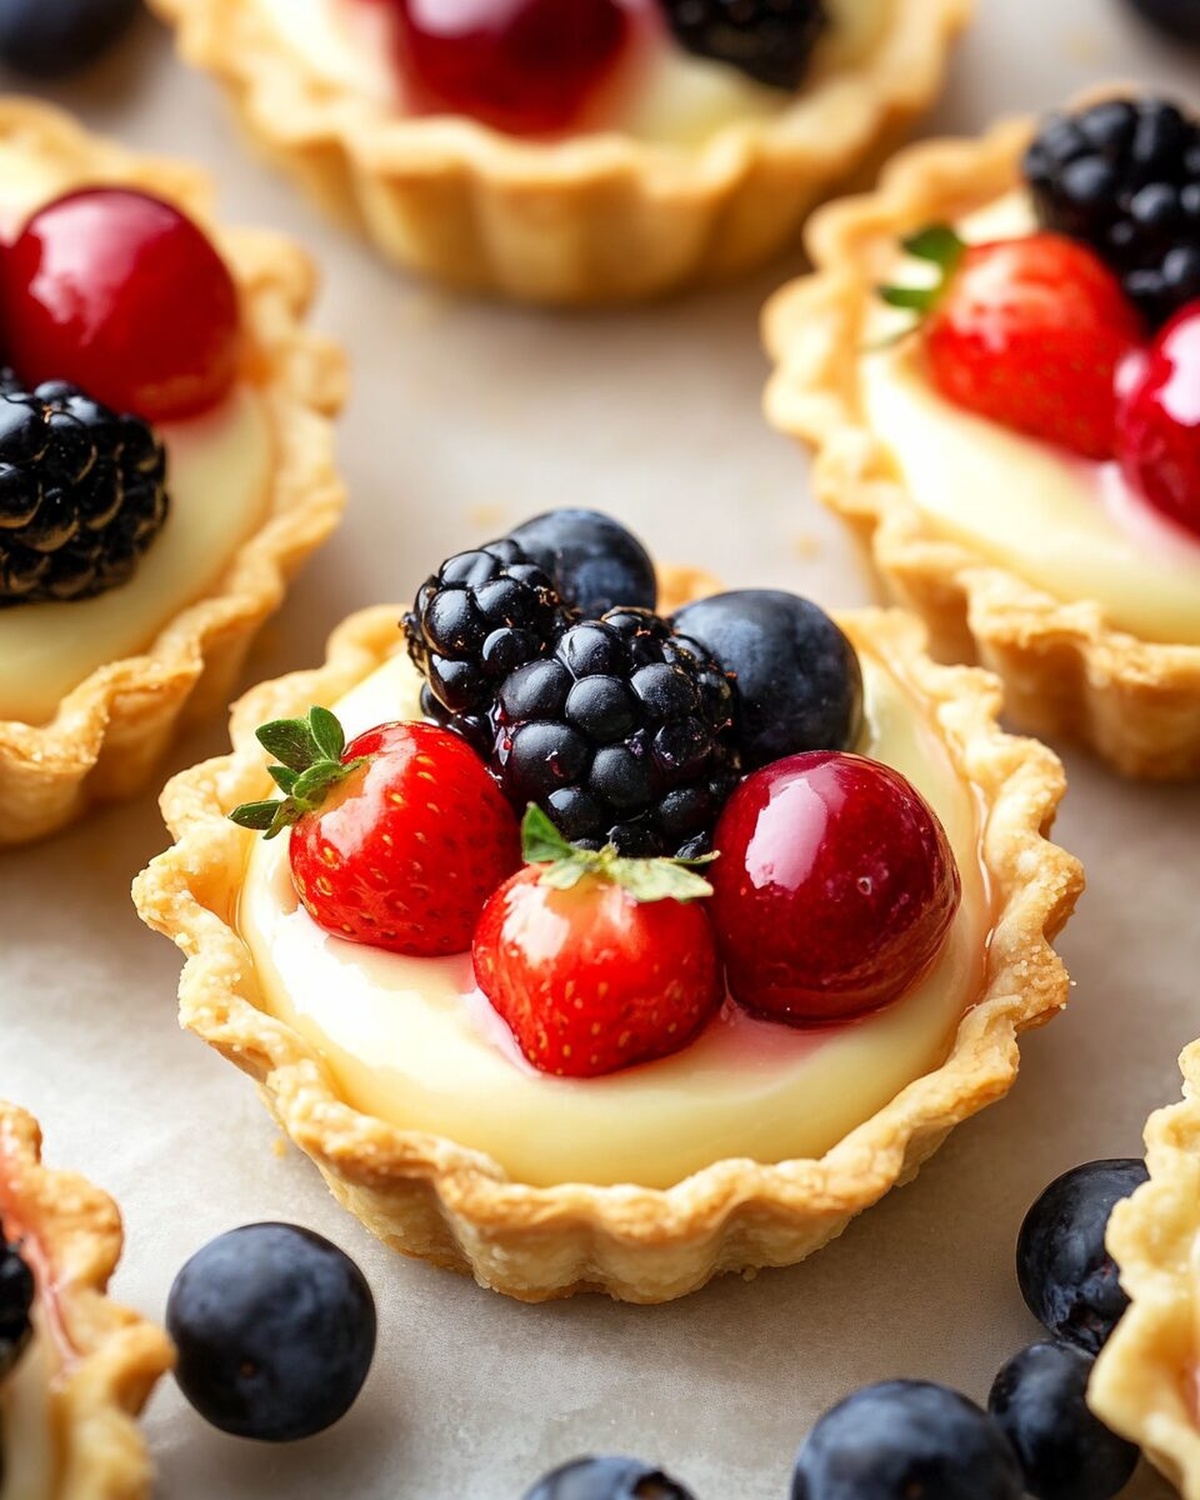
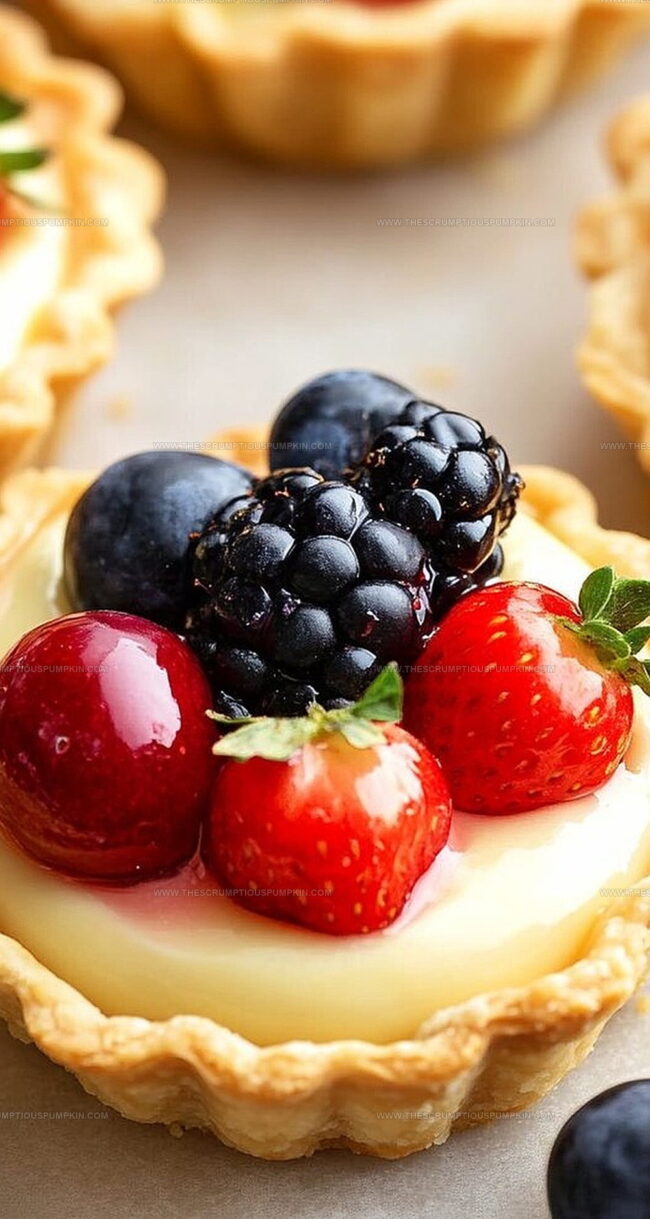
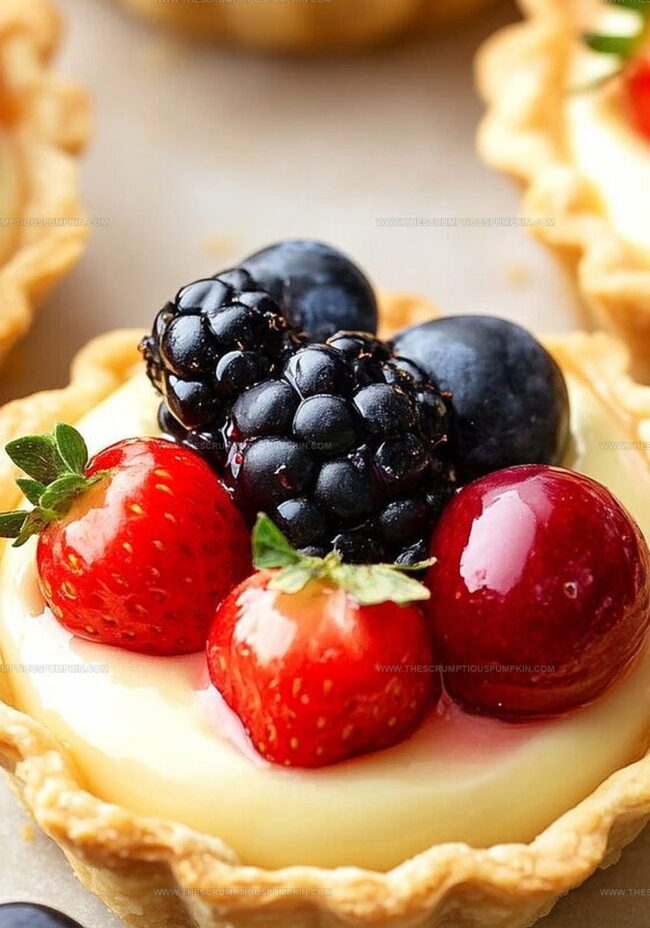
Step 5: Assemble Gorgeous Fruit Tarts
Spoon the chilled pastry cream into each cooled tart shell. Decorate the top with an array of fresh, colorful fruits.
For an extra touch of shine, mix apricot jam with a splash of water and brush over the fruit.
Tips To Master Mini Fruit Tarts
Mini Fruit Tarts With A Twist
Perfect Pairings For Mini Fruit Tarts
How To Keep Mini Fruit Tarts Fresh
FAQs For Mini Fruit Tarts
Yes, you can prepare the tart crust dough up to 2 days in advance and store it wrapped in plastic in the refrigerator. You can also freeze the unbaked crusts for up to 1 month.
Berries like strawberries, raspberries, and blueberries are perfect. Sliced kiwis, mandarin oranges, and fresh peaches also work wonderfully. Choose fruits that are ripe and colorful.
Constantly whisk the mixture while cooking and add warm milk slowly to temper the eggs. Strain the cream through a fine-mesh sieve if you see any small lumps forming during cooking.
Print
Mini Fruit Tarts Recipe
- Total Time: 1 hour 35-40 minutes
- Yield: 12 1x
Description
Delightful mini fruit tarts offer a perfect balance of buttery pastry and fresh seasonal fruits. Sweet miniature desserts provide a charming bite-sized treat you’ll adore for elegant gatherings or casual afternoon indulgence.
Ingredients
Tart Crust Ingredients:
- 2 cups (480 milliliters) all-purpose flour
- 1/2 cup (113 grams) unsalted butter, cold
- 1 egg
- 1/2 cup (60 grams) powdered sugar
- 1 teaspoon vanilla extract
- 1/4 teaspoon kosher salt
Pastry Cream Ingredients:
- 2 cups (480 milliliters) whole milk, room temperature
- 5 large egg yolks
- 1/2 cup (100 grams) granulated sugar
- 3 tablespoons cornstarch
Fruit Topping Ingredients:
- Fresh strawberries
- Fresh blueberries
- 1 tablespoon (15 milliliters) apricot jam
- 1/2 teaspoon water
Instructions
- Craft a delicate shortbread-like dough by blending flour, powdered sugar, and salt in a food processor. Incorporate cold butter until crumbly, then mix in egg and vanilla extract until a cohesive dough forms.
- Refrigerate the dough for 1 hour to enhance flavor and texture development.
- Preheat the oven to 350°F. Roll out chilled dough on a lightly floured surface and carefully cut rounds to fit mini tart molds. Gently press dough into each pan, then puncture the base with a fork to prevent rising.
- Freeze the prepared tart shells for 20 minutes to solidify the butter and maintain crisp edges.
- Bake the shells for 15-20 minutes until achieving a golden-brown color. Allow to cool completely on a wire rack.
- Create luxurious pastry cream by heating milk and vanilla in a saucepan. Simultaneously whisk sugar, cornstarch, and egg yolks in a separate bowl.
- Gradually temper the egg mixture by slowly adding warm milk, then return the combined liquid to the saucepan. Simmer over medium-low heat, continuously whisking until the cream thickens to a pudding-like consistency.
- Chill the pastry cream thoroughly in the refrigerator to set.
- Assemble the tarts by generously piping or spooning the cooled pastry cream into each crisp shell.
- Artfully arrange fresh fruit on top of the cream, creating an elegant visual display.
- Optional: Enhance the fruit’s appearance by brushing with a delicate glaze made from diluted apricot jam.
Notes
- Chill the dough thoroughly to prevent shrinkage and ensure a flaky, tender crust that holds its shape during baking.
- Blind bake the tart shells by using pie weights or dried beans to prevent the crust from puffing up and maintain a crisp texture.
- For a gluten-free version, substitute all-purpose flour with almond flour or a gluten-free blend, keeping the same proportions in the recipe.
- Customize the fruit topping by using seasonal fruits or a mix of berries, tropical fruits, or sliced stone fruits for variety and vibrant colors.
- Prep Time: 1 hour 20 minutes
- Cook Time: 15-20 minutes
- Category: Desserts, Snacks
- Method: Baking
- Cuisine: French
Nutrition
- Serving Size: 12
- Calories: 240
- Sugar: 10 g
- Sodium: 50 mg
- Fat: 12 g
- Saturated Fat: 7 g
- Unsaturated Fat: 3 g
- Trans Fat: 0 g
- Carbohydrates: 30 g
- Fiber: 1 g
- Protein: 4 g
- Cholesterol: 80 mg
Mia Thompson
Pastry Chef & Content Creator
Expertise
Education
Portland Community College – Baking and Pastry Arts Program
Specialized in artisanal bread, seasonal desserts, and sustainable baking methods.
National University of Natural Medicine – Bachelor of Science in Nutrition (BScN)
Focused on “Food as Medicine” philosophy, with core threads in nutrition.
Mia’s love affair with baking began in her grandmother’s kitchen, where sneaking spoonfuls of batter first sparked her curiosity. She refined her skills through Portland Community College’s Baking and Pastry Arts Program and her expertise at the National University of Natural Medicine, earning a B.Sc. in Nutrition.
At The Scrumptious Pumpkin, Mia reimagines classics with effortless seasonal treats, healthier twists on old favorites, and playful confections that feel like pure joy. Beyond the oven, she nurtures her urban garden, forages local ingredients around Portland, and leads hands‑on nutrition workshops for her community.