
Irresistible Cheesy Garlic Chicken Wraps Recipe For Lunch Joy
Whipping up these delectable cheesy garlic chicken wraps might just become your new culinary obsession.
Savory aromas will dance through your kitchen, promising a meal that satisfies deep hunger.
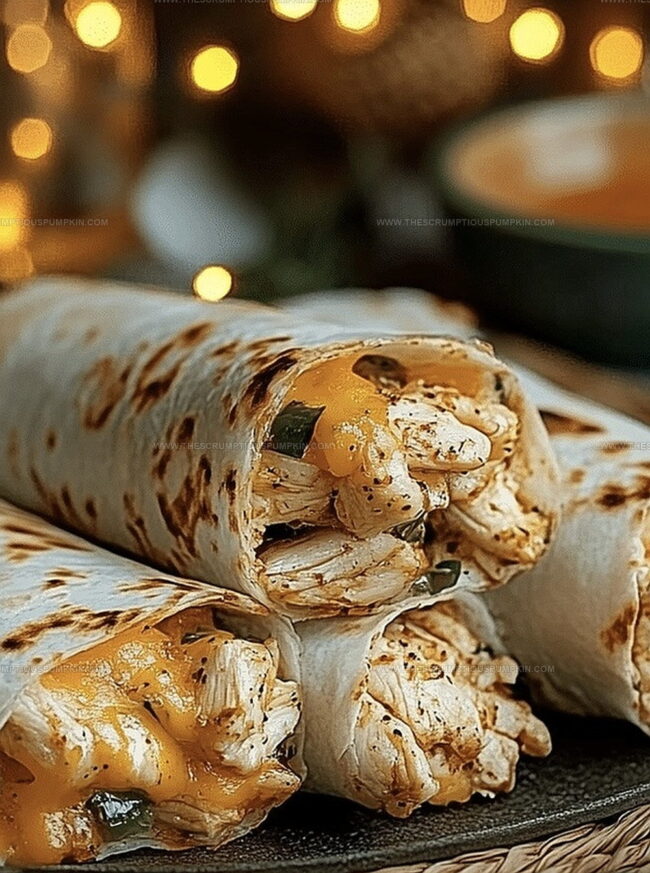
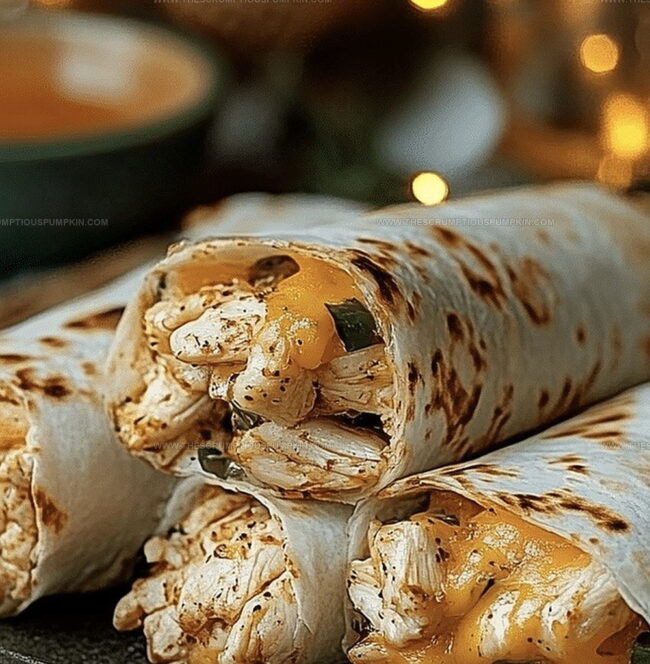
Layers of melted cheese and tender chicken create a perfect handheld delight.
Garlic’s bold flavor infuses each bite with irresistible richness.
Soft tortillas embrace the delicious filling, making every mouthful a celebration of comfort food.
Crisp vegetables add a refreshing crunch that balances the warm, gooey interior.
You’ll want to bookmark this recipe for those nights when simple, delicious meals are the ultimate goal.
Why Cheesy Garlic Chicken Wraps Are So Easy And Flavorful
What Goes Into Cheesy Garlic Chicken Wraps
For the Protein:For the Seasoning:For the Wrapping:For the Cheese:For the Fresh Garnish:For the Optional Topping:For the Cooking:How To Make Cheesy Garlic Chicken Wraps At Home
Step 1: Prep Oven and Baking Surface
Set the oven to 375°F and line a baking sheet with parchment paper for easy cleanup and non-stick cooking.
Step 2: Slice Chicken Precisely
Cut chicken breasts into thin, uniform strips to guarantee even cooking and quick preparation.
Step 3: Craft Flavor Blend
In a large mixing bowl, combine:Step 4: Coat Chicken with Seasoning
Thoroughly toss chicken strips in the garlic seasoning mixture, ensuring each piece is generously covered with aromatic spices.
Step 5: Sear Chicken to Golden Perfection
Heat olive oil in a large skillet over medium-high heat. Cook chicken strips until golden brown and nearly done, about 4-5 minutes per side.
Step 6: Rest Chicken
Remove chicken from skillet and let rest for 2-3 minutes to preserve moisture and prevent dryness.
Step 7: Warm Tortillas
Microwave flour tortillas for 15-20 seconds to enhance flexibility and prevent cracking.
Step 8: Layer Chicken
Arrange seared chicken strips diagonally on each tortilla for even distribution.
Step 9: Add Cheesy Goodness
Sprinkle a combination of:over the chicken, allowing heat to slightly melt the cheese.
Step 10: Garnish with Fresh Herbs
Top with freshly chopped:for a burst of color and vibrant flavor.
Step 11: Optional Creamy Touch
Add a dollop of sour cream for extra creaminess and tangy flavor.
Step 12: Roll Tortillas
Carefully roll tortillas into tight wraps, tucking in sides to prevent filling from spilling.
Step 13: Bake Chicken Rolls
Place wrapped chicken rolls on prepared baking sheet and bake for 10-12 minutes until cheese melts and tortillas become lightly crisp.
Step 14: Serve and Enjoy
Remove from oven, let cool for 2 minutes, then slice diagonally for serving.
Helpful Tips For Cheesy Garlic Chicken Wraps
Fun Ideas To Change Up Cheesy Garlic Chicken Wraps
What Goes Well With Cheesy Garlic Chicken Wraps
How To Store Cheesy Garlic Chicken Wraps Without Sogging
Common FAQs About Cheesy Garlic Chicken Wraps
You can replace mozzarella with monterey jack cheese, use Greek yogurt instead of sour cream, and swap flour tortillas with corn tortillas. Adjust seasonings according to your taste preferences.
Add red pepper flakes to the seasoning blend, include diced jalapeños in the filling, or drizzle hot sauce over the chicken strips before rolling. These options will boost the heat level without changing the recipe’s core structure.
Yes, you can prepare chicken strips and wrap them in advance. Store assembled rolls in an airtight container in the refrigerator for up to 3 days. Reheat in the oven at 350°F for 10-12 minutes to maintain crispiness.
Print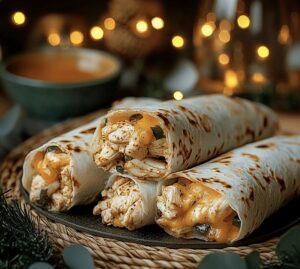
Multi-Cheese Garlic Chicken Wraps Recipe
- Total Time: 35 minutes
- Yield: 6 1x
Description
Savory cheesy garlic chicken wraps deliver comfort wrapped in golden tortillas, blending zesty flavors and melted cheese. Crisp edges and warm fillings promise a delightful meal you’ll crave again and again.
Ingredients
Protein:
- 2 lbs chicken breast, boneless and skinless
- 1 cup shredded mozzarella cheese
- 1/2 cup shredded cheddar cheese
Wrap and Seasoning:
- 6 large flour tortillas
- 4 cloves garlic, minced
- 2 tbsp olive oil
- 1 tsp salt
- 1/2 tsp black pepper
Herbs and Extras:
- 1/4 cup fresh parsley, chopped
- 2 tbsp green onions, chopped
- 1/4 cup sour cream (optional)
Instructions
- Preheat the oven to 375°F and prepare a baking sheet with parchment paper for easy cleanup.
- Slice chicken breasts into thin, uniform strips to ensure even cooking and quick preparation.
- Create a robust seasoning blend by mixing minced garlic, salt, and black pepper in a large mixing bowl.
- Toss chicken strips thoroughly in the garlic seasoning mixture, ensuring each piece is generously coated with the aromatic spices.
- Heat olive oil in a large skillet over medium-high heat and sear chicken strips until golden brown and nearly cooked through, approximately 4-5 minutes per side.
- Remove chicken from skillet and let rest for 2-3 minutes to retain moisture and prevent drying.
- Warm flour tortillas in the microwave for 15-20 seconds to enhance flexibility and prevent cracking.
- Layer each tortilla with seared chicken strips, creating a diagonal arrangement for even distribution.
- Sprinkle a blend of mozzarella and cheddar cheese over the chicken, allowing the heat to slightly melt the cheese.
- Garnish with freshly chopped parsley and green onions for a burst of color and fresh flavor.
- Optional: Add a dollop of sour cream for extra creaminess and tang.
- Carefully roll the tortillas into tight wraps, tucking in the sides to prevent filling from spilling.
- Place wrapped chicken rolls on the prepared baking sheet and bake for 10-12 minutes until cheese is melted and tortillas are lightly crisp.
- Remove from oven, let cool for 2 minutes, then slice diagonally for serving.
Notes
- Chicken Thickness Matters: Cut chicken strips uniformly to guarantee consistent cooking and prevent dry or undercooked sections.
- Seasoning Secret: Don’t be shy with garlic and spices; they infuse incredible depth and aroma into the chicken.
- Cheese Melting Technique: Allow residual heat from chicken to gently melt cheese for a smooth, creamy texture without overcooking.
- Wrap Rolling Pro Tip: Fold tortilla sides inward before rolling to create a tight seal that prevents filling from escaping during baking.
- Dietary Adaptations: Swap flour tortillas with gluten-free alternatives for celiac-friendly version; use low-fat cheese for lighter option.
- Meal Prep Hack: Prepare chicken strips and wraps in advance, refrigerate, and bake just before serving to save time during busy weeknights.
- Prep Time: 15 minutes
- Cook Time: 20 minutes
- Category: Lunch, Dinner, Snacks
- Method: Baking
- Cuisine: American
Nutrition
- Serving Size: 6
- Calories: 430
- Sugar: 1 g
- Sodium: 710 mg
- Fat: 18 g
- Saturated Fat: 6 g
- Unsaturated Fat: 10 g
- Trans Fat: 0 g
- Carbohydrates: 40 g
- Fiber: 2 g
- Protein: 35 g
- Cholesterol: 95 mg
Mia Thompson
Pastry Chef & Content Creator
Expertise
Education
Portland Community College – Baking and Pastry Arts Program
Specialized in artisanal bread, seasonal desserts, and sustainable baking methods.
National University of Natural Medicine – Bachelor of Science in Nutrition (BScN)
Focused on “Food as Medicine” philosophy, with core threads in nutrition.
Mia’s love affair with baking began in her grandmother’s kitchen, where sneaking spoonfuls of batter first sparked her curiosity. She refined her skills through Portland Community College’s Baking and Pastry Arts Program and her expertise at the National University of Natural Medicine, earning a B.Sc. in Nutrition.
At The Scrumptious Pumpkin, Mia reimagines classics with effortless seasonal treats, healthier twists on old favorites, and playful confections that feel like pure joy. Beyond the oven, she nurtures her urban garden, forages local ingredients around Portland, and leads hands‑on nutrition workshops for her community.