
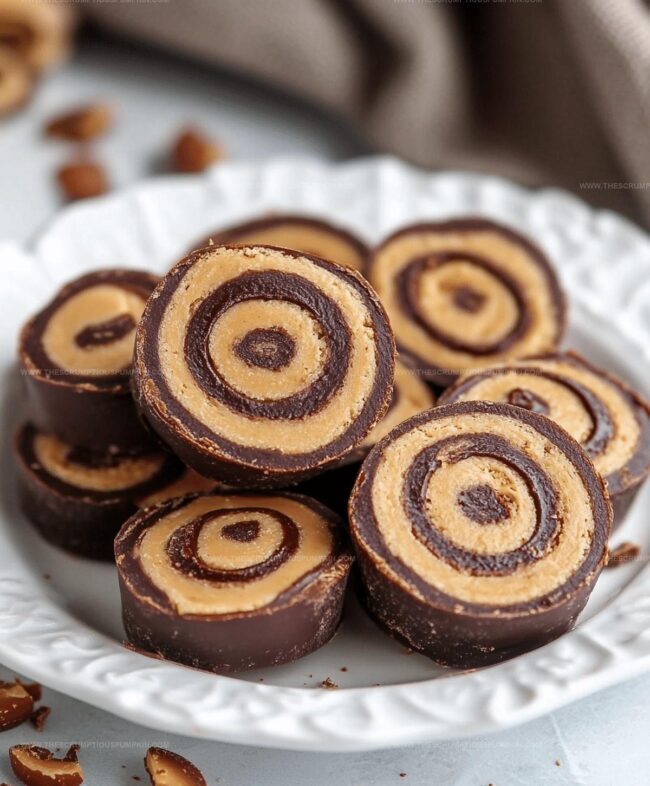
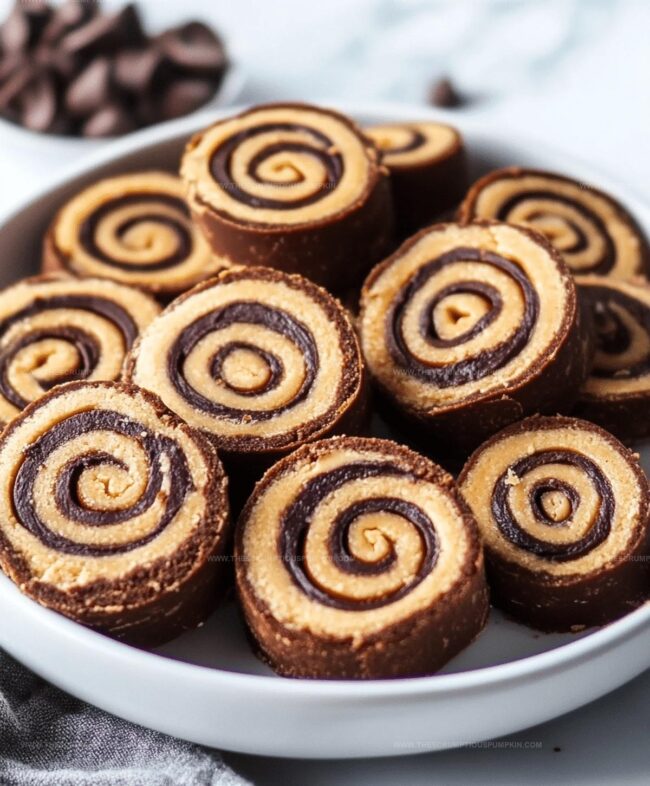
Sweet Swirls: No Bake Chocolate Peanut Butter Pinwheels Recipe
Sweet memories swirl around these no bake chocolate peanut butter pinwheels that blend creamy textures with nostalgic comfort.
Childhood afternoons often sparkled with simple dessert magic like these delightful treats.
Minimal kitchen skills work perfectly for crafting such a delectable snack.
Rich chocolate and smooth peanut butter create an irresistible dance of flavors that mesmerize taste buds.
Delicate spirals promise pure indulgence without turning on a single oven burner.
Quick preparation means you can satisfy sudden cravings in minutes.
Let’s unroll these decadent pinwheels and savor every blissful bite.
Reasons You’ll Adore No Bake Chocolate Peanut Butter Pinwheels
Pinwheel Ingredient Essentials For Easy No-Bake Treats
Base Ingredients:Binding Ingredients:Preparation Ingredients:How To Make Pinwheels In Minutes
Step 1: Blend Creamy Base
In a mixing bowl, whisk together powdered sugar, peanut butter, and softened butter until the mixture becomes smooth and well-combined.
Make sure there are no lumps for a perfect texture.
Step 2: Flatten Delicious Layer
Place a large sheet of parchment paper on your work surface.
Transfer the peanut butter mixture onto the paper and gently roll it out into a rectangular shape using a rolling pin.
Cover the mixture with another sheet of parchment paper to prevent sticking and ensure an even surface.
Step 3: Drizzle Chocolate Magic
Melt chocolate using a double boiler or microwave in short intervals, stirring frequently to prevent burning.
Carefully spread the melted chocolate in an even layer across the entire peanut butter rectangle, leaving a small border around the edges.
Step 4: Create Elegant Roll
Starting from the longer side of the rectangle, slowly and tightly roll the mixture into a compact log.
Use the parchment paper to help guide and support the rolling process, ensuring a smooth and consistent shape.
Step 5: Chill and Set
Wrap the rolled log in plastic wrap and place it in the refrigerator.
Allow the pinwheels to firm up for at least 4-6 hours, or preferably overnight.
The chilling process helps the dessert maintain its shape and enhances the flavor.
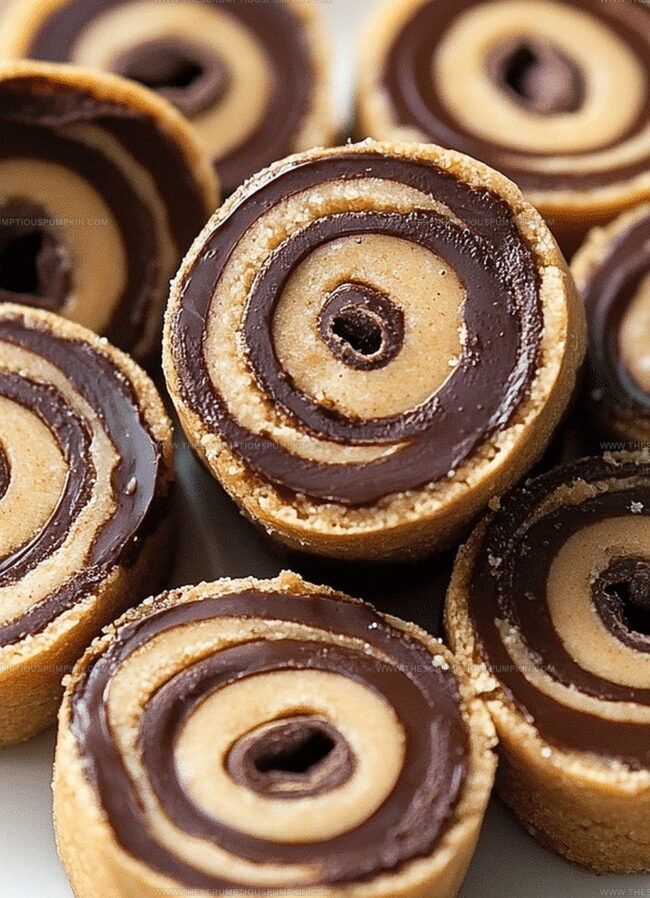
Step 6: Slice and Serve
Remove the log from the refrigerator and unwrap it.
Using a sharp knife, slice the log into thin pinwheel rounds.
Arrange the pinwheels on a serving plate and enjoy the delightful combination of chocolate and peanut butter.
Smart Tips For Perfect Pinwheel Slices

Fun Ways To Switch Up Pinwheels
Serving Pinwheels For Maximum Fun
Storing Pinwheels To Keep Them Fresh
FAQs
No, they’re super easy! Even beginners can create these with just a few simple steps and minimal cooking skills.
All you need are basic kitchen tools like a mixing bowl, parchment paper, and a refrigerator. No fancy equipment required.
You can swap peanut butter with almond or cashew butter, and use different types of chocolate like milk or dark chocolate to suit your taste.
These delicious treats can stay fresh in the refrigerator for up to 5-7 days when stored in an airtight container, making them perfect for advance preparation.
Print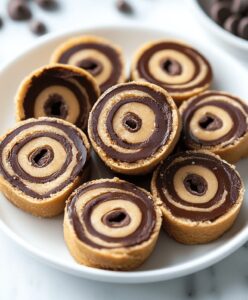
No Bake Chocolate Peanut Butter Pinwheels Recipe
- Total Time: 12 hours 20 minutes
- Yield: 12 1x
Description
Sweet choco-peanut butter pinwheels dance with creamy richness and delightful swirls of comfort. Crisp cookie base and silky filling invite you to savor each irresistible bite of pure dessert magic.
Ingredients
Main Ingredients:
- 3/4 cup (170 grams) creamy peanut butter
- 1/4 cup (57 grams) unsalted butter, softened
- 2 cups (340 grams) semi-sweet chocolate chips, melted
Binding Ingredient:
- 1 1/2 cups (180 grams) powdered sugar
Garnish/Coating:
(none)
Instructions
- Combine powdered sugar, peanut butter, and softened butter in a mixing bowl, blending until a uniform, silky consistency develops.
- Place the mixture between two parchment paper sheets and carefully roll into a precise rectangular shape, ensuring even thickness.
- Gently drizzle and spread melted chocolate across the entire peanut butter surface, creating a smooth, complete coverage.
- Tightly roll the rectangle from one long edge to the other, forming a compact cylindrical log with defined layers.
- Transfer the log to the refrigerator and allow it to chill for 12 hours, enabling the ingredients to set and solidify completely.
- Remove from refrigerator and slice the log into uniform, thin pinwheel rounds using a sharp knife.
- Arrange the pinwheels on a serving platter and present immediately for a delectable no-bake dessert experience.
Notes
- Ensure powdered sugar is sifted to prevent lumps and create a smoother, more uniform mixture.
- Use room temperature butter and peanut butter for easier blending and a creamier texture.
- For a dairy-free version, substitute butter with coconut oil or vegan margarine.
- Experiment with dark, milk, or white chocolate to customize the pinwheels’ flavor profile.
- Prep Time: 20 minutes
- Cook Time: 12 hours
- Category: Snacks, Desserts
- Method: Rolling
- Cuisine: American
Nutrition
- Serving Size: 12
- Calories: 221
- Sugar: 17 g
- Sodium: 29 mg
- Fat: 14 g
- Saturated Fat: 4 g
- Unsaturated Fat: 9 g
- Trans Fat: 0 g
- Carbohydrates: 23 g
- Fiber: 1 g
- Protein: 3 g
- Cholesterol: 8 mg
Lucas Bennett
Founder & Recipe Developer
Expertise
Education
Blue Ridge Community College – Certificate in Culinary Arts
Focused on seasonal cooking, sustainable kitchen practices, and farm-to-table techniques.
Appalachian State University – B.A. in English
Built critical thinking and analysis through diverse texts. Guided by faculty, it prepares graduates for publishing and more.
Growing up in the rolling hills of North Carolina, Lucas learned early that some of life’s best memories start around a kitchen table. After studying English at Appalachian State University and honing his culinary skills at Blue Ridge Community College, he dreamed of blending storytelling with rustic, seasonal cooking, and The Scrumptious Pumpkin was born.
Lucas focuses on easy, single-serving recipes that turn fresh, local ingredients into something special. His style is simple, heartfelt, and rooted in the beauty of the seasons. When he’s not testing a new dish, you’ll probably find him hiking in the Blue Ridge Mountains, browsing farmers’ markets, or scribbling food stories in a notebook.