
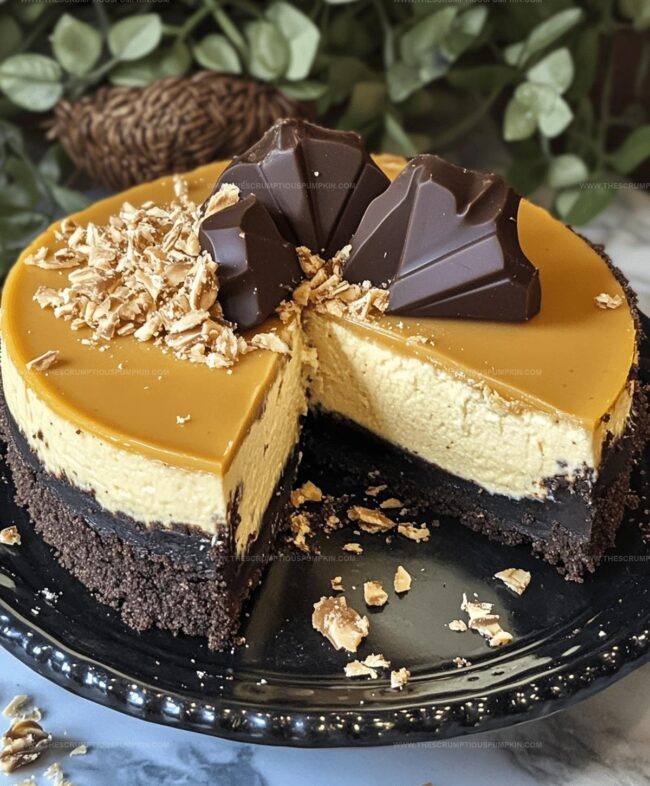
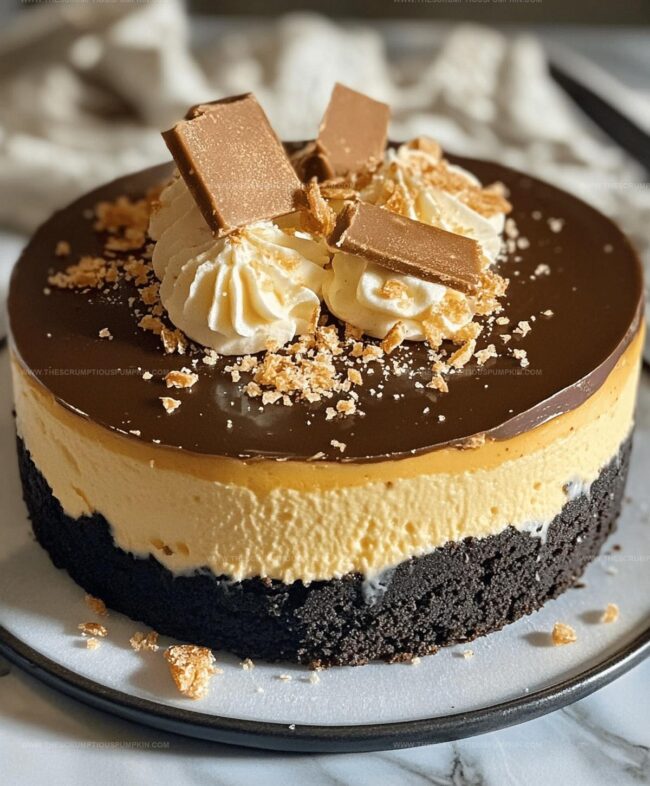
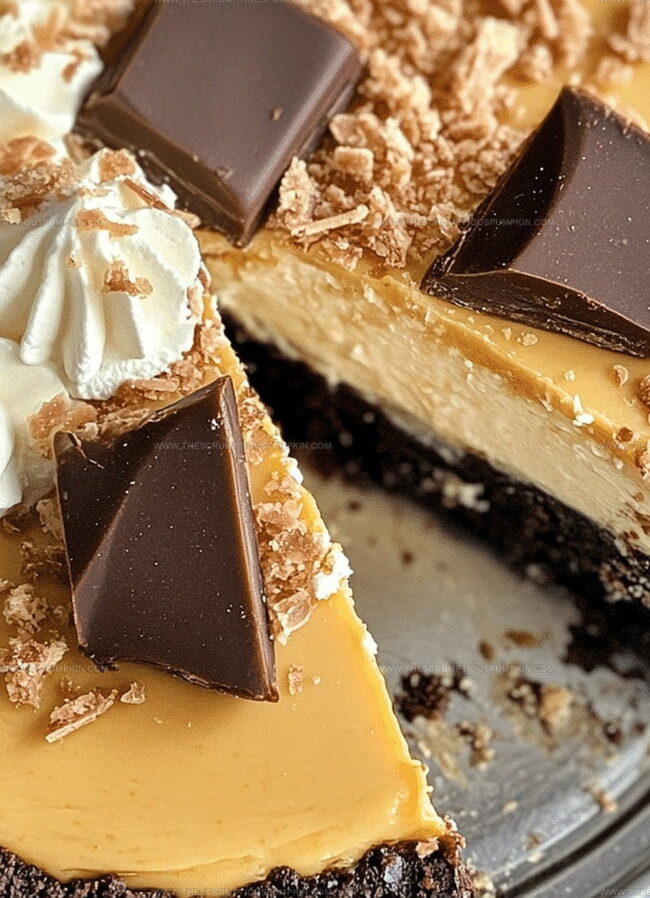
The Easiest No Bake Nanaimo Bar Cheesecake Recipe Ever
Sweet layers of creamy nanaimo bar cheesecake promise pure dessert bliss without any baking required.
Canadians adore this decadent treat that combines classic flavors in a cool, dreamy format.
Rich chocolate, custard-like filling, and crumbly base come together in one spectacular no-stress dessert.
Chocolate lovers will swoon over each silky smooth bite packed with nostalgic goodness.
Minimal kitchen effort delivers maximum deliciousness through this chilled confection.
Chilling time allows flavors to meld and textures to set perfectly.
Invite friends and watch them marvel at your seemingly complicated yet effortless creation.
Nanaimo Bar Cheesecake: Layers Of Fun
Nanaimo Bar Cheesecake Ingredient Guide
Base Layer Ingredients:Cheesecake Layer Ingredients:Chocolate Topping Ingredients:Making Nanaimo Bar Cheesecake Simple
Step 1: Prepare Crumbly Base
Mix graham cracker crumbs, shredded coconut, melted butter, cocoa powder, and sugar in a mixing bowl.
Blend these ingredients until they form a cohesive, slightly moist mixture that holds together when pressed.
Step 2: Form Base Layer
Press the crumbly mixture firmly and evenly into the bottom of a springform pan.
Use the back of a spoon or flat-bottomed measuring cup to create a compact, smooth surface.
Place the pan in the refrigerator to chill for 20 minutes, allowing the base to set.
Step 3: Whip Creamy Cheesecake Filling
In a large mixing bowl, beat cream cheese until smooth and creamy.
Add powdered sugar, custard powder, and vanilla extract.
Mix thoroughly until the mixture is completely combined and free of lumps.
Step 4: Fold in Whipped Cream
Gently fold whipped cream into the cream cheese mixture.
Use a spatula to incorporate the whipped cream, maintaining the light and airy texture.
Be careful not to overmix and deflate the whipped cream.
Step 5: Layer Cheesecake Filling
Spread the creamy cheesecake filling evenly over the chilled base layer.
Use a spatula to create a smooth, level surface.
Return the pan to the refrigerator and let it set for 2-3 hours or overnight.
Step 6: Create Chocolate Topping
In a microwave-safe bowl, combine chocolate chips and heavy cream.
Microwave in 30-second intervals, stirring between each interval, until the chocolate is completely melted and smooth.
Step 7: Add Chocolate Layer
Pour the melted chocolate over the set cheesecake layer.
Tilt the pan gently to ensure even coverage.
Return to the refrigerator and chill for an additional hour until the chocolate topping is firm.
Step 8: Serve and Enjoy
Carefully remove the cheesecake from the springform pan by releasing the sides.
Slice into wedges and serve chilled.
Enjoy the rich, creamy, and decadent Nanaimo Bar Cheesecake!
Tips To Master Nanaimo Bar Cheesecake

Nanaimo Cheesecake Variations To Enjoy
Serving Nanaimo Bar Cheesecake Squares
Keeping Nanaimo Bar Cheesecake Fresh
FAQs
A traditional Canadian dessert from Nanaimo, British Columbia, with three distinct layers: a chocolate crumb base, a creamy custard middle layer, and a chocolate topping.
Custard powder adds a unique flavor and helps create a smooth, creamy texture that’s characteristic of classic Nanaimo bars.
You can replace graham crackers with digestive biscuits, use vanilla pudding mix instead of custard powder, and swap coconut with ground almonds for similar results.
No, this no-bake cheesecake is relatively easy. The steps are straightforward, and you don’t need advanced baking skills to create a delicious dessert.
Print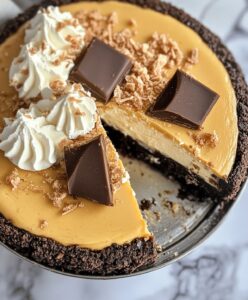
No Bake Nanaimo Bar Cheesecake Recipe
- Total Time: 24 hours 20 minutes
- Yield: 8 1x
Description
Creamy Nanaimo bar cheesecake brings Canadian dessert magic to your table without baking. Chocolate, custard, and graham cracker layers blend into a cool, rich slice of pure indulgence you won’t be able to resist.
Ingredients
Crust Ingredients:
- 2 cups graham cracker crumbs
- 1 cup shredded coconut
- 0.5 cups (120 ml) unsalted butter, melted
- 0.33 cups (80 ml) cocoa powder
- 0.25 cups (60 ml) granulated sugar
Instructions
- Combine graham cracker crumbs, shredded coconut, melted butter, cocoa powder, and sugar in a mixing bowl until thoroughly blended.
- Transfer the crumbly mixture into a springform pan, pressing firmly and evenly across the bottom to create a compact base layer.
- Refrigerate the base for 20 minutes to allow the ingredients to set and solidify.
- In a separate large mixing bowl, whip cream cheese until smooth and creamy, incorporating powdered sugar, custard powder, and vanilla extract.
- Gently fold whipped cream into the cream cheese mixture, maintaining a light and airy texture.
- Carefully spread the cream cheese mixture over the chilled base layer, ensuring an even distribution.
- Place the cheesecake in the refrigerator and allow it to set for approximately 23 hours until firm and fully chilled.
- Create the chocolate topping by microwaving chocolate chips and heavy cream in a microwave-safe bowl, stirring until the mixture becomes completely smooth and glossy.
- Pour the melted chocolate evenly over the set cheesecake layer, covering the surface completely.
- Return the cheesecake to the refrigerator and chill for an additional hour to allow the chocolate topping to solidify.
- Once fully set, carefully release the springform pan and transfer the cheesecake to a serving plate.
- Slice into portions and serve chilled for the ultimate no-bake dessert experience.
Notes
- Customize the base by swapping graham crackers with gluten-free alternatives like almond flour or crushed gluten-free cookies for those with dietary restrictions.
- Ensure cream cheese is room temperature to prevent lumps and create a smoother, silkier cheesecake texture.
- Consider using dark chocolate for the topping to reduce sweetness and add a sophisticated depth of flavor.
- Freeze individual slices wrapped tightly in plastic wrap for up to one month for a make-ahead dessert option.
- Prep Time: 20 minutes
- Cook Time: 24 hours
- Category: Desserts
- Method: Chilling
- Cuisine: Canadian
Nutrition
- Serving Size: 8
- Calories: 263
- Sugar: 14 g
- Sodium: 32 mg
- Fat: 13 g
- Saturated Fat: 9 g
- Unsaturated Fat: 4 g
- Trans Fat: 0 g
- Carbohydrates: 33 g
- Fiber: 2 g
- Protein: 2 g
- Cholesterol: 21 mg
Lucas Bennett
Founder & Recipe Developer
Expertise
Education
Blue Ridge Community College – Certificate in Culinary Arts
Focused on seasonal cooking, sustainable kitchen practices, and farm-to-table techniques.
Appalachian State University – B.A. in English
Built critical thinking and analysis through diverse texts. Guided by faculty, it prepares graduates for publishing and more.
Growing up in the rolling hills of North Carolina, Lucas learned early that some of life’s best memories start around a kitchen table. After studying English at Appalachian State University and honing his culinary skills at Blue Ridge Community College, he dreamed of blending storytelling with rustic, seasonal cooking, and The Scrumptious Pumpkin was born.
Lucas focuses on easy, single-serving recipes that turn fresh, local ingredients into something special. His style is simple, heartfelt, and rooted in the beauty of the seasons. When he’s not testing a new dish, you’ll probably find him hiking in the Blue Ridge Mountains, browsing farmers’ markets, or scribbling food stories in a notebook.