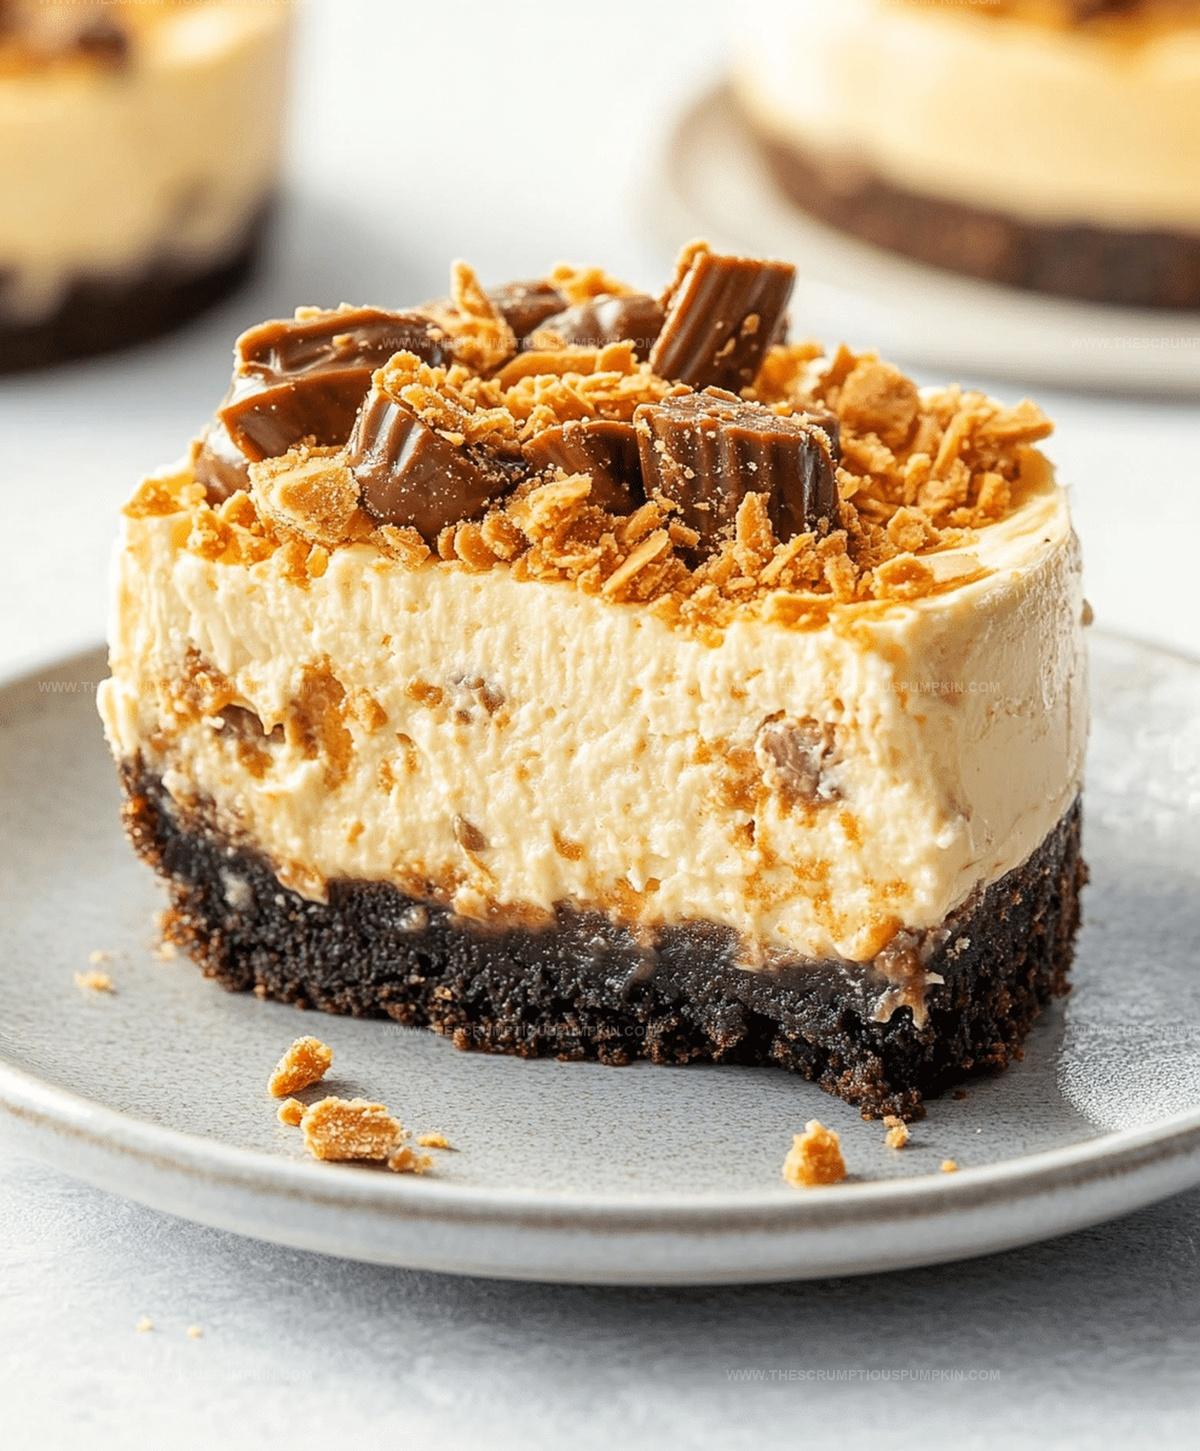
Silky Peanut Butter Butterfinger Cheesecake Recipe To Dream About
Creamy peanut butter butterfinger cheesecake brings pure dessert magic right to your plate.
Sweet cravings demand serious attention from serious bakers.
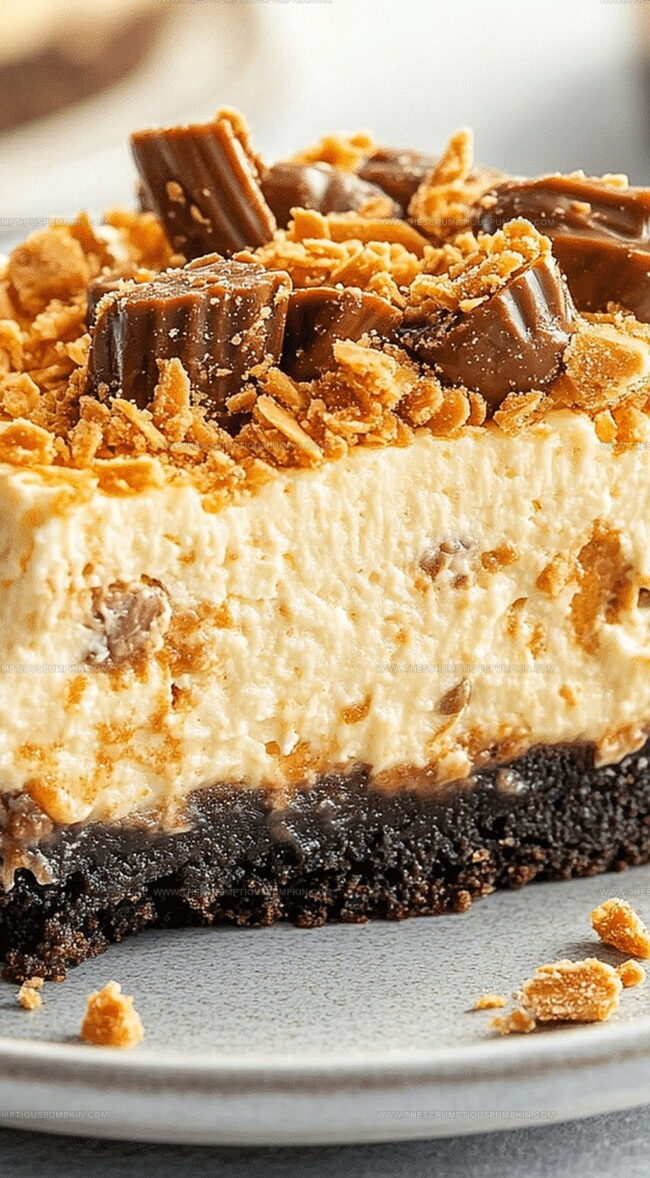
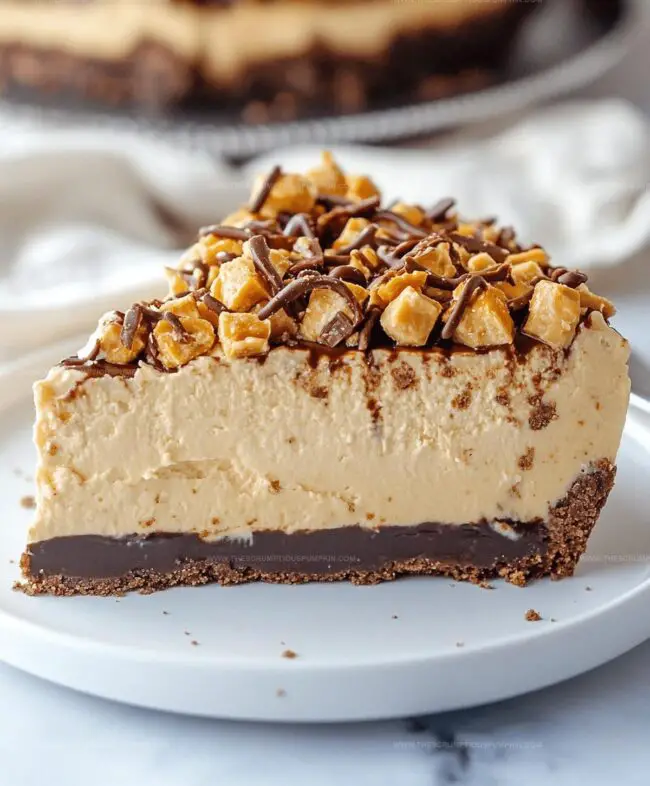
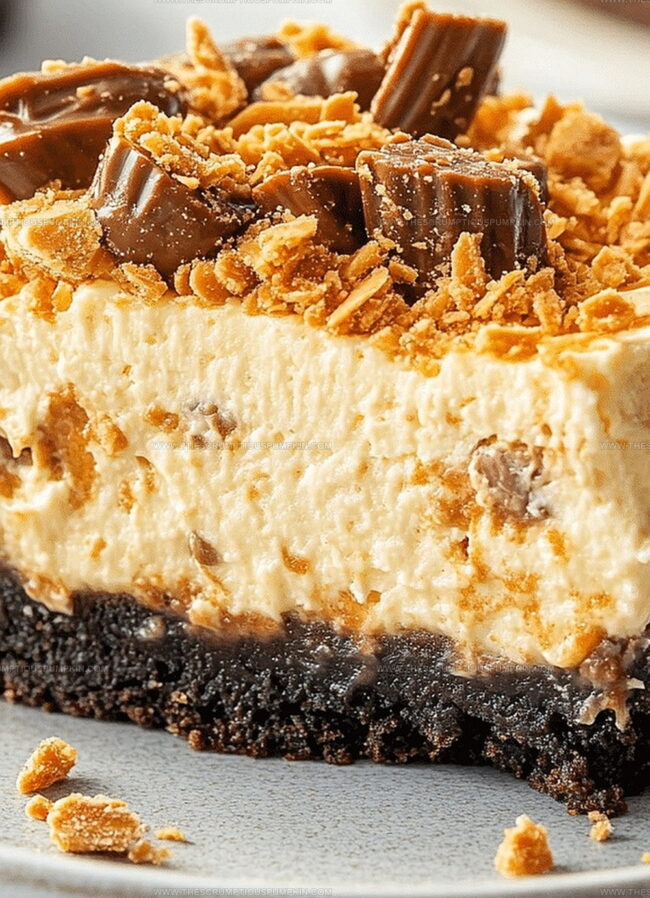
Decadent layers of chocolate and caramel dance between rich cream cheese foundations.
Candy bar pieces scattered throughout promise delightful crunch in every single bite.
Smooth textures blend with crispy fragments for an incredible sensory experience.
Complex flavors merge seamlessly, creating a dessert that feels both indulgent and irresistible.
Slice into this incredible treat and watch everyone’s eyes light up with pure excitement.
Why Peanut Butter Butterfinger Cheesecake Is Decadent
Peanut Butter Butterfinger Cheesecake Ingredients
Crust Ingredients:Cheesecake Filling Ingredients:Topping and Garnish Ingredients:How to Make Peanut Butter Butterfinger Cheesecake
Step 1: Craft the Crumbly Foundation
Crush graham crackers into fine crumbs and mix with melted butter.
Press the mixture firmly into the bottom of a springform pan, creating a solid base for your decadent cheesecake.
Use the back of a spoon to pack the crust evenly and create a smooth surface.
Step 2: Whip Up the Creamy Filling
In a large mixing bowl, blend cream cheese until it becomes silky and free of lumps.
Gradually incorporate peanut butter and sugar, mixing until the combination is completely smooth and velvety.
Use an electric mixer on medium speed to ensure a perfect texture.
Step 3: Integrate Eggs Gently
Add eggs to the cream cheese mixture one at a time.
Carefully mix each egg into the batter, ensuring it’s fully incorporated before adding the next.
This technique helps maintain the cheesecake’s luxurious, creamy consistency and prevents overmixing.
Step 4: Enhance with Flavor Boosters
Pour in vanilla extract and fold in the crushed Butterfinger pieces.
Distribute the candy bits evenly throughout the batter, creating pockets of crunchy caramel and chocolate goodness in every bite.
Step 5: Bake to Perfection
Pour the cheesecake batter into the prepared crust.
Place the pan in a preheated oven and bake until the center is almost set but still slightly jiggly.
The edges should be lightly golden and the surface should have a slight sheen.
Step 6: Cool and Garnish
Allow the cheesecake to cool completely at room temperature.
Refrigerate for several hours or overnight to set.
Before serving, sprinkle additional crushed Butterfinger pieces on top for extra crunch and visual appeal.
Slice and serve chilled for the ultimate indulgent dessert experience.
Pro Tips for Peanut Butter Butterfinger Cheesecake
Variations of Peanut Butter Butterfinger Cheesecake
Serving Peanut Butter Butterfinger Cheesecake
Storing Peanut Butter Butterfinger Cheesecake
FAQs
Peanut butter and Butterfinger candy bars create a rich, sweet, and crunchy flavor profile that sets this cheesecake apart from traditional recipes.
While Butterfinger works best, you could substitute with similar crispy chocolate bars like Crunch or Skor for a comparable texture and taste.
No, this cheesecake contains peanut butter and cannot be safely consumed by those with nut allergies.
This cheesecake is moderately easy to make, requiring basic baking skills like mixing, beating, and understanding oven temperatures. A beginner with some baking experience can successfully prepare this dessert.
Print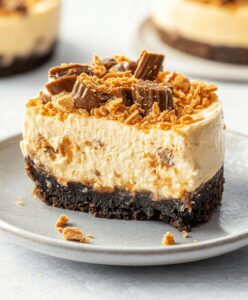
Peanut Butter Butterfinger Cheesecake Recipe
- Total Time: 1 hour 30 minutes
- Yield: 12 1x
Description
Sinful Peanut Butter Butterfinger Cheesecake merges creamy richness with crunchy candy bar excitement. Chocolate graham cracker crust and silky filling create a dessert paradise that will make sweet tooths dance with pure indulgence.
Ingredients
Main Ingredients:
- 24 ounces (680 grams) cream cheese
- 1 cup (240 milliliters) peanut butter
- 4 Butterfinger candy bars, chopped
- 1 prepared graham cracker crust
Binding Ingredients:
- 1 cup (200 grams) sugar
- 3 large eggs
Flavor and Texture Enhancers:
- 1/2 cup (120 milliliters) heavy cream
- 2 teaspoons vanilla extract
Instructions
- Warm the oven to 325°F and meticulously craft a graham cracker foundation by pressing crumbs into a springform pan, ensuring an even, compact base.
- In a spacious mixing bowl, whip cream cheese, creamy peanut butter, and granulated sugar until the mixture achieves a silky, lump-free consistency.
- Incorporate eggs individually, thoroughly blending after each addition to maintain a smooth, homogeneous texture.
- Gently fold in fragrant vanilla extract and sprinkle generously with crushed Butterfinger candy, distributing the crunchy fragments evenly throughout the velvety batter.
- Delicately transfer the luscious mixture into the prepared crust, smoothing the surface with a spatula to create an elegant finish.
- Bake for approximately 55-60 minutes, watching for slight wobbling in the center that indicates perfect doneness.
- Remove from oven and allow the cheesecake to cool completely at room temperature, preventing potential cracking.
- Refrigerate for a minimum of 4 hours or overnight to set the cheesecake firmly.
- Before serving, garnish the top with additional crushed Butterfinger pieces, creating a tempting, textural crown.
Notes
- Crush Butterfinger candy bars completely to ensure even distribution throughout the cheesecake for consistent flavor in every bite.
- Use room temperature cream cheese and eggs to create a smoother, lump-free batter that blends more easily.
- Consider wrapping the springform pan in aluminum foil to prevent water from seeping in during the baking process and protect the delicate crust.
- For a gluten-free version, swap graham crackers with gluten-free cookie crumbs and use certified gluten-free Butterfinger bars or similar chocolate-peanut butter candy.
- Prep Time: 30 minutes
- Cook Time: 1 hour
- Category: Desserts
- Method: Baking
- Cuisine: American
Nutrition
- Serving Size: 12
- Calories: 450 kcal
- Sugar: 30 g
- Sodium: 220 mg
- Fat: 35 g
- Saturated Fat: 12 g
- Unsaturated Fat: 18 g
- Trans Fat: 1 g
- Carbohydrates: 28 g
- Fiber: 2 g
- Protein: 8 g
- Cholesterol: 90 mg
Lucas Bennett
Founder & Recipe Developer
Expertise
Education
Blue Ridge Community College – Certificate in Culinary Arts
Focused on seasonal cooking, sustainable kitchen practices, and farm-to-table techniques.
Appalachian State University – B.A. in English
Built critical thinking and analysis through diverse texts. Guided by faculty, it prepares graduates for publishing and more.
Growing up in the rolling hills of North Carolina, Lucas learned early that some of life’s best memories start around a kitchen table. After studying English at Appalachian State University and honing his culinary skills at Blue Ridge Community College, he dreamed of blending storytelling with rustic, seasonal cooking, and The Scrumptious Pumpkin was born.
Lucas focuses on easy, single-serving recipes that turn fresh, local ingredients into something special. His style is simple, heartfelt, and rooted in the beauty of the seasons. When he’s not testing a new dish, you’ll probably find him hiking in the Blue Ridge Mountains, browsing farmers’ markets, or scribbling food stories in a notebook.