Heart-Melting Valentine Red Velvet Brownies Recipe
Sweet moments become extraordinary when valentine red velvet brownies spark culinary magic in your kitchen.
Passionate bakers understand how decadent desserts can turn simple gatherings into memorable celebrations.
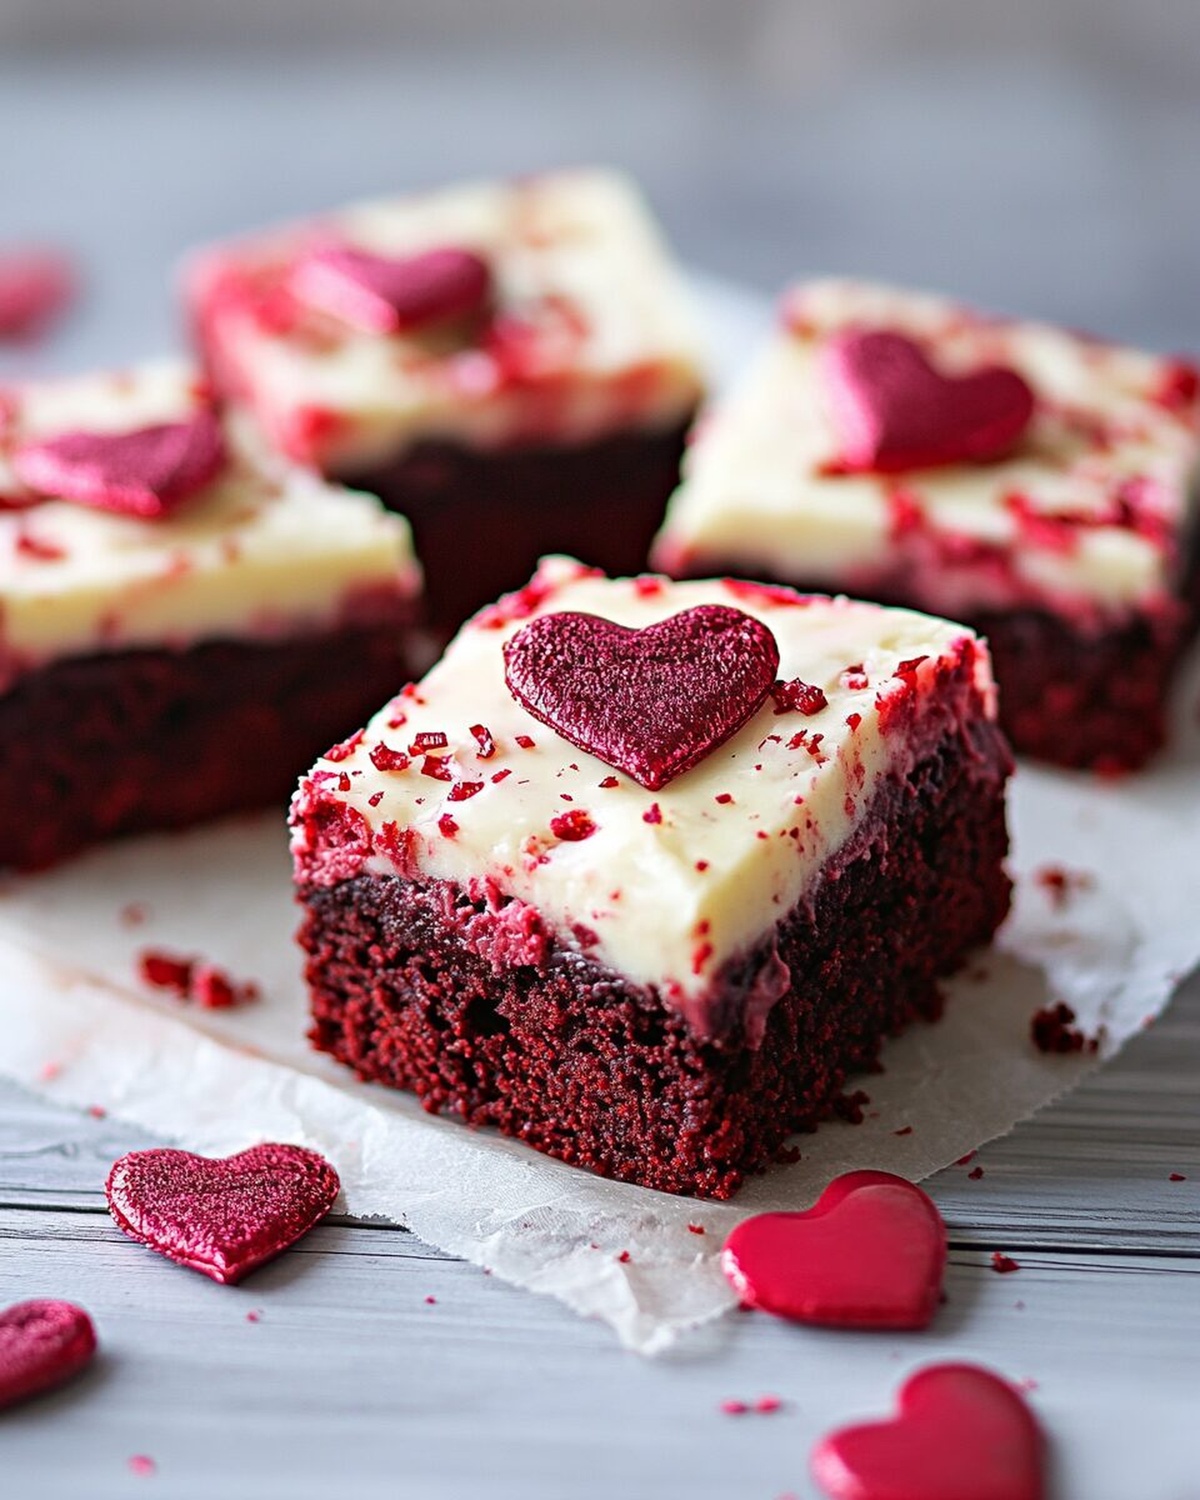
Chocolate and vibrant crimson colors create a romantic backdrop for indulgent treats.
Rich cocoa notes blend seamlessly with cream cheese frosting, promising an irresistible experience.
Soft, fudgy textures melt deliciously on your palate, inviting pure pleasure.
Crafting these brownies requires minimal effort but delivers maximum delight.
You’ll fall in love with every single bite of this dreamy dessert.
Why Valentine Red Velvet Brownies Feel Extra Special
What You’ll Need For Valentine Red Velvet Brownies
Main Ingredients:Coloring and Flavoring:Topping and Frosting Ingredients:Baking Essentials:How To Bake Valentine Red Velvet Brownies
Step 1: Prepare Baking Station
Grab your 9″x9″ baking pan and line it with non-stick foil or regular foil sprayed with cooking spray. Position your oven rack and preheat to 325°F.
Step 2: Melt Chocolate Base
In a heavy saucepan over low heat, gently melt:Stir continuously until the mixture becomes silky smooth and fully combined.
Step 3: Create Batter Foundation
Remove chocolate mixture from heat and whisk in sugar.
Add eggs one at a time, mixing thoroughly after each addition. Incorporate:Blend until the batter looks vibrant and uniform.
Step 4: Incorporate Dry Ingredients
Sift together flour and baking powder. Fold these dry ingredients into the wet mixture, stirring until the batter becomes smooth and glossy.
Step 5: Bake to Perfection
Pour the batter into the prepared pan, spreading evenly. Slide the pan into the preheated oven and bake for 35-45 minutes.
The brownies are done when a toothpick inserted in the center reveals a few moist crumbs.
Step 6: Cool and Set
Allow brownies to cool completely in the pan, resting on a wire rack.
Step 7: Craft Luxurious Frosting
In a small saucepan over low heat, combine:Stir until the mixture becomes perfectly smooth and glossy.
Step 8: Frost and Decorate
Pour the warm frosting over the cooled brownies.
Immediately sprinkle with:Step 9: Final Setup
Let the frosting set completely. For the cleanest cuts, refrigerate overnight before slicing into squares.
Valentine Red Velvet Brownies Tips You’ll Love
Yummy Variations Of Valentine Red Velvet Brownies
Perfect Matches For Valentine Red Velvet Brownies
How To Keep Valentine Red Velvet Brownies Tasty
Quick FAQs For Valentine Red Velvet Brownies
Red velvet brownies use cocoa powder and red food coloring to create a distinctive red color and subtle chocolate flavor, giving them a unique taste and appearance compared to traditional chocolate brownies.
Yes, you can omit the food coloring, but the brownies will lose their signature red color. The taste will remain the same, resulting in a more traditional chocolate brownie.
You’ll need a 9×9 inch baking pan, a heavy saucepan, mixing bowls, and basic baking tools like a whisk and spatula. A hand mixer or stand mixer can make mixing easier, but they’re not absolutely necessary.
Print
Valentine Red Velvet Brownies Recipe
- Total Time: 55-65 minutes
- Yield: 12 1x
Description
Passionate chocolate lovers crave Valentine red velvet brownies that melt hearts with their rich crimson charm. Silky chocolate layers blend romance and indulgence, promising a sweet celebration of love for special moments shared.
Ingredients
Main Ingredients:
- 1.5 cups granulated sugar
- 1 cup all-purpose flour
- 3 large eggs
- 1/2 cup butter, cubed (1 stick)
- 1/3 cup semi-sweet chocolate chips
Flavor and Color Enhancers:
- 2 tablespoons red liquid food color OR 1 tablespoon red gel food color
- 1 teaspoon vanilla extract
Supplementary Ingredients:
- 1/4 teaspoon salt
- 1/2 teaspoon baking powder
Frosting and Topping:
- 1 can (14 ounces / 396 grams) sweetened condensed milk
- 2 cups white chocolate chips
- 1/2 cup Valentine M&M’s
- 1/8 cup heart-shaped sprinkles
Instructions
- Prepare the oven to 325°F and position a rack in the center.
- Create a non-stick surface in a 9″x9″ pan using foil with cooking spray.
- Gently melt chocolate and butter in a heavy saucepan over low heat, stirring until completely smooth and glossy.
- Incorporate sugar into the melted mixture, then introduce eggs individually, thoroughly blending after each addition.
- Infuse the batter with vanilla, salt, and vibrant red food coloring, mixing until evenly distributed.
- Sift flour and baking powder together, then delicately fold into the chocolate mixture until a uniform consistency is achieved.
- Transfer the crimson batter into the prepared pan, ensuring an even surface with a spatula.
- Bake for 35-45 minutes, watching for a toothpick that emerges with slight moisture when inserted into the center.
- Allow brownies to cool completely within the pan on a wire rack.
- Create a luxurious topping by heating sweetened condensed milk and white chocolate chips, stirring until perfectly smooth.
- Cascade the creamy frosting over the cooled brownies while still in the pan.
- Decorate the surface with festive M&M’s and heart-shaped sprinkles for a romantic touch.
- Permit the frosting to set entirely; refrigerating overnight will ensure precise, clean-cut squares.
Notes
- Choose high-quality cocoa powder and food coloring for the most vibrant red velvet flavor and color.
- Use room temperature eggs to ensure smooth batter incorporation and consistent texture.
- Control moisture by not overmixing the batter, which prevents tough and dense brownies.
- Chill brownies overnight for cleaner cutting and more intense flavor development.
- Prep Time: 20 minutes
- Cook Time: 35-45 minutes
- Category: Desserts
- Method: Baking
- Cuisine: American
Nutrition
- Serving Size: 12
- Calories: 370
- Sugar: 40 g
- Sodium: 150 mg
- Fat: 18 g
- Saturated Fat: 10 g
- Unsaturated Fat: 8 g
- Trans Fat: 0 g
- Carbohydrates: 52 g
- Fiber: 1 g
- Protein: 4 g
- Cholesterol: 80 mg
Mia Thompson
Pastry Chef & Content Creator
Expertise
Education
Portland Community College – Baking and Pastry Arts Program
Specialized in artisanal bread, seasonal desserts, and sustainable baking methods.
National University of Natural Medicine – Bachelor of Science in Nutrition (BScN)
Focused on “Food as Medicine” philosophy, with core threads in nutrition.
Mia’s love affair with baking began in her grandmother’s kitchen, where sneaking spoonfuls of batter first sparked her curiosity. She refined her skills through Portland Community College’s Baking and Pastry Arts Program and her expertise at the National University of Natural Medicine, earning a B.Sc. in Nutrition.
At The Scrumptious Pumpkin, Mia reimagines classics with effortless seasonal treats, healthier twists on old favorites, and playful confections that feel like pure joy. Beyond the oven, she nurtures her urban garden, forages local ingredients around Portland, and leads hands‑on nutrition workshops for her community.